Several types of wood stoves are used in the home as water heaters, room heaters and for cooking. The modern stoves have automatic electronic control systems that are best maintained by a qualified engineer. However, there are quite a few other components that can be maintained by the homeowner.
Hot Stuff
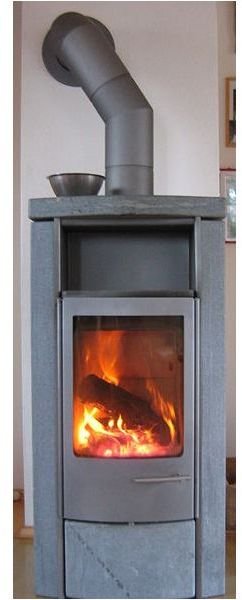
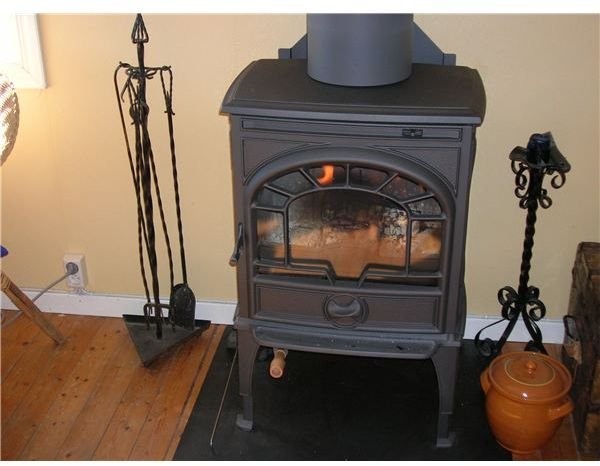
A wood stove is a great asset to any home, giving relaxing warmth that many people find to be very therapeutic; the heat being enjoyed not only in the room that the stove is installed but throughout the house as well.
Wood stoves installed in the home are a popular means of heating the home and can give a lifetime of service; provided the manufacturer’s operation and maintenance instructions are carried out.
The next few sections give an overview of how the stove operates and the types of wood to use for optimum efficiency, before giving some pointers for wood stove repair and maintenance.
Overview of Wood Stove Operation
Wood used to heat the home is a form of renewable energy, so long as it is taken from a sustainable resource. It may therefore be eligible for a government Energy Efficient Tax Credit.
Lighting the stove
Old newspaper and kindling wood are ideal materials to start the fire in the stove combustion zone, keeping in mind that liquid fuel such as kerosene or gasoline should never be used. Once the fire is established, smaller pieces of wood can be added; controlling the combustion air with the dampers. (If dampers are electronically controlled this will be done automatically.) A sketch of manual dampers is shown below. (Please click on image to enlarge.)
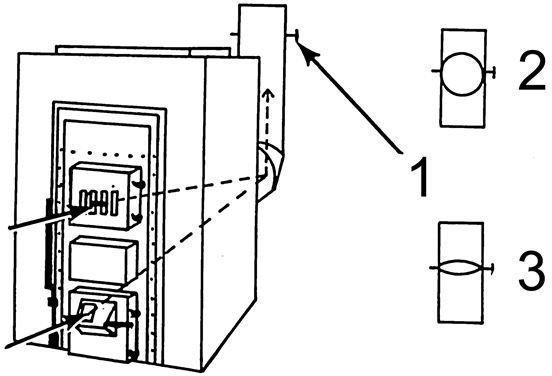
The hot air and wood exhaust gasses rise up the furnace and are directed by baffle plates out the flue. In modern stoves, a small percentage of hot air/gases are re-directed back down across the ceramic glass door to prevent a build-up of unsightly creosote on the glass.
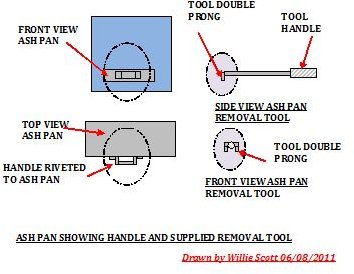
The ash pan will need emptying every so often and it is best to leave about an inch of ash in the bottom of the pan to promote optimum stove combustion efficiency. Remember ash is hot so wear gloves and use the correct tool to remove the pan as shown below. (Please click on image to enlarge.)
Types of wood
Only dry, untreated wood should be used in the stove as this will produce more heat and reduce the formation of creosote inside the furnace and chimney.
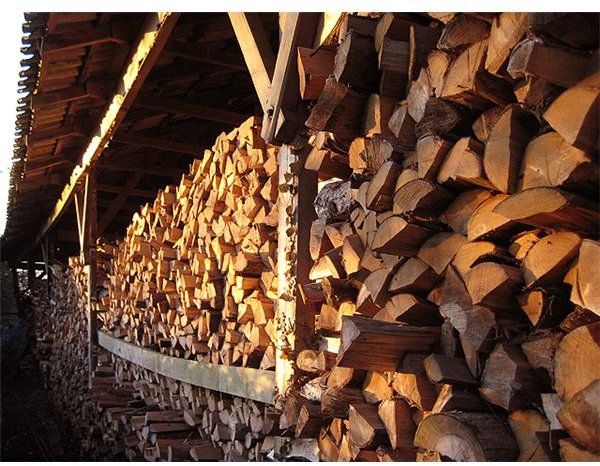
Both hardwood and soft woods are can be burned, but hardwood is denser; burning more slowly and lasting longer. Firewood should be cut in the spring, being split into sizable logs before being stacked and covered in a manner to allow air to circulate through the stack. This wood should then be seasoned and ready for use in the fall. A typical wood pile is shown below. (Please click on image to enlarge.)
A simple test for checking that the wood is seasoned is to examine the ends of it; dry wood will have cracks in the grain at the ends.
Before moving on to the maintenance section, it is worth going over a few safety issues regarding the use of wood stoves:
- The wood stove surround can become, very hot so children and pets should be kept away from these areas.
- Never use any fuel except untreated wood in the stove.
- Only operate the stove with the door tightly shut.
- Never use liquid fuels to start or fuel the fire.
- Always load and burn wood behind the log retainer and remember to use a stout pair of gloves to prevent burns when adding fuel.
- Inspect the flue regularly for build up of creosote, an excess of creosote can cause a fire in the flue.
Repairs and Maintenance
As stated earlier, maintenance and repair of the electronic controls, stove internal firebricks and chimneys/liners should be left to the manufacturer’s service engineer.
The maintenance and repair of the following components can be carried out by the average DIY person; provided the safety precautions are strictly adhered to.
Safety Precautions During Repairs
- Isolate the main electrical power supply to the stove.
- Eye protection, disposable face mask and gloves should be worn
- Old towels or dust sheets should be laid on the floor around the stove once it has cooled down. This will catch the dirt/dust falling during maintenance of the different components.
The instructions below are accompanied by diagrams. (Please click on these to enlarge.)

Glass Door
The inside surface of the ceramic glass in the door will become obscured through time and will require cleaning for maximum ergonomic flame effect. This is carried out when the stove has been shut down and allowed to cool, following the instructions below:
- Open the glass door wide.
- Wash the glass inside and out with hot soapy water; then dry glass.
- Using an appropriate non-abrasive cleaner (see reference section) spray onto inside and outside of the glass. Leave the cleaner on the surface of the glass for the recommended time, then remove with a wet cloth and polish dry.
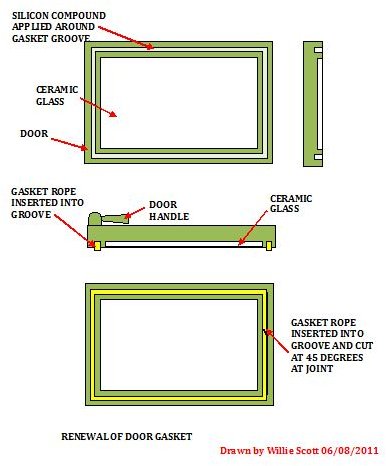
Replacing Glass Door Gasket
- Open the glass door wide.
- Using an old knife remove the old gasket material from the groove on the inside of the door.
- Ensure that all the gasket material has been removed, then smear high temperature silicon jointing compound right around the inside of the groove.
- The gasket material is supplied on a roll, ¼ or ⅜ square and is made from high temperature fiberglass rope. Cut the end of the rope at an angle of 45 degrees and insert the rope around the groove, unwinding it from the roll.
- When the gasket is completely inserted right around the groove, mark and cut the end at 45 degrees to form a joint at the start point as shown in the diagram.
- Close and open the door a few times to ensure the gasket is squeezed tight into the groove then leave for 12 hours before relighting the stove.
The ash pan and flue inspection doors normally have the same type of gaskets as the glass door described above. These gaskets should be replaced at the intervals recommended by the manufacturer following the instructions as per the glass door. This is with the exception of item No.7; in this case the flue access and inspection plate should be tightened up and left for 12 hours before relighting the stove.
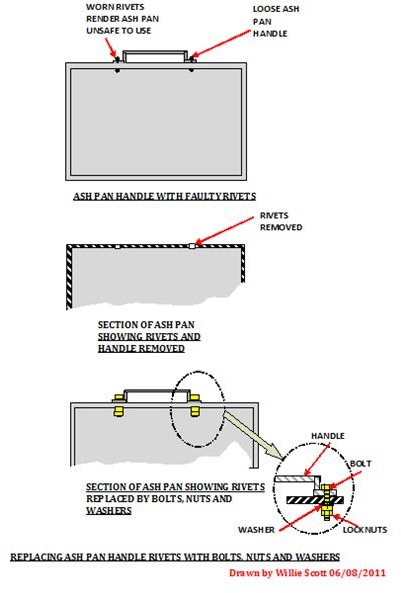
Ash Pan
The ash pan is located at the bottom of the wood stove and is used to collect the wood ash as it falls down wards through the fire grate. The pan has a handle at the front that is used to remove it using a long-handled, pronged tool. This handle is riveted to the pan, and due to excessive heat along with wear and tear, it will become loose and dangerous to continue using.
This can be repaired by drilling out the rivets and replacing them with nuts and bolts as shown in the diagram below:
Cleaning the flue
This can be carried out either from the top of the flue where it exits from the roof by rodding from above, or from the inspection plate just above the stove by rodding upwards. It is much safer to rod the flue from below so this will be the method used to clean the flue. A diagram showing the flue and cleaning tools is shown below:

1.Open the glass door and place dust sheets inside the stove between the flue exit and the fume baffles. Continue spreading the dust sheets outside around the stove at floor level to catch any errant creosote and dust particles; then shut the door.
2.Remove the rain cap from the top of the flue; if located on the roof, use a set of roof ladders.
3.Remove the flue inspection plate and mask the opening with tape, leaving a small hole to allow the rod through. Open the flue damper to maximum position, overriding the automatic control if fitted.
4.Screw the wire brush cleaning head onto the first rod, and push the head upwards through the inspection hatch while rotating the rod counterclockwise.
5.When the end of the rod has reached the inspection hatch; screw the next rod onto the first one and continue pushing up and rotating the rods.
6.Repeat these operations, adding rods as required, until the brush head appears out the top of the flue.
7.Retract the rods, still rotating them counterclockwise through the inspection hatch, unscrewing them from each other as they become accessible.
8.Using a flashlight, inspect the flue for cleanliness then replace the gasket on inspection plate before reaffixing the plate to the flue hatch.
9.Open the glass door carefully, removing the dust sheet from inside the stove and around the floor area. Tip the bits of creosote and dust into a cardboard box lined with a black plastic bag.
10. Brush the fume baffles and inside the stove clear of dust and creosote and shovel this into the cardboard box along with the gloves and face mask.
11. Seal the bag and the box and dispose of safely at a council facility.
Notes:
- Safety is very important when repairing or maintaining a wood stove in the home.
- Remember that the outside surfaces of the stove can become very hot so precautions should be taken if young children and pets are around.
- Using well seasoned, dry wood will give out much more heat and prevent excessive build-up of creosote within the chimney and on the inside of the glass door.
It is important to remember that adopting a regular maintenance program will extend the life of your wood stove for over twenty-five years. The more you take care of it and make sure you are up-to-date on all equipment and repairs, the longer you can enjoy!
References
- Maintenance Products: http://www.sandhillwholesale.com/repair-maintenance-products-c-5.html?osCsid=78758d121a25dd43d10baf132091e619
- Glass door cleaner: http://heating-and-cooling.hardwarestore.com/98-580-stove-cleaners.aspx
- Flue cleaning tools and ceramic stove paint:http://www.woodmanspartsplus.com/50033/Poly-Round-Chimney-Brushes.html


