Making homemade cheese is as much art as it is science. The task is much easier and more economical if you build and use this DIY cheese press from common parts found in your garage or kitchen.
Assemble Your DIY Cheese Press Parts
The basic parts of this DIY cheese press include a solid base, a container to use as a cheese mold, and weight to maintain consistent pressure. Originally, the design called for long nuts with bolts, and a crank handle to apply pressure. The initial design was published in an issue of Grit Magazine. However, after a test batch, modifications to the original design allow for easier cleaning and storing.
You will need:
A sturdy, moisture resistant base approximately six inches by six inches. (Original design, wood block covered in laminate. Modification: ½ inch thick flagstone tile)
A container to use as a cheese mold. (Original design, a short section of four inch PVC pipe, approximately six inches long, notched at the bottom to allow drainage. Modification: none.)
A round wooden block cut to fit snugly inside cheese mold/container.
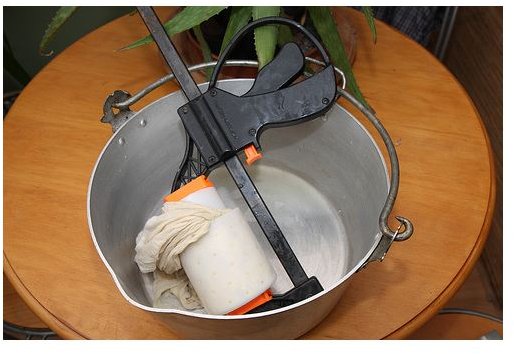
A pressure mechanism. (Original design called for long bolts driven through a wood block, mounted to the base, with a center bolt attached to the wood block press. Modification: no bolts or top blocks, just the round piece of wood for the PVC pipe, a mason jar, and some free weights.) Alternatively, for small presses, you could also use a large vice as a pressure mechanism, like the one pictured to the right.
The Importance of Clean Equipment
Whatever plans for a DIY cheese press you use, consider the clean up required after you remove the cheese. You need equipment and parts that allow for thorough cleaning. Harmful bacteria, left over soap residue, and similar contaminants will affect your cheese. Depending on the recipe used, your cheese will sit in the press for at least 12 hours, usually longer. Soap residue will affect the flavor. Bacteria will affect the curing process. Be sure your cheese press design allows for thorough cleaning. Untreated, unprotected wood is notorious for absorbing and housing bacteria, molds, and mold spores.
Pressing Your Cheese
After following your chosen homemade cheese recipe, you are ready to assemble your press and pour in the curds. Involve your children and turn your cheese press testing into a fun homeschool science experiment .
Set the base of your press in a kitchen sink, preferably one you won’t need to use for the duration of your cheese production. Alternatively, you can use a shallow pan to catch the whey draining from your curds. Even a bucket will do, so long as it is clean and bacteria-free.
Set your PVC pipe on the base, with notches facing down. Pour in your curds.
Lay a small piece of wax paper over the open end of the PVC pipe. Fit the round wooden block into the top of the PVC, pressing it and the wax paper down with your fist. Push to compact the curds and force out the excess whey.
Place a mason jar upside down on top of the round wooden block. Place a small two pound weight from a set of free weights, a heavy book, large stone, or other weight on top of the mason jar. Allow the wood block to settle deeper into the PVC pipe before adding more weight. This could take several hours. For added stability, consider placing a piece of plywood over the mason jar to hold weights evenly. Alternatively, you could anchor the plywood to the cheese press base with long bolts, threaded pipe, or other options to provide “legs” at the four corners. This modification, however, prevents easy disassembly of the press for storage in a kitchen drawer.
Follow the instructions in your recipe for pressing times. Add weight as needed, depending on your recipe and individual results. When the whey is drained and the cheese is ready to salt and cure, simply remove the weights, pick up the PVC, and use the wood block to push the mold out of the pipe.
Depending on the specific items you use, the base, PVC pipe, and jar can all go in the dishwasher for clean up. The wooden block, thanks to the wax paper barrier, should only need surface cleaning.
References and Resources
Clermont College, Setting up a Homemade Cheese Press https://biology.clc.uc.edu/fankhauser/Cheese/Cheese _5_gallons/Cheese_press/PRESS_SETUP_00.htm
Grit Magazine, A Homemade Cheese Press https://www.motherearthnews.com/Do-It-Yourself/1994-10-01/A-Homemade-Cheese-Press.aspx
Mother Earth News, Goats Milk Cheese https://www.motherearthnews.com/Real-Food/1975-07-01/Homemade-Cheese.aspx
Image courtesy of Flickr user, Jerry Pank, under Creative Commons License https://www.flickr.com/photos/cookipedia


