You might need to update Windows 7 drivers for different kind of reasons. Windows XP, Windows Vista and 7, all have different processes of performing driver updates. Performing a Windows 7 driver update is simple and easy. Here is how to do it.
Why Update Drivers
Drivers enable the operating system to communicate with computer peripherals and they also affect the system performance. Hence, it is imperative that all the system drivers must be updated regularly. Drivers that come with the hardware you buy can be outdated, so you can check if newer drivers are available and install them. Performing a Windows 7 driver update may be necessary when certain hardware of your computer isn’t working properly or the current driver is conflicting with other hardware drivers. Windows 7 printer drivers often require frequent updating to keep pace with the rest of the system.
How To Update Drivers
When you decide to update your Windows 7 drivers, it is not necessary to uninstall the current drivers to install the latest ones. What you can do is simply update the current drivers after downloading the latest ones from the Internet. Here is how to update your hardware drivers manually if you are running Windows 7.
As the preliminary step, find out the manufacturer of your hardware and then open the manufacturer’s driver support website. You can look at the hardware chip to find the manufacturer name or find it from the hardware list in Windows 7 Device Manager. Once you have opened the website, locate the latest drivers for your hardware. Before you download them, make sure that you have chosen to download only the drivers and not the installation software that automatically installs the drivers.
You may choose to download and run the installation software but installing drivers manually is more effective and reduces the amount of unused software utilities that end up on your computer. Once you have downloaded the drivers, install them on your Windows 7 computer.
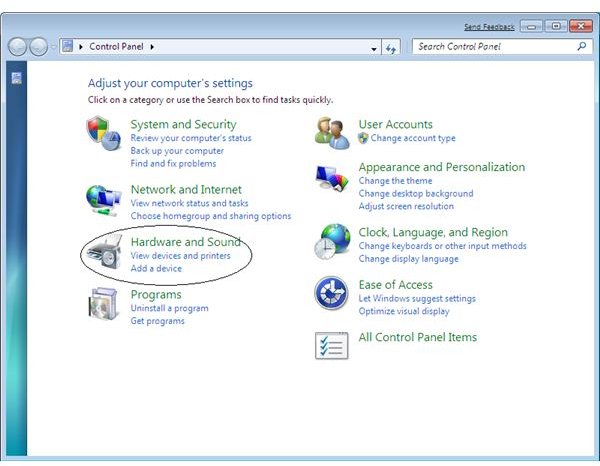
Go to the Device Manager in Windows 7. For that, either type ‘devmgmt.msc’ in the search field of the Start Menu or click on Control
Panel in Start Menu. When the Control Panel opens, click on Hardware and Sound and then in the new screen, click on Device Manager. The Device Manager window will open.
Next, locate the device for which you want to update the driver. Click on the [+] icon to expand the hardware categories, in order to view all your devices. Say, it is your Ethernet card that you want to update the driver of. Right click on the device, and from the list of options shown in the pop-up menu, click on ‘Properties’, and the device properties window will open.
In the Properties window, point your mouse on the Driver tab and click on it. Here you will find the ‘Update Driver’ button, click on it and the Update Driver wizard will open. You will be asked ‘How do you want to search for driver software?’. Click on ‘Browse my computer
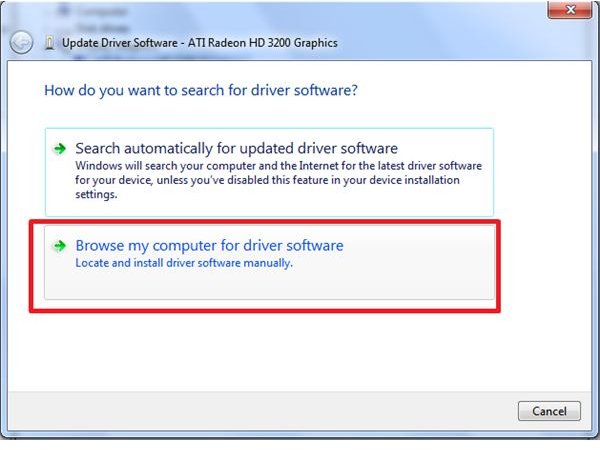
for driver software’. Now you will be able to install drivers you downloaded earlier. Click on the “browse” button to locate the folder containing the driver files. After selecting the folder, click OK and then click Next on the other window to proceed.
Windows will search for the driver files within the folder you selected and install them. Once installed, Windows might ask you to restart the computer. If it does, restart Windows and the drivers will be completely installed and loaded properly.


