Microsoft Access is great for creating a simple front end, but what if you already have a SQL database you can use? This article will walk you through setting up an ODBC connection for Access to use to connect to your SQL server.
Overview
For the purposes of this article, I will walk you through step by step how to connect Microsoft Access using ODBC to SQL Server using Microsoft Access 2010. The steps should be similar if using Access 2007 or earlier.
Before we get started, you will need to have some pieces of information handy during this process. Check with your database administrator if you need assistance in gathering some of this information.
What you will need:
- Microsoft Access
- SQL Server (installed and working)
- Host name and instance of the SQL server
- Database credentials or method for connecting
- Database name you wish to connect to
Creating the ODBC File
-
Open Microsoft Access.
Advertisement -
On the main “Available Templates” page, select the Blank Database and click Create.
-
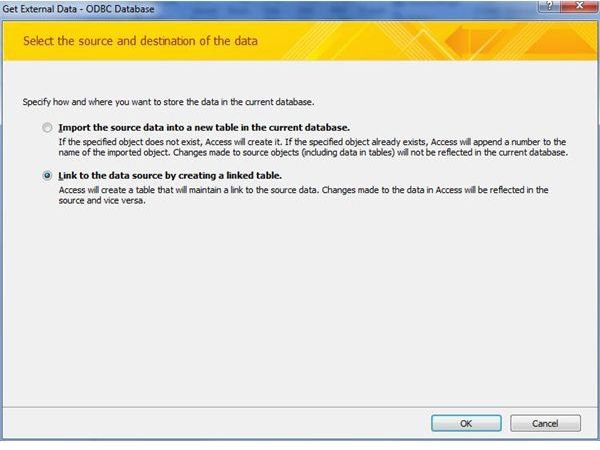
Click the External Data tab and select ODBC Database. The wizard will open (Figure 1).
Advertisement
-
You now have two options – you can either import data into a new table within Access, or you can create a linked table. Since we are going to use and modify data in a SQL database, we will choose the second option. Click the “Link to the data source by creating a linked table” radio button and click OK.
-
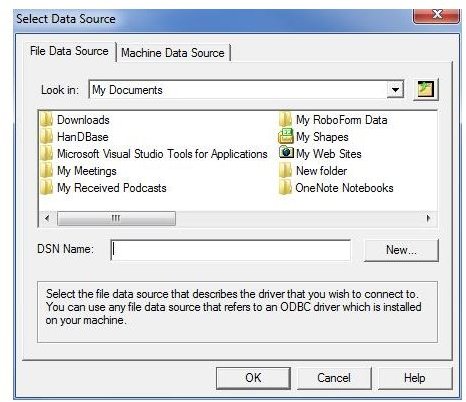
The “Select Data Source” window will open. Make sure the File Data Source tab is opened and click New (Figure 2).
Advertisement -
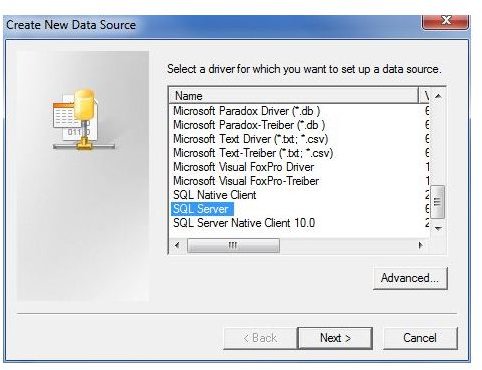
The “Create New Data Source” window opens. Scroll through the list and click on SQL Server (Figure 3). Click Next.
Creating the ODBC Connection
- Enter a name and location to save the data source file. Click Next. On the summary page, click Finish.
-
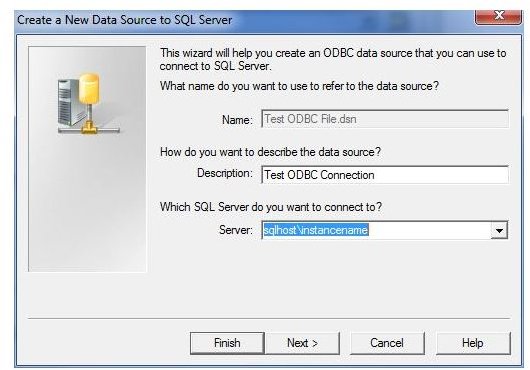
The “Create a new data source to SQL Server” window will open. Enter a brief description in the description field. Enter the name (and instance if applicable) of the SQL server you are connecting to (Figure 4). Click Next.
Advertisement -
Select the proper authentication method – Windows NT or SQL Server credentials. Click Next to continue.
-
Use the “Change the default database to:” dropdown to select the database you want to connect to. Keep the remaining items as default. Click Next.
Advertisement -
This last page can remain default. Click Finish.
-
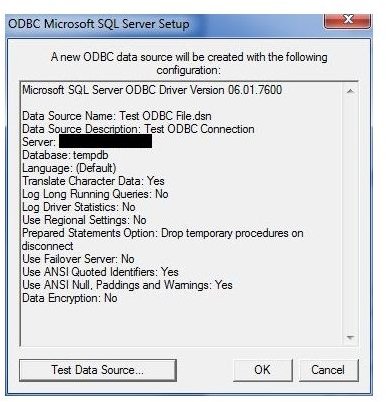
The summary page gives you the opportunity to test the connection before finishing (Figure 5). Click the “Test data source…” button. You should receive a success message. If you ran into an error, there may be an issue with the credentials you provided or the SQL server may not be configured for remote connections. Consult with your Database Administrator for more assistance. Click OK on the test windows and the summary window. You should be back to the “Select Data Source” window we started with back in step 5 (Figure 2).
Advertisement
-
Make sure the new ODBC file you created is selected and click OK.
-
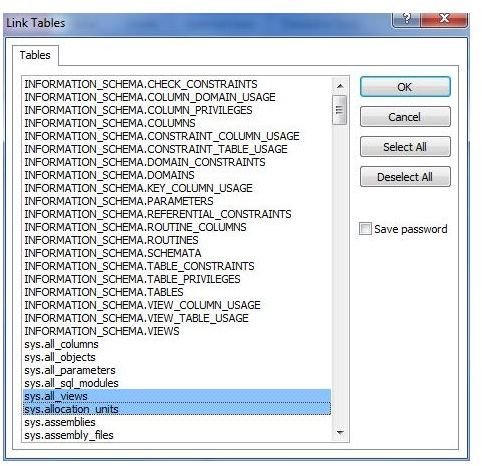
A “Link Tables” window will open. Select the tables you wish to link and click OK. Note: you can hold down the CTRL button to select multiple tables (Figure 6).
Advertisement -
For each linked table you selected, you will need to choose the primary (unique) key. Select one or more keys and click OK. Repeat for all tables you are linking.
-
You will now see the linked tables show up in Access. If you double click on them, you will see the data in the tables populate (Figure 7).
Advertisement

That’s all – the rest is up to you. Take a look at BrightHub for some other great Microsoft Access articles such as how to create a lookup field in Microsoft Access or how to create a form manually in design view.


