If you want to create index cards for recipes or school, you can do so by using Microsoft Word.
Change the Page Size
Create index cards in Microsoft Word by changing the document page size. In Word 2007, there are many different page sizes you can choose from. For example, you can change the document to the size of an envelope, a greeting card or an index card. There are three sizes you can choose from to make index cards. 
- Open Microsoft Word and click Page Layout from the Word Ribbon . You can adjust the size of your document to create an index card here.
- Look to the Page Setup section of the Word Ribbon and click the Size button. A list of sizes you can change your document to will open.
- Scroll through the list of page sizes until you see the Index Card sizes. Click one of the sizes to change your document to the size of an index card. Sizes you can choose from include 3x5, 4x6 and 5x8 inches. Your Word document will change to the index card size you selected.
Format the Index Card
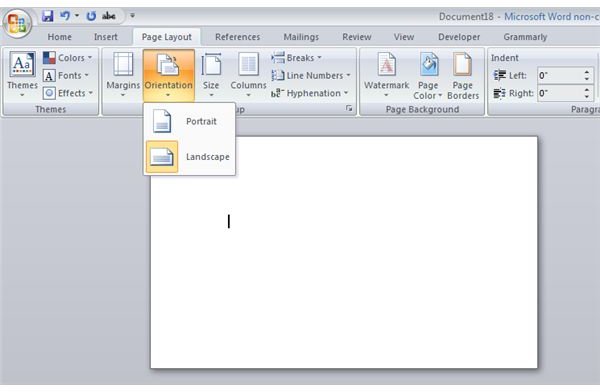
After you change the size of your document, you must format the index card. Before you start adding text to the index card, you need to set the page orientation and select font options.
-
If you don’t have the Page Layout tab open, click Page Layout from the Word Ribbon.
 Advertisement
 -
Look to the Page Setup section of the Ribbon and click Orientation if you want to change how your index card is displayed. By default, the index card is displayed in Portrait view. If you want the index card to be displayed horizontally, click Landscape.
-
Click the Home tab if you want to change the default text . For example, if you are using index cards to create flash cards for a child, you may want to use a colorful text. Look to the Font section of the Ribbon and select the font style, size, and color for your index card.
Advertisement
Add Text and Print the Index Card
Now that you have changed the document size and formatted the index card, you are ready to add text to the card. After you finish adding text, you can save and print the card. 
- Use your mouse to click inside the index card. Enter the text you want displayed on the card.
- Save your document after you finished editing the card. Click the Office button and select Save As from the menu that opens. Enter a name for your index card and click Save.
- If you are ready to print your index card, add paper to your printer. You can print on an index card or a sheet of copy paper. If you print on copy paper, the index card you created will only print on part of the page.
- Print your index card. Click the Office button, select Print and click OK to print your index card.
Tip
- If you want to create another index card, simply erase the text from the index card you saved or printed and add the text for the next card. Don’t click the Save icon if you want to keep the old card; instead, click the Office button, select Save As, enter a different name for this index card and click Save. This saves you time from changing the page size and text formatting on each index card.


