How Do I Set Up A Logical Drive Using Windows 7?
Overview
You may be aware that you have items called “C:” and “D:” under “My Computer” in Windows, but what are these, what do they mean and how do you set them up under Windows 7?
Assume for a moment that your computer has a single hard drive in it. In order to safeguard some data, you may want to create various “partitions” or containers. In order to use these containers, you can assign a drive letter to them – in this case it is called a logical drive. Even though you only have one physical hard drive, you can make your computer think you have several drives.
For more information on partitions and how they relate to logical drives, check out this article that explains what a logical drive is.
Now that you have a basic understanding of what a logical drive is, how do you set up a logical drive using Windows 7?
Logical Drives in Windows 7
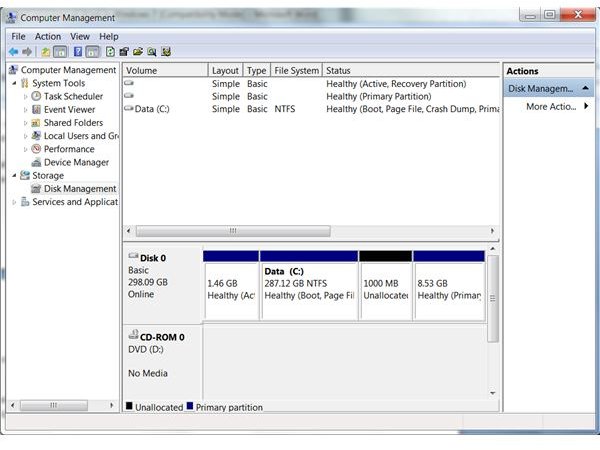
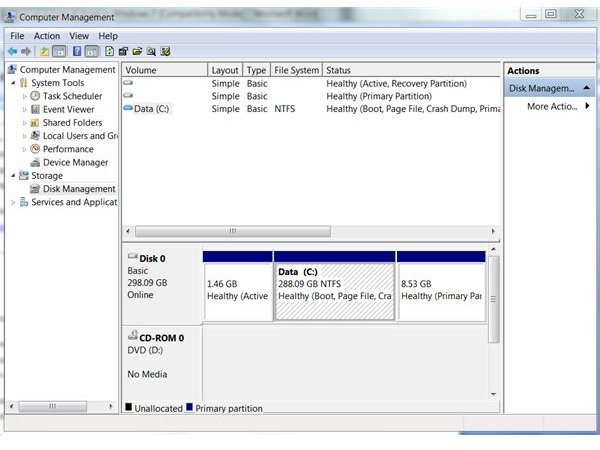
You can examine the configuration of your partitions and logical drives by going to the Disk Management console in Windows 7. Before you begin, you need to make sure you have a free partition set up that you can assign to a logical drive. As you can see in Figure 1, I only have two logical drives set up – however one of them is assigned to my DVD drive. The C: drive is assigned to my hard drive. I will first shrink my C: drive, create a new volume and assign a new logical drive to it.
- Click the Start button, right click on Computer and click Manage. Note that you will need Administrative access to access the Disk Manager.
-
The Computer Management console opens up. Expand the Storage category and click on Disk Management.
-
Right click on the partition you wish to edit. In my case, I’ll right click on my C: drive and select Shrink.
-
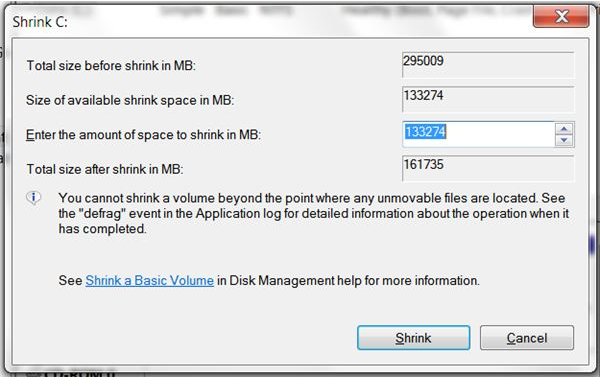
After a moment, the Shrink window will open (Figure 2). Determine how much you want to shrink the hard drive and click the Shrink button.
-
After a few minutes, you will see a new set of unallocated space pop up (Figure 3). Right click on the unallocated space and select “Create Simple Volume…”.
-
The New Simple Volume Wizard will start. Click Next.
-
Specify the size of volume you wish to create (default should be okay). Click Next.
-
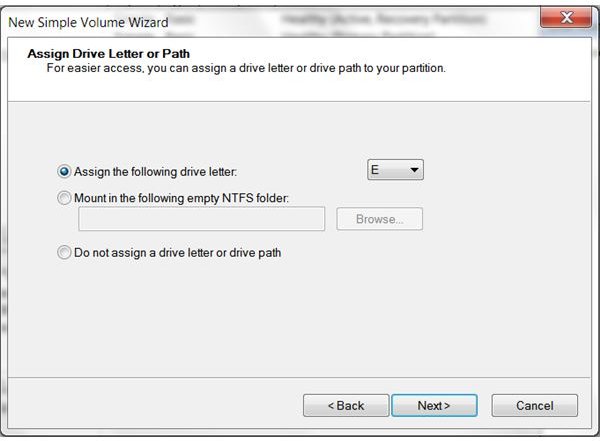
Windows will automatically assign a logical drive letter to the new volume as part of the wizard. Keep the default presented and click Next (Figure 4).
-
On the Format Partition page, keep the defaults and click Next.
-
Click Finish on the summary screen.
-
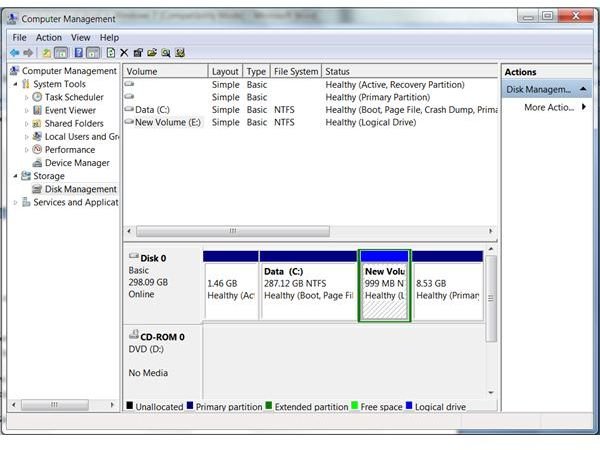
After a moment your new volume and logical drive will be created (Figure 5).
- If you wish to change the drive letters assigned to volumes, you can right click on them and select “Change Drive Letters and Paths…”. Please note that some applications hard-code the drive letter used to install so if you change the letter assigned to your DVD drive, programs that rely on this may have issues functioning.
That’s it! As you can see, it is relatively simple to set up a logical drive using Windows 7.