With the inclusion of new features such as jump lists, Windows 7 has eliminated others like the Quick Launch toolbar. If you are unhappy about Windows 7 missing Quick Launch, learn how you can add it to the taskbar - and why you may decide not to.
What Happened to Quick Launch?
If you noticed Windows 7 missing Quick Launch and thought there was a problem with your computer, you do not have to be concerned. Microsoft intentionally removed Quick Launch from Windows 7. The reason for this is that Windows 7 allows you to “pin” programs and folders directly to the taskbar. By pinning icons to the taskbar , you can access Jump Lists that provide contextual menus. You can use Jump Lists to start an application, view the contents of a folder, find recently opened files and more. It is quite simple to pin a program, file or folder to the taskbar; all you need to do is drag the item and drop it there. If you decide you no longer want an item pinned to the taskbar, right-click the icon and select Unpin This Program from the Taskbar.
Although pinning programs to the taskbar and making use of jump lists is a timesaving new feature, you may simply prefer the Quick Launch toolbar to which you are accustomed. If so, read on to restore the Windows 7 missing Quick Launch.
How to Enable Quick Launch
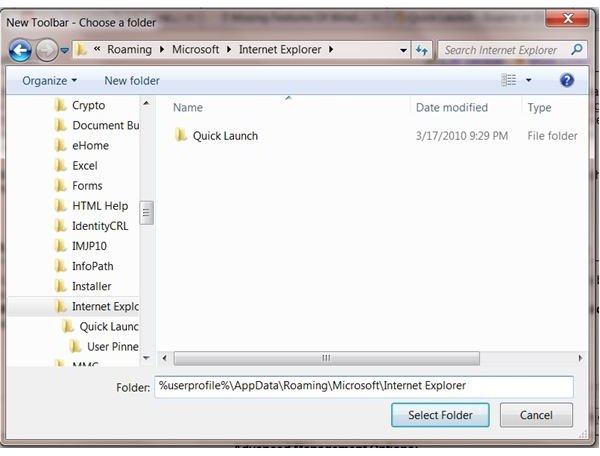
Adding the Windows 7 missing Quick Launch back to the taskbar takes a bit of time and concentration, but it is not terribly difficult. To begin, right-click any blank area of the taskbar, point to Toolbars and select New Toolbar. This opens the New Toolbar - Choose a Folder dialog box. Type or copy and paste %userprofile%\AppData\Roaming\Microsoft\Internet Explorer into the Folder box and press Enter. Click on Quick Launch and click the Select Folder button. This adds the Quick Launch toolbar to the right side of your Windows 7 taskbar, just to the left of the system tray.
This is probably not where you are used to seeing the Quick Launch toolbar, however, and you may wish to move it to the left side of the Windows 7 taskbar. To do so, you must first make sure the taskbar is not locked. Right-click a blank area of the taskbar and look at the contextual menu. If Lock the Taskbar has a check mark beside it, you do not have to do anything. If Lock the Taskbar is not checked, this means that the taskbar is currently locked. Click Lock the Taskbar to unlock it. Then you can drag the Quick Launch toolbar to its rightful location on the left side of the taskbar.
You might also notice that the Quick Launch toolbar displays text describing each application on it. This can take up too much space and be distracting as well. Fortunately, it is easy to fix. Simply right-click the Quick Launch toolbar and click Show Text to remove the check mark beside it. This removes the text and leaves you with only the icons. Likewise, you can disable the word Quick Launch from appearing. Right-click the toolbar and click on Show Title. This clears the check mark and removes the title from the toolbar, leaving you with a Windows 7 Quick Launch toolbar just the way you remember it from previous Windows versions.


