How to Set Up Windows 7 Auto Login
Overview
Whether your primary computer is the one that you use at the office or the one your family shares in the den, it might make your life a little easier if you didn’t have to log on every time you booted it up. You could press the power button, then go off and fill your coffee cup or start dinner and then come back to your nice, warmed-up desktop. Instead, you either have to wait for it to boot and type in your user name and password, or you must do so when you finally get back to your desk.
Fortunately, there is a way to set up Windows 7 auto login. That being said, be sure to consider whether it is safe enough to do so. If there is even the slightest possibility that someone who should not have access to information on your computer could press that power button and wait for your PC to fire up without you knowing, then you will probably want to keep the user name and password in place. If you are not the slightest bit concerned about this, read on to learn how to enable Windows 7 auto login.
Manage User Accounts
Before getting started with Windows 7 auto login, you may wish to find out how to create user accounts and change passwords as needed. To add a user account, change a password or enable Windows 7 auto login, you must be logged on as an administrator. Read Windows 7 Administrator Privileges to learn more.
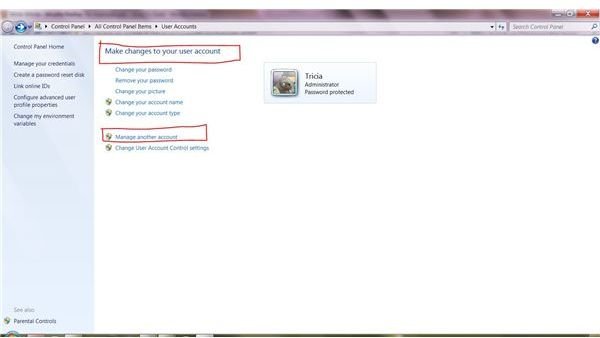
To create or manage user accounts, click Start and type user into the Instant Search box at the bottom of the Start menu. Select User Accounts from the results. Select the account you want to change and click the option for the changes you want to make. To create a new account, click Manage Another Account and then select Create New Account.
User Account Settings
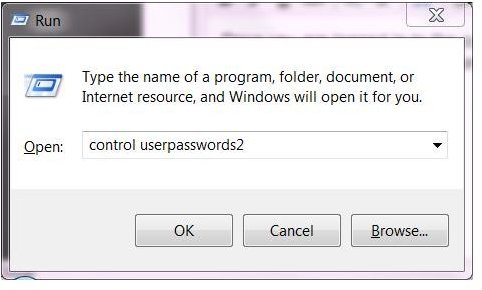
Once you are logged in to the computer as an administrator, you can proceed with Windows 7 auto login setup. Open the Run dialog by clicking Start, typing run and pressing Enter. You can also use the keyboard shortcut Windows Key+R. Type control userpasswords2 into the Open box. Click OK or press Enter. The User Accounts dialog box will open.
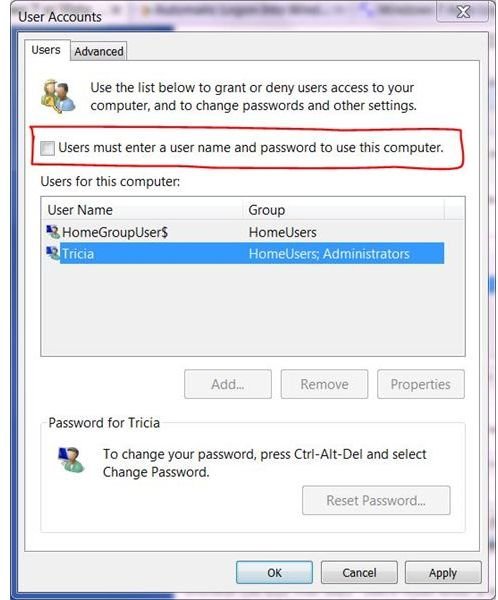
Clear the Users Must Enter a User Name and Password to Use This Computer check box. Click Apply to apply this change.
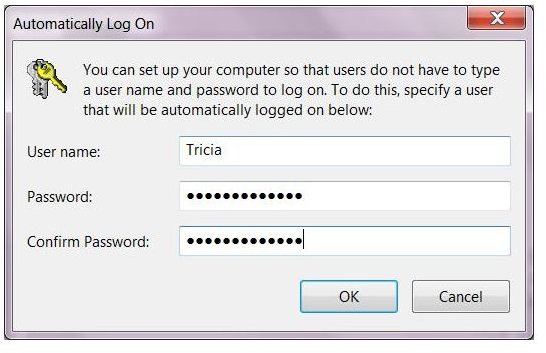
A new dialog box will open, aptly named Automatically Log On. You will need to enter the user name and password for the user account that you want to automatically log on each time the computer is started. Type the user name into the User Name field, type the password for this account into the Password field and then enter the password once more in the Confirm Password field. Click OK to apply the changes. Click OK again to close the User Accounts dialog box.