You may have already come to realize that Windows Vista’s desktop works a bit differently than its predecessors. Read on to learn how to get the desktop to look and act the way you want it to.
Customize Icons
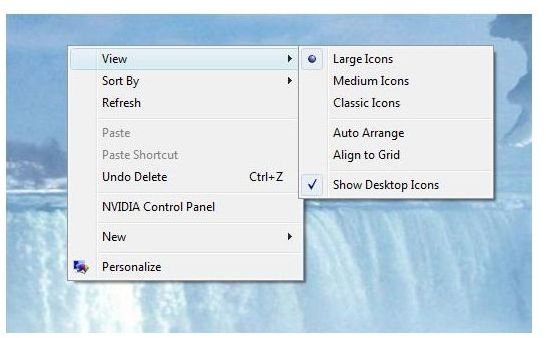
To customize the appearance of the icons on a Vista desktop, right click any blank area of the desktop and point to View. Select Large, Medium or Classic for the icon size. Select Auto Arrange to let Vista decide where the icons should be placed. Select Align to Grid in order to snap the icons to the desktop’s invisible grid. If they are not aligned to the grid, you can move them around and place them precisely where you want them.
Much like the View options, the Sort By, Refresh and New options provided when you right click the desktop work much the same as they do in XP. Sort By allows you to change the manner in which icons are sorted, and Refresh will update the desktop following any changes. New displays a menu, making it easy to create everything from a new text document to a new briefcase.
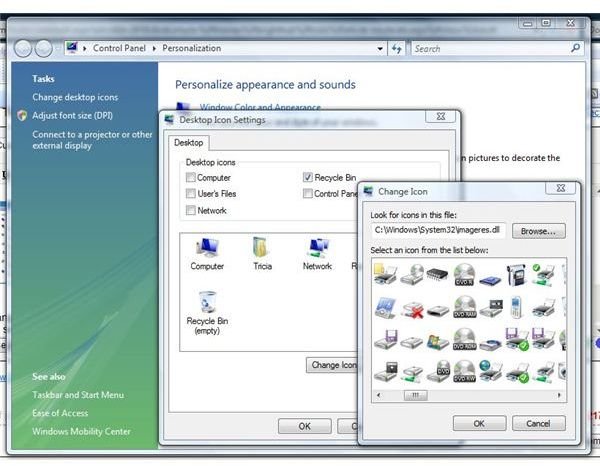
At the bottom of the right click menu is an option labeled Personalize. Clicking this will bring up the Personalization window, which is where most of your Vista desktop customization will begin.

To change an icon, click Change Desktop Icons in the task pane of the Personalization window. In the Desktop Icon Settings dialog, select the program whose icon you want to change and click Change Icon. Click Browse, find the icon you want to use and click OK and then Apply.
Customize Background and Screen Saver
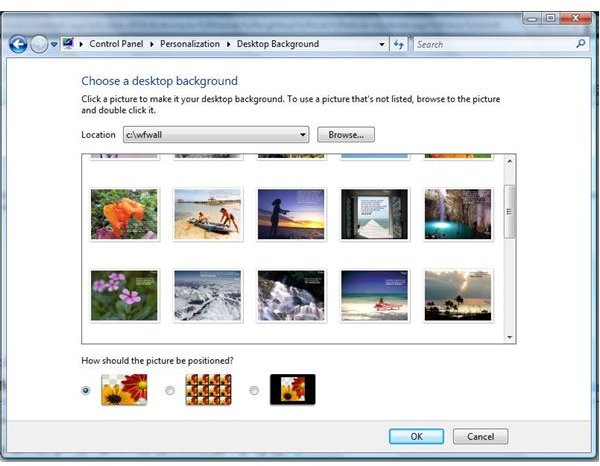
To change the appearance of the Vista background, click Desktop Background under Personalize Appearance and Sounds in the Personalization window. Select a background image from the gallery presented, or click Browse to navigate to an image file elsewhere on the computer. Once you have selected an image, select the positioning for the picture. You can choose Fit to Screen, which stretches the picture across the desktop; Tile, which will repeat the graphic like tiles across the desktop; or Center, which will center the image and leave a blank area around the border.
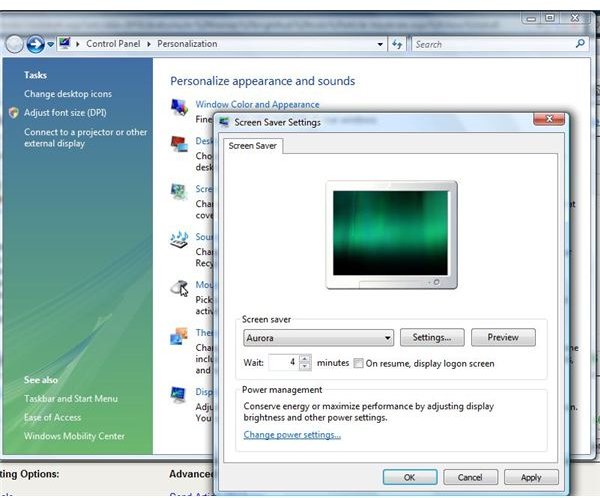
Click Screen Saver on the Vista desktop Personalization window to open the Screen Saver Settings dialog box. Select the screen save you want to use in the list of available options. The Settings button allows you to customize certain screen savers, such as slideshows. Once you have selected a screen saver, you can can click Settings to see if there are customization options available for that screen saver. Click Preview to see how the screen saver will look, and then move the mouse or click on the keyboard to return to the Settings dialog. You can change the amount of time your computer goes unused before the screen saver starts, and opt to return to the log in screen once you are ready to resume, which gives added protection if you use a password to log in. When you have made changes, click Apply.
Want to further customize the Vista desktop? Check out the Bright Hub tutorial The Vista Sidebar: Windows Vista Tips and Tricks . For even more Vista knowledge, read the four-part series Taming the Control Panel in Windows Vista .


