Learn How to Set Tabs in Microsoft Word and the Benefits of Using Tabs
About Tabs
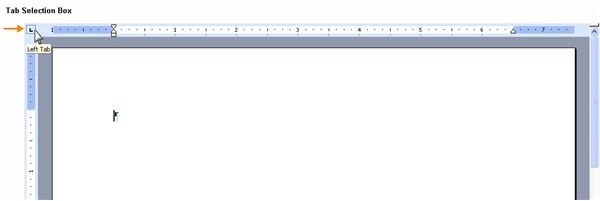
The fastest way to create a tab is by using the ruler bar that runs across the top of your Microsoft Word document. To the left of the ruler bar is a small box with what looks like a “black L” in the middle. This is the tab selection box. Click on this box to change the type of tab. If you hover your mouse over it, a pop-up will appear letting you know what type of tab is currently selected. To set the tab, all you do is choose the one you want, then click anywhere on the ruler bar. The tab will then appear on the ruler in that location. Now when you hit the TAB key, your insertion point and any text will move in conjunction with that tab position. Also, once a tab is set, it is carried down as you press the Enter key until you remove it.
Why Set Tabs?
If you use just the TAB key without setting tabs, or, worse, use the space bar to align text, then the text will not line up correctly if you add additional text, change the font or text size, or copy and paste the text into another document.
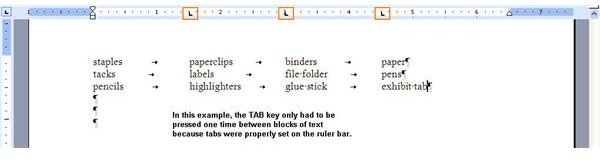
As a general rule, you should never press the TAB key more than once between any two blocks of text. You should always set a tab position instead. You can always tell if a list has been created properly by turning on Show/Hide and revealing the formatting marks in the document:

Setting a Left Tab
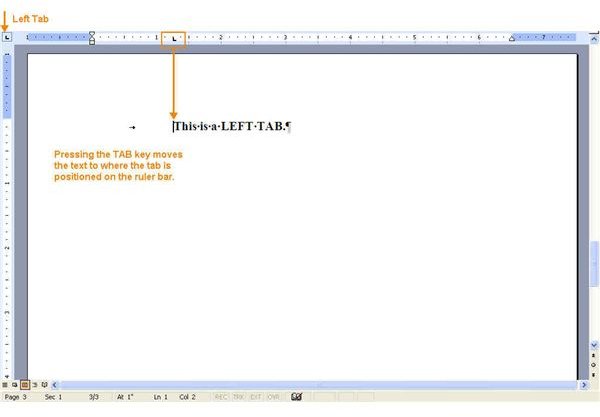
The Left Tab looks like an “L”. When you set a left tab and press the TAB key, the text will move to the location of the tab. To set a left tab, select Left Tab from the tab selection box and then click anywhere on the ruler bar.
Setting a Right Tab
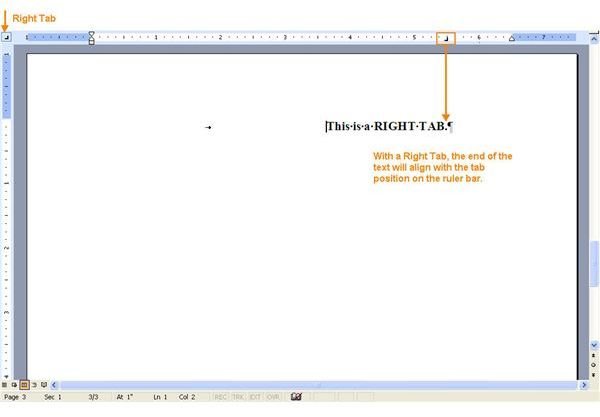
The Right Tab looks like a backwards “L”. With a right tab, the end of the text will align with the tab. To set a right tab, select Right Tab from the tab selection box and then click anywhere on the ruler bar.
Setting a Center Tab
The Center Tab looks like an upside down “T”. When you set a center tab, the text will be centered from the tab position on the ruler bar. To set a center tab, select Center Tab from the tab selection box and then click anywhere on the ruler bar.

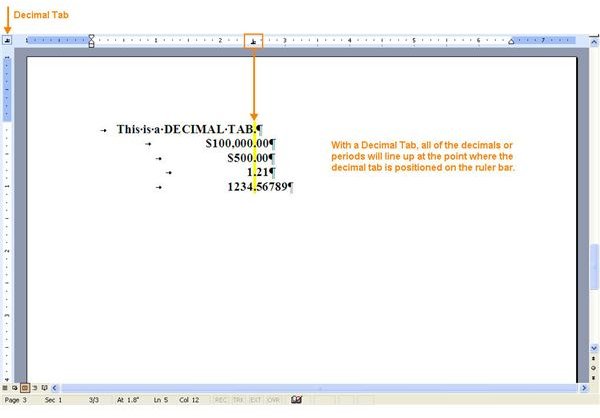
Setting a Decimal Tab
A Decimal Tab looks like an upside down “T” with a dot. The decimal tab is used to line up text or numbers at the decimal point or period. To set a decimal tab, select Decimal Tab from the tab selection box and then click anywhere on the ruler bar.
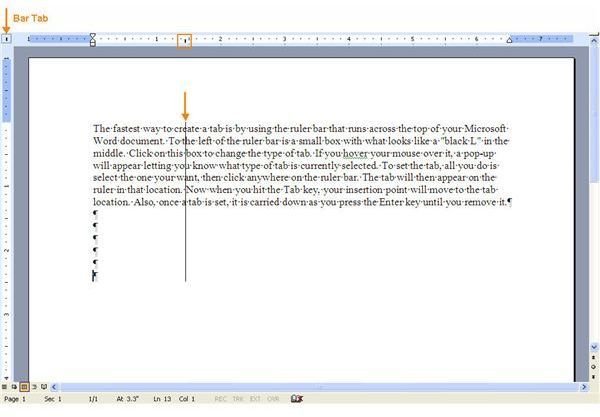
Setting a Bar Tab
In Microsoft Word a Bar Tab is a type of tab that creates a vertical line or “bar” at the position of the tab. As you press the Enter key, the line gets longer. A bar tab works differently than any of the other tabs because you actually don’t press the TAB key. Once you insert the tab on the ruler bar, the vertical line will automatically appear.
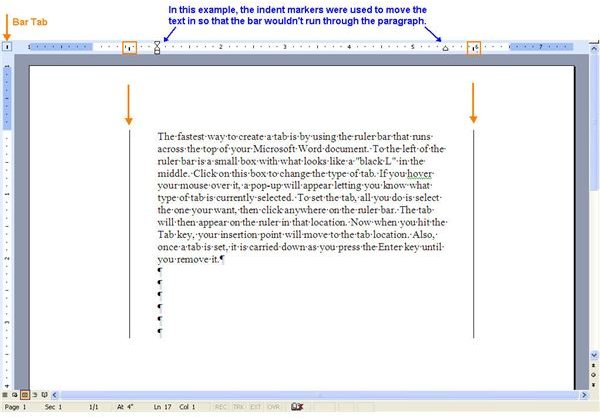
A bar tab comes in handy when you want to offset something or draw special attention to something in your Word document. But before placing a bar tab, you may want to first use your indent markers to move the text over. Here are a couple different ways a bar tab could look:
Setting Tabs Using the Tab Dialog Box
If you need to set more precise tab positions that you can’t do by clicking on the ruler bar, or if you want to add a dot leader before the tab, then you may want to use the Tabs dialog box.
To open the Tabs dialog box, do one of the following:
- In any version of Word, you can double click any tab stop on the ruler bar;
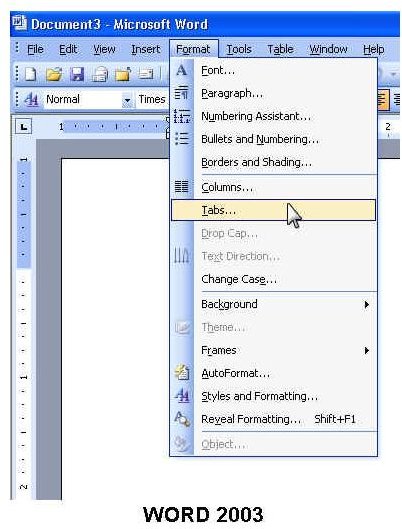
- In Word 2003 and earlier, click Format on the menu bar and choose Tabs;
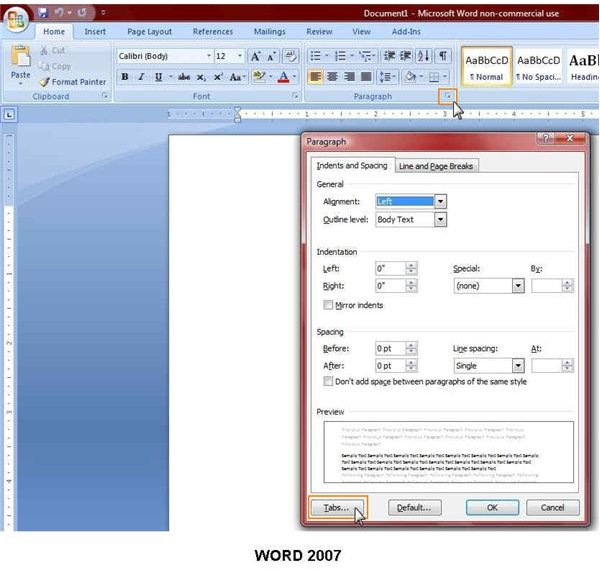
- In Word 2007, click the Paragraph dialog box launcher on the Home tab, and then click the Tabs button at the bottom of the Paragraph dialog box.
The Tabs Dialog Box
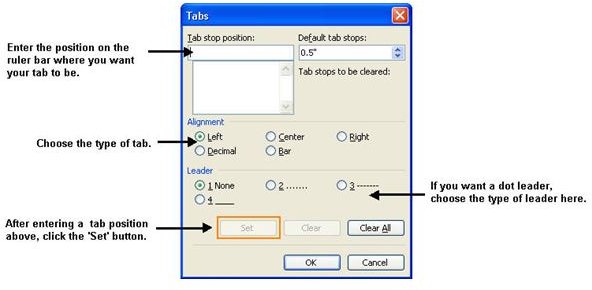
The options in the Tabs dialog box are the same in Word 2007 and in earlier versions of Word. Just type in the tab position that you want, choose the type of tab alignment, choose the type of leader, if any, and press the Set button. Do this for each tab that you want to set. Each time you press the Set button, you will see that tab position move to the lower box. When you’re done, click OK. You will then see the tab positions automatically inserted on the ruler bar.
Clearing Tabs
To remove a tab, select the text or paragraphs that you want to remove the tabs from, then either drag the tab off of the ruler bar, or open up the Tabs dialog box, select the tab you want to remove and press Clear. To clear all tabs in your document, select the entire document (Ctrl+A), open the Tabs dialog box and click the Clear All button.
Conclusion
Remember when setting tabs to first select the paragraphs that you want to affect, then set the tab. If you’re just setting a tab for one paragraph, then just place your insertion point in the paragraph when setting your tab. And always remember that setting tabs will save you a lot of frustration later, and a properly formatted document makes for a more professional-looking finished product.