How to Import Excel Data into a Microsoft Access 2007 Table
Database Tables in Access and Excel
Excel may be a fine choice for creating small, stand-alone database tables, but it’s no match for Microsoft Access, particularly if you want to perform advanced queries or you are dealing with large quantities of dynamic data. However, there are many times when the true scope of a project doesn’t become visible until well after initial data has been collected and stored in Excel spreadsheets.
If you find that Excel isn’t robust enough to handle your data needs, you can import all of your Excel spreadsheets into Access tables in order to take advantage of the powerful tools found in the database application by following these steps.
How to Import Excel Data into an Access Table
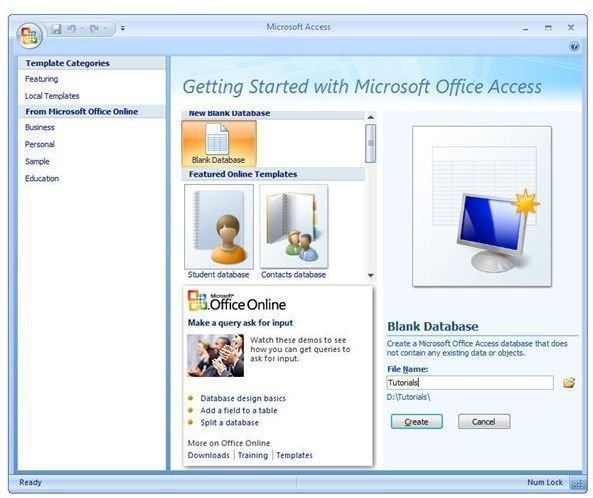
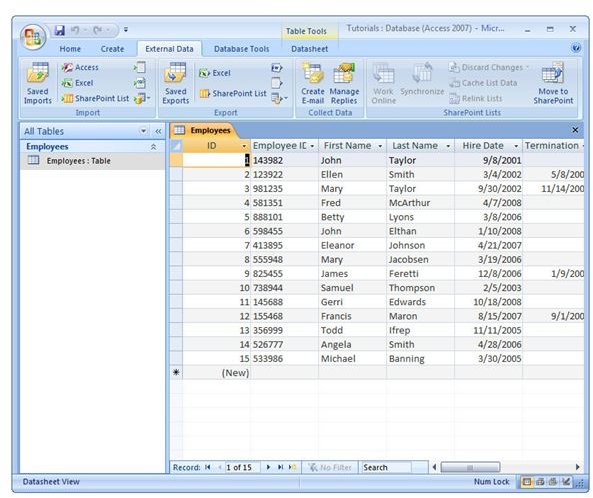
Step 1: Create a blank database or open an existing database in Access. For the purposes of this example, we will create a new database called Tutorials. (Click any image for a larger view.)
After creating the new database, Access will automatically open a blank table. Go ahead and close this table without saving it. We won’t be needing it.
Step 2: Open the External Data tab on the Access ribbon. Click on Excel in the Import category.
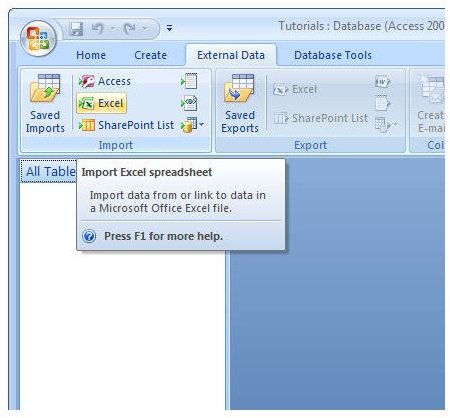
This will open the Get External Data – Excel Spreadsheet wizard that will walk you through the steps of importing the data.
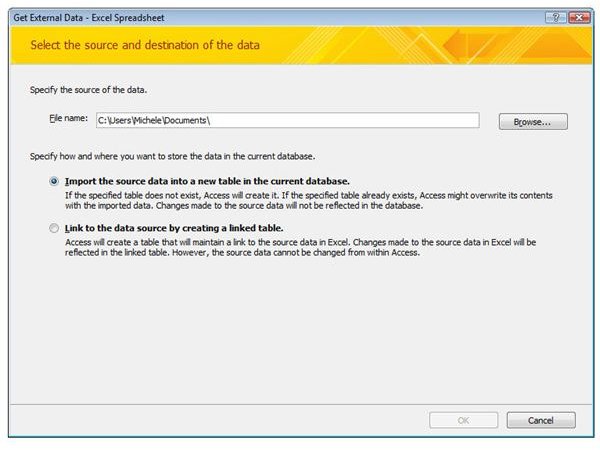
Step 3: Enter the name of the Excel workbook that contains the spreadsheet you wish to import in the File name field. You can also use the Browse button to look for the file if you’re unsure of the exact path and name.
Click on the radio button next to Import the source data into a new table in the current database. Click OK to continue.
Step 4: Select which worksheet you would like to import. If you can’t recall what information is in each sheet, click on the sheet name and sample data from that selection will be shown in the preview area of the window.
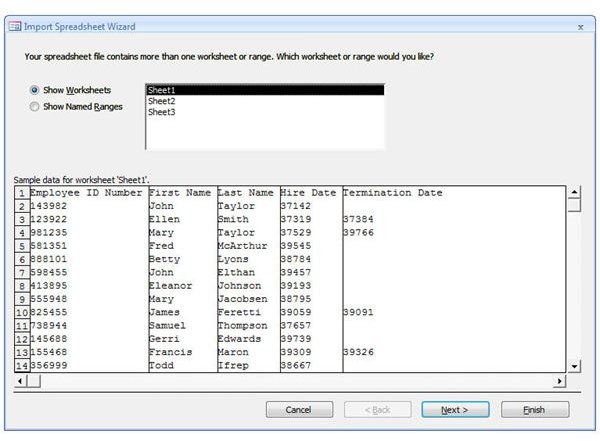
Click Next to continue.
Step 5: In the next screen, put a check in the box if the first row of your spreadsheet contains column headings that you want to use as field names. If you don’t have column headings, your fields will be assigned the generic names Field1, Field2, and so on. You will be able to change these selections on the next screen.
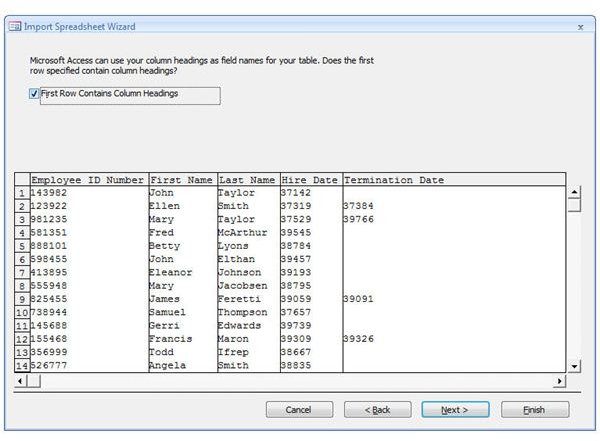
Click Next to continue.
Step 6: This next screen is where you’ll have to do a little bit more work in order to define the field properties for each column in your table. Begin by clicking on the first column in the preview area. If you don’t want to import that column into the table, put a check mark in the box next to Do not import field and move on to the next column. Otherwise, perform the following steps, in any order, for each column that you want to keep.
-
If you don’t like the default name for the column, change it in the Field Name box.
-
If you want to index this field, choose the type of indexing you want to use from the Indexed drop down list. Otherwise, leave this option set to No.
-
Select a data type for all of the entries in this column.

After navigating through each column, click Next to move on.
Step 7: Next, the wizard will ask you for your choice of what to use as a primary key for this table, if any. For more information on primary keys, see the article Microsoft Access: Setting Up Relationships Between Tables.
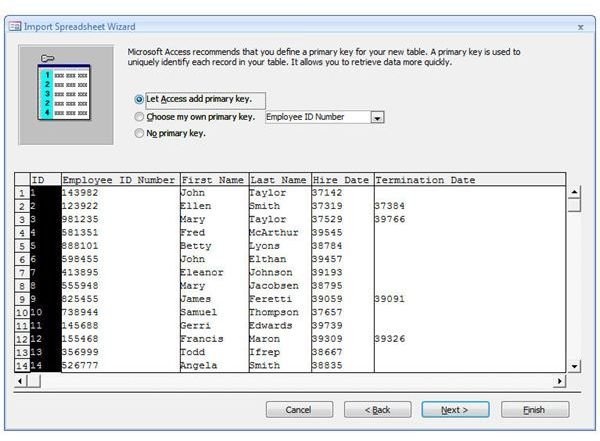
When you’re ready to continue, click Next.
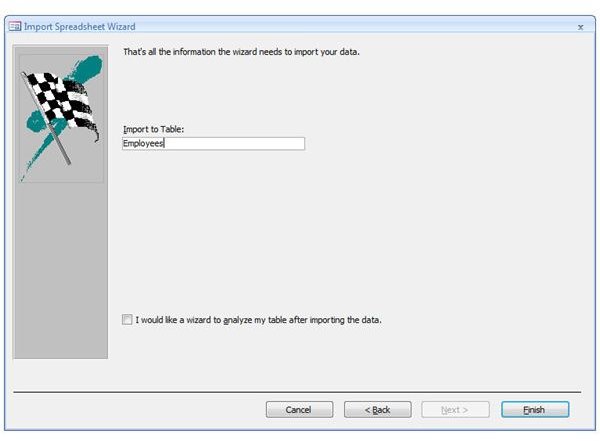
Step 8: Specify a name for the table in the box under Import to Table. If you would like a wizard to analyze the new table to see how its structure might be made more efficient, put a check in the appropriate box on this screen. For now, we’ll leave that box unchecked and click Finish to create the table.
Step 9: Finally, you’ll be asked if you want to save the import steps used to create this table. If you are importing several worksheets, all containing the exact same layout, you can check this option to save time on future imports.
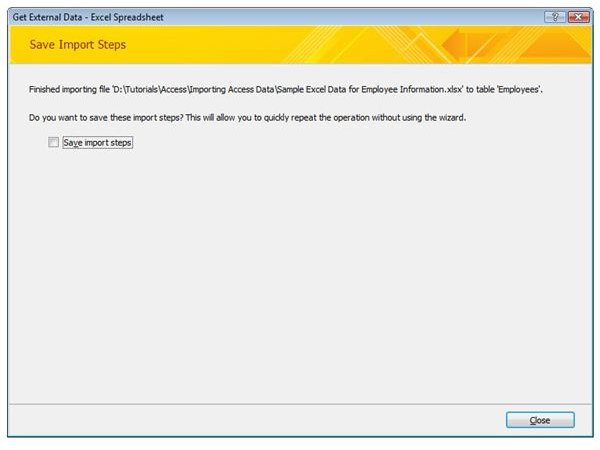
Click Close. The newly created table can now be seen in your database window.
For information on other aspects of Access, be sure to take a look at the other items in the collection of MS Access tips and tricks available on Bright Hub’s Windows Channel.