Wanting technical help with your computer hardware? More specifically your Hard Drive? Here we discuss installing an external SATA hard drive in a NexStar 3 SATA to eSata and USB 2.0 enclosure. Then we test the performance of the external drive compared to the built-in C: drive in the PC.
Selecting an External Enclosure
I had a PC with a failed motherboard that had a working 250 GB hard drive in it. Although I had a good backup of my work (and most of my play) from that hard drive, I wanted to recover the use of the drive. This PC had a SATA (serial ATA) hard drive and optical drives. Local computer and “big box” stores all carried PATA (parallel ATA) to USB adapters, but not SATA adapters.
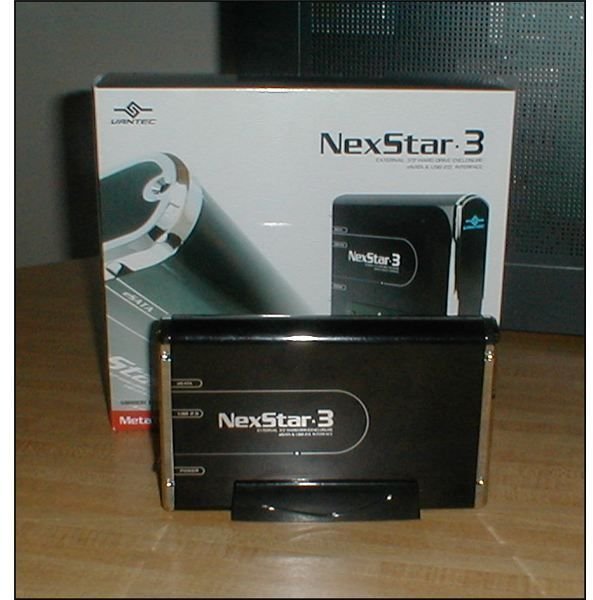
After researching external enclosures online, I selected the NexStar 3 model INST-360SU-BK adapter/enclosure by Vantec. Figure 1 below shows the assembled enclosure and the box it came in. Immediately apparent is that the unit has an attractive black (onyx) mirror finish with chrome accents and a large blue LED Vantec logo for drive activity. As things go, it’s not very subtle, but it matches the piano black finish of the front of my PC. It also would not be out of place humming along beside a Media Center PC in the living room.
Image
Description of the NexStar III Enclosure
This adapter comes with both a USB cable and a SATA to eSata cable with an adapter “card” for the PC. The theoretical advantage of SATA over USB is that throughput can be up to six times faster than USB 2.0. (That’s for a PC/motherboard with SATA II. Standard SATA will provide a smaller improvement over USB 2.0.)
The packaging consisted of a cardboard box within a sleeve. Some care was taken with the design of the packaging, with each component sealed individually in plastic bags. No components were damaged or missing. Included was a readable paper user’s manual in conventional English.
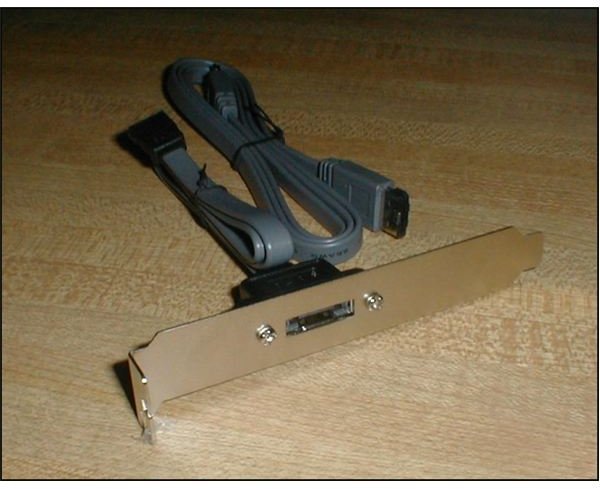
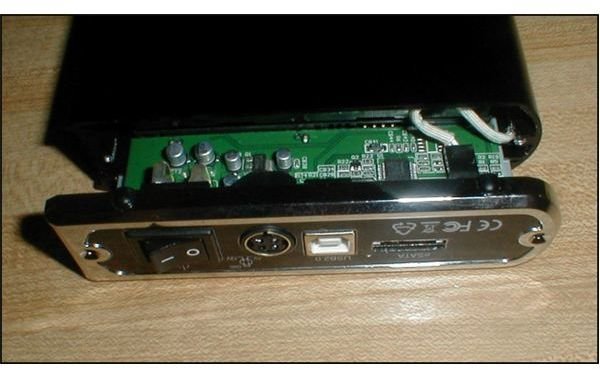
Figure 2 shows the rear of the assembled unit. Shown from the top are the connections for eSATA, USB 2.0, and power, and the on/off switch. Figure 3 shows the PC adapter card and the eSATA cable.
Images

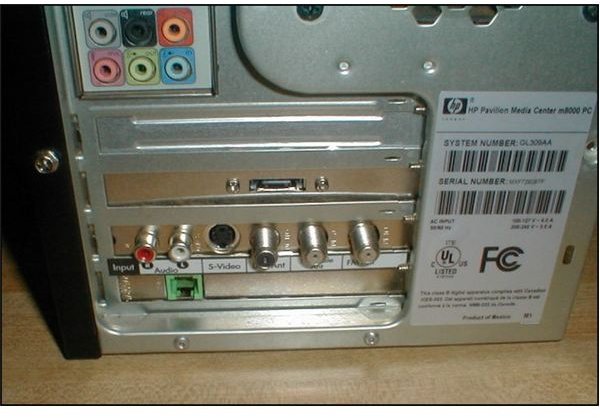
This adapter, of course, only works with a SATA type drive. If you’re uncertain which type of drive you have, remove the side cover of your PC to expose the motherboard. Start at the back of the hard drive and follow the cable (it will be a regular cable, not a ribbon-cable) to the motherboard. You should see a group of rectangular sockets, as shown below. [See Figure 4]
Images
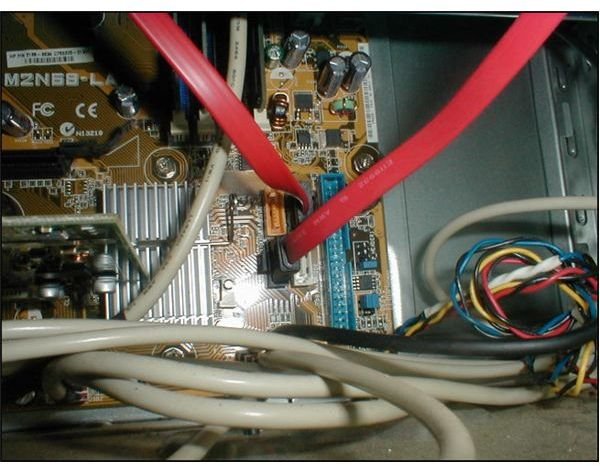
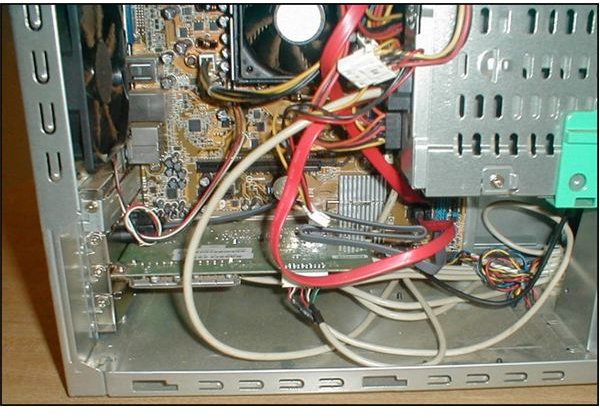
Figure 5 shows the eSATA adapter installed on the PC. I’ve been having some fun calling it a “card.” Actually, it’s not. It uses a card slot, but it does not plug into the motherboard below the slot. The box refers to it as a “bracket.” The rear of the PC after installing the card adapter is shown in Figure 6.
Images
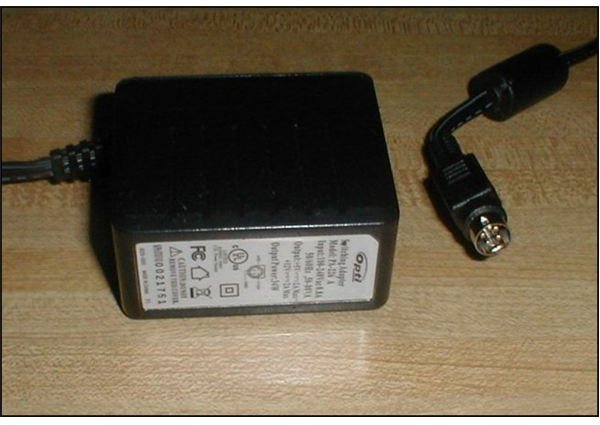
The “power brick” and plug-in are shown in Figure 7. Two nice features of the transformer are that it has an end-plug arrangement and a pilot light. The cord itself is only about 4-feet long and was too short to plug into my backup power supply AND sit atop my PC. This was a bit disappointing as desktop space is at a premium on my desk.
Image
Installing the Hard Drive
The first step involved in inserting the hard drive into the enclosure is removing two screws and carefully pulling the rear panel away. A white cable was plugged into the circuit board that needs to be temporarily removed in order to pull the carrier out.
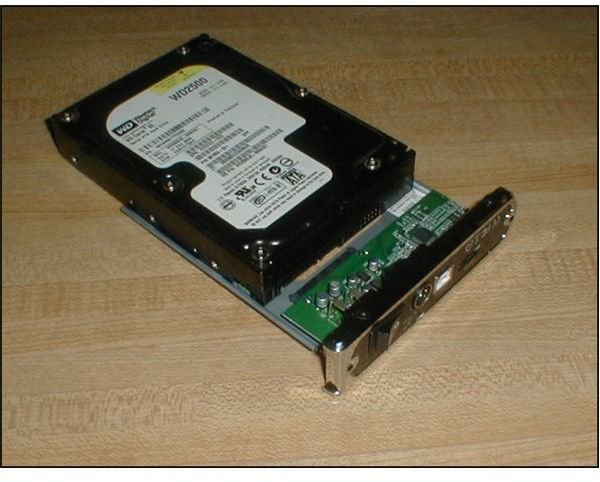
Once the carrier is removed, the next step is to plug the hard drive into the adapter. The plug on the circuit board engages both the power and data parts of the hard drive, and it’s a very easy installation. Figure 8 shows the hard drive being plugged in.
Image
Next: Finishing Up, Testing Performance, and Specifications
Then turn the carrier and hard drive over and attach the hard drive with four screws (provided).
Next, slide the carrier and hard drive into the enclosure. Be careful not to pinch the power cord for the LED. When the carrier is almost completely slid in, stop and reattach the LED power cord. Then fold it slightly so it will double over into place and finish closing the enclosure. Install the two screws removed in the first step, and you’re done with the actual enclosure part.
Image
From here, closing up the PC, plugging in the AC adapter, and plugging the cable into the PC were all that were involved to complete the installation. Upon reboot, the PC identified new hardware and added it as “external SCSI mass storage.”
There is an ambiguity in the manual. Under “Features,” it claims the device is “Hot-swappable plug and play without rebooting.” In a later section it says, “Warning: NEVER remove the NexStar 3 while the hard drive is in use. Doing so may corrupt the data on the hard drive or damage the hard drive, NexStar 3, or computer.”
I advise some caution here. Some operating systems, such as Windows Vista, employ “delayed write” to improve performance. Using “Safely Remove Hardware” in Windows, in my opinion, would be the safest way to disconnect the drive.
This enclosure utilizes passive cooling – it does not have a fan. It relies on the surface area of the aluminum housing to dispel heat. In over a week’s use, I’ve observed it getting warm to the touch, but never too hot to be uncomfortable.
Performance
All measurements were made using DiskBench by nodesoft.com (No Design Software). The first test consisted of creating a 200 MB file in a temporary directory on the external hard drive. The second test involved reading that same file back in. Then the numbers were compared to the PC’s internal hard drive. The drive installed in the external enclosure is a Western Digital Corp. 250 GB model WD250JS-60MDB1. The drive in the PC is a Hitachi 500 GB model HDT7250VLA.
- Create 200 MB file on the external hard drive. Time: 1802 milliseconds, transfer rate: 110.988 megabytes per second.
- Read the same file back. Time: 238 milliseconds, transfer rate: 840.336 megabytes per second.
This compares to 1743 milliseconds, 114.745 megabytes per second create and 242 milliseconds and 826.44 megabytes per second read back for the internal C: drive on this machine.
Summary
The NexStar 3 works as advertised. It was neatly packaged and easy to assemble and install.
Pros: snazzy black mirror finish with chrome accents, passive cooling with no fan noise, complete kit with cables for both USB and SATA and PC card adapter included, and readable paper manual.
Cons: power cord too short for some setups, and the snazzy black mirror finish collects fingerprints like crazy.
Specifications
The NexStar 3 is made by Vantec Thermal Technologies of Fremont, CA. https://www.vantecusa.com
- Model: NST-360SU-BK
- Device Support: SATA I/II Hard Drive
- Device Size: 3.5''
- Internal Interface: SATA
- External Interface: USB 2.0 & eSATAHD
- Capacity: Up to 1 TB
- Power Supply: AC
- Adapter Material: Aluminum
- Dimensions: 206 x 123 x 33mm
For more information about how we tested, please see
Installing an External SATA Hard Drive - Comparison Testing External Vs Internal Hard Drives


