Setting Up a Gmail Account in Microsoft Outlook 2013
Getting Started
This tutorial makes two assumptions – that you already have a Gmail account and that you already have Outlook 2013 installed. Make sure you have your Gmail email address and password handy. You’ll need these when configuring Outlook. If you don’t have a Gmail account, head on over to https://gmail.com and click the link to create an account.
Configuring Gmail
Before you set anything up in Outlook you’ll need to configure Gmail to allow external connections.
1. Log into your Gmail account.
2. Click the Gear icon in the top right.
3. Select Settings.
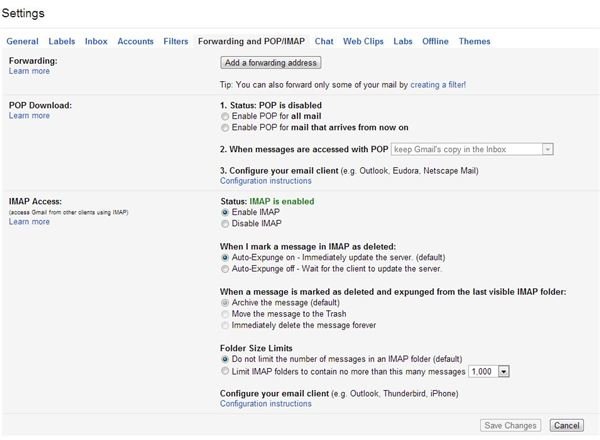
4. Click the Forwarding and POP/IMAP tab.
5. Select the option to enable IMAP (Figure 1). Keep the remaining options selected as default.
6. Click the button to save changes.
Adding Gmail to Outlook
To add your Gmail account to Outlook follow these steps:
1. Open Outlook 2013.
2. Click on the File menu tab and select Account Settings -> Account Settings.
3. In the Account Settings page you should be on the E-mail tab (Figure 2). Click the New button. Note – any other existing accounts you have set up will show up here. It’s okay to have multiple accounts set up.
4. Enter your name, email address and password in the correct boxes and click Next (Figure 3).
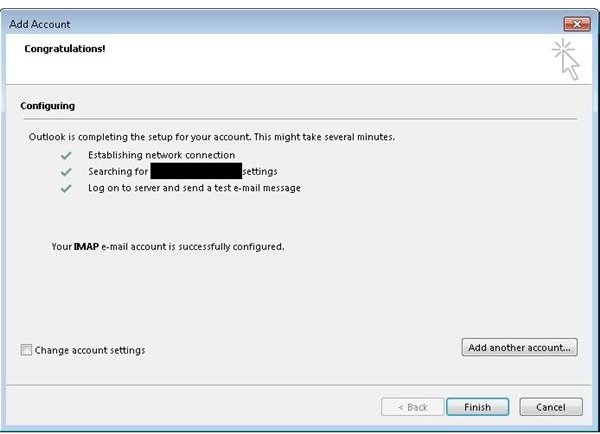
5. If all goes well Outlook should be able to automatically detect the settings Gmail uses (Figure 4). If you run into issues you can still run the Account wizard and attempt to connect using manual configuration.
Manually Configuring Outlook
If you run into issues using the automatic configuration, follow these steps to manually configure Outlook.
1. Follow steps 1-3 in the section above.
2. On the Auto Account Setup page, select the option for Manual setup and click Next.
3. On the Choose Service page select POP or IMAP and select Next.
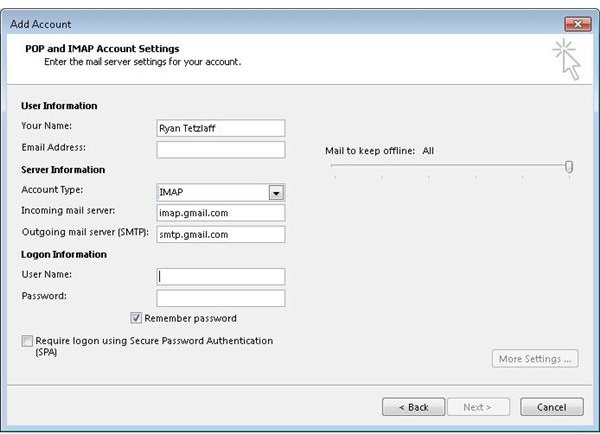
4. In the POP and IMAP Account settings page, fill out the following fields (Figure 5):
- Name: Your name
- Email Address: Your email address
- Account Type: IMAP
- Incoming Mail server: imap.gmail.com
- Outgoing Mail server: smtp.gmail.com
- Username: Your username
- Password: Your password
5. Click on the More Settings button.
6. Click on the Outgoing Server tab and select “My outgoing server requires authentication”. Leave the top radio button selected “Use same settings”.
7. Click the Advanced tab.
8. Fill in the following fields (Figure 6):
- Incoming server: 993
- Use following type of encrypted connection: SSL
- Outgoing server: 587
- Use the following type of encrypted connection: TLS
9. Click OK and complete the wizard by following the prompts.
You should now be able to send and receive your Gmail email from Outlook. Note that by setting up a connection like we did in this article you will retain mail in both Gmail and Outlook. If you delete a message in one place it will be deleted from the other. Thus, you can use Outlook if you’ve got your laptop or desktop handy, but you can still use Gmail while on the road.