This series brings you step-by-step instructions to unlocking the full potential of Microsoft Word, and in this chapter of “Instructions in Microsoft Word” we examine how to make a line.
Editor’s Note: This article was originally published in 2008 and has been placed in our archive.
Using Lines and Connectors in Microsoft Word
Taking your Microsoft Word files to the next level by embellishing them with lines and connectors can add panache to any document, and creating them can be quick and easy once you learn these basic steps.
Please note that this article is in reference to Microsoft Office Word 2003 and all tips, tricks, and shortcuts are specific to said edition. Please check the edition of your program to see if it differs and adjust accordingly.
If you’re using Microsoft Word 2007, use this guide to the drawing toolbar to find out how to create different shapes, lines, and even shadows right within your document. Microsoft Word 2003 users can continue reading about setting up a drawing toolbar, using the Line feature, and how to connect two sections or objects together with lines.
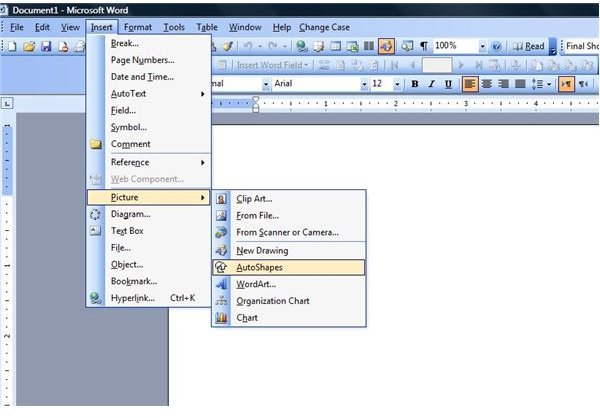
Setting up a Drawing Toolbar
- Click on the Insert Menu found in the top right portion of the screen.
-
Select Picture from the drop-down menu.
-
Choose the AutoShapes option.
Advertisement
Once you have completed these steps, the Drawing Toolbar will stay located under your drop-down menus. (Click any image in this article for a larger view.)
Quickly Drawing a Line
With your Drawing Toolbar now located below your drop-down menus, drawing a line is quick and convenient. Just click the Line graphic found on your Drawing Toolbar. A Line graphic will appear in place of your regular cursor graphic that you can drag and draw to create your desired design.
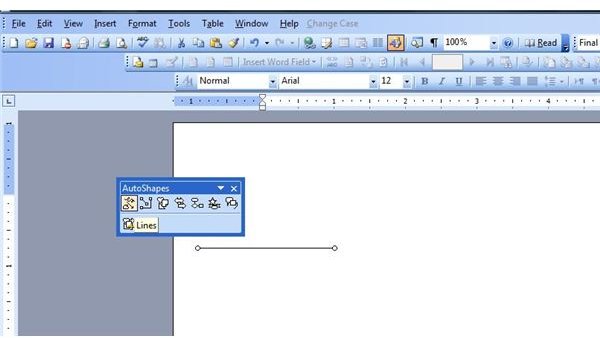
Manipulating your line can be done by holding down the Shift key as you drag which constrains the line at a 15 degree angle from its starting point. Holding down the Control key as you drag and draw your line will lengthen it in opposite directions.
Drawing Connector Lines
When you’re looking to connect two objects together, such as compatible diagrams, there are three types of connector lines to choose from: straight, angled (elbowed), and curved. Your connector line will appear as blue circles as your cursor moves around the screen.
To Draw a Connector:
-
Select the Connectors graphic from your AutoShapes toolbar.
-
Select Connectors and choose your connecting line.
Advertisement -
Click on what you want to attach.
- Drag cursor to the object you wish to attach to.
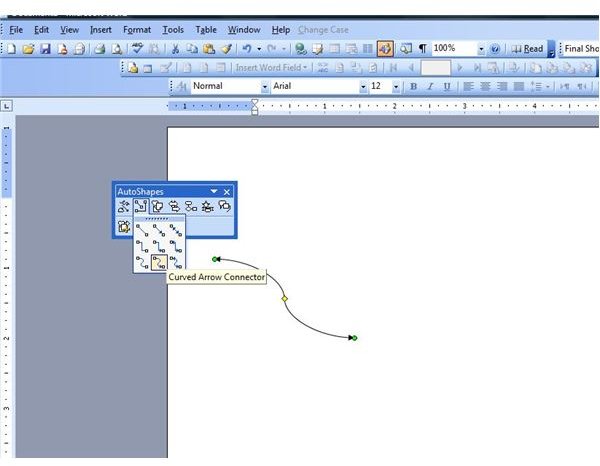
Feel free to move objects around, remembering that objects that are unlocked will appear as green circles and connected objects will appear as red circles.
Drawing a line in Microsoft Word is just one of the many features the program offers. To find out more about some of the other capabilities of the software, check out the other articles in Bright Hub’s collection of Microsoft Word user guides .
This article has been placed in our archives.
This post is part of the series: Instructions in Microsoft Word
This series brings you step-by-step instructions to unlocking the full potential of Microsoft Word.


