Upgrading your computer operating system should be an easy enough task, but when it comes to Windows there can be some snags. To upgrade Vista Ultimate to Windows 7 Home Premium you have to do a custom install instead of a standard upgrade.
Getting Started
The first thing you need to do before attempting to upgrade Vista Ultimate to Windows 7 Home Premium is find out if you are currently running the 32 bit or 64 bit version of Vista Ultimate. To determine which version you are using Click on the Start button, right-click Computer then click Properties. The version is displayed under “Windows Edition” near the top of the window. You must use the same version of Windows 7 to do the upgrade.
Before you start to upgrading Vista Ultimate to Window 7 Home Premium you will need to gather all of your original program disks for any non windows programs on your computer and also have either a jump drive or CD-R available as well. This is because you cannot directly upgrade from Vista Ultimate to Win 7 Home Premium.
Upgrading Vista to Windows 7
Once you have gathered the required materials start your computer. Make a backup of all of your important files because the custom install you are about to do will wipe your hard drive. Either make a backup disk or transfer the files to a flash drive.
Now reboot your system and after the start up is finished insert your upgrade disk. At the menu screen select “custom Installation.” If you try to select “upgrade” you will get an error message that tells you you do not have the correct version of Windows Vista installed for this upgrade.
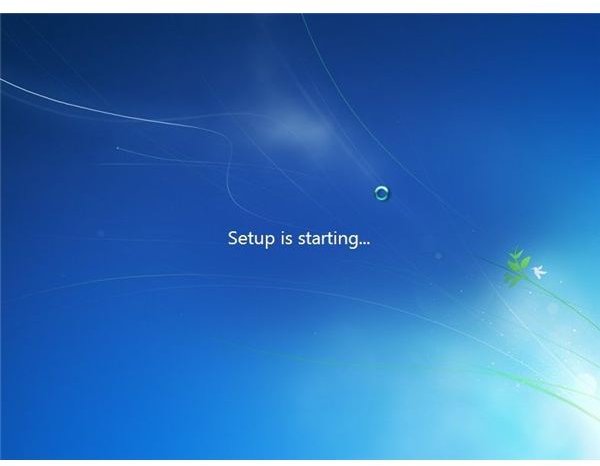
A custom installation is nothing more than a clean installation of the Windows 7 Home Premium operating system. You will first see the “setup is starting” screen.
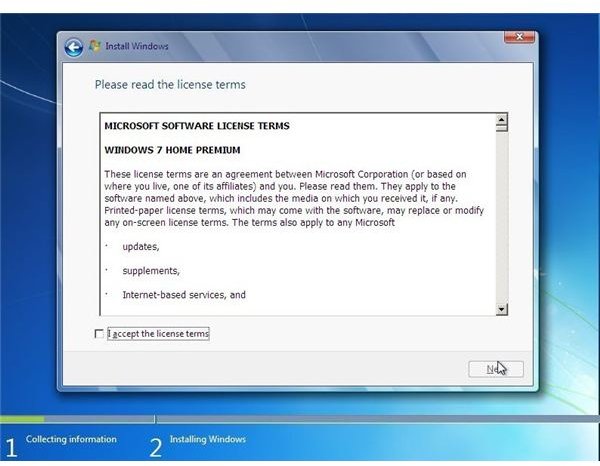
Next there will be a loading bar that begins with collecting data. The progress bar may run quickly or slowly depending on your processor.

Following the data collection there will be the standard license screen.
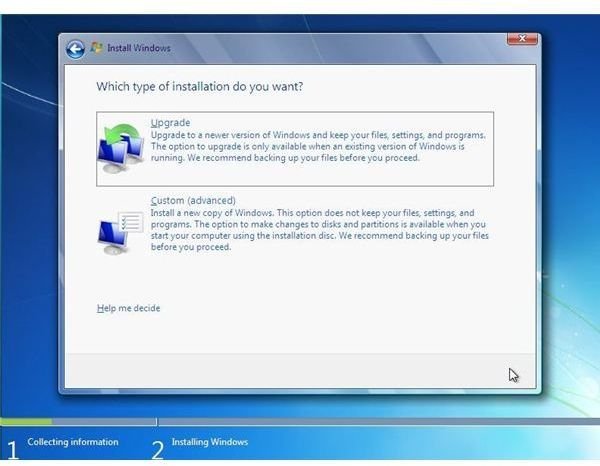
Now you have to choose the installation type. Chose “Custom Installation.” Then click next for “Automatic Hard drive setup using full capacity.” If you are an advanced user you can use the “Drive Options”
From here on out it is a standard fill in the blanks operation that will run you through the installing of the Windows files and Services.
After all of these files are installed the computer will come to a screen that says “press any key to boot from CD or DVD,” don’t touch anything. This screen will disappear in 10 seconds. If you do touch a key then the entire install will start over again.
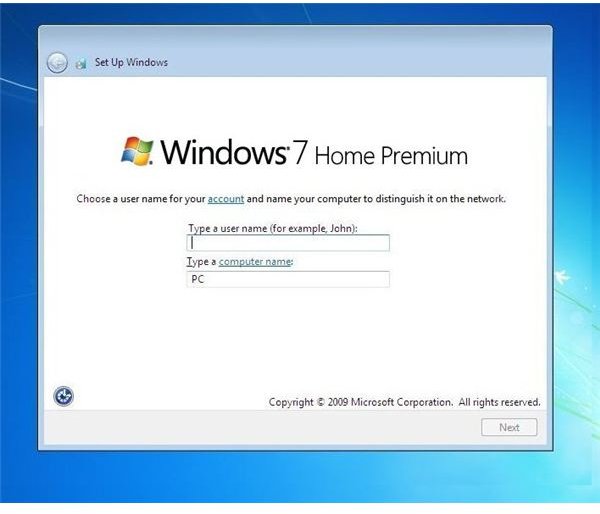
When the screen flashes the system will run Windows for the first time. It will run through the progress bar for upwards of 45 minutes. When Windows is fully loaded you will need to put in your user account name and computer name. The next screen will be your password screen. After the password is entered you will need the product key that came with the upgrade package. Enter the key and your almost finished.
To upgrade Vista Ultimate to Windows 7 Home Premium all that is left is setting up your personal settings including internet options and time and date. After this information is entered Windows will restart with your personalized settings. Now that your upgrade is finished simply reinstall your extra programs and the backup disk you created previously.
References
All Screenshots by Ken Sleight during the upgrade process.
https://www.microsoft.com/windows/windows-7/get/upgrade-considerations.aspx
https://answers.microsoft.com/en-us/windows/forum/windows _7-windows_install/can-i-upgrade-from-vista-ultimate-to-windows-7/d92d040b-bd0e-4d1f-ac43-0d6e867c26d6


