How to restore a Windows Live Mail recovered folder and import all the messages in the recovered databases. See how to do it for Windows 7 in this article.
Windows Live Mail Folders
Let’s assume that by mistake, you somehow deleted your Windows Live Mail software or formatted the hard drive but you managed to recover the mail folders. Maybe you recovered only one specific e-mail account folder or you recovered them all and you want to import all your messages into the newly installed Windows Live Mail. First, you would want to install again your Windows Live Mail application and even if you had an older version, I recommend installing the 2011 version, as it is much better than the older versions. You can download the web installer package here .
By default, on Windows 7, Windows Live Mail will place all your mail related files in this folder:
C:\Users\[username]l\AppData\Local\Microsoft\Windows Live Mail
(where [username] it is the username you are using to log on your computer.
Let’s assume that you recovered the entire “Windows Live Mail” folder and you placed it on a temporary location on your hard drive like “c:\temp\Windows Live Mail”.
Windows Live Mail Import Procedures
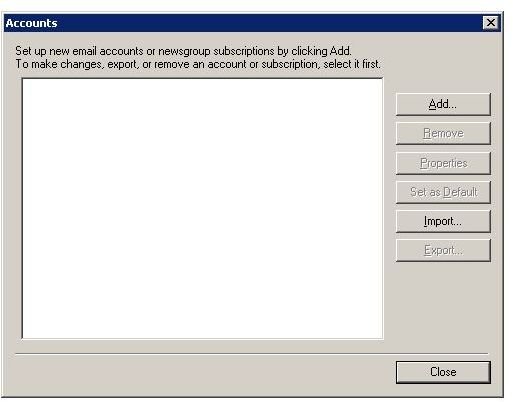
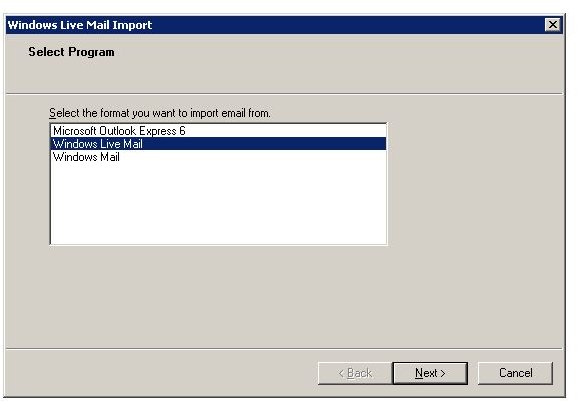
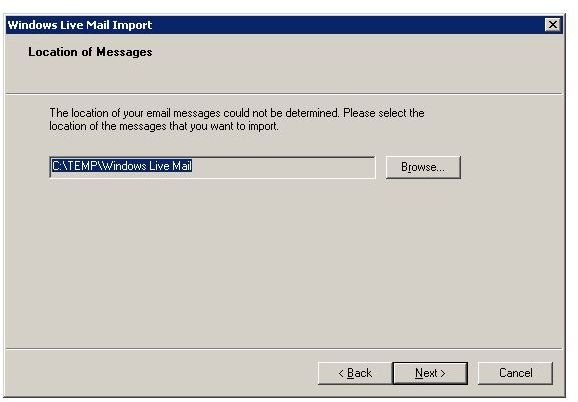
If you do not have a backup of your account settings, click Add and add your e-mail account. After you add the account settings, press the Export button. Export your account settings, placing the file in a safe place, and close the Accounts window. Press ALT+F again and go to Import Messages. Select Windows Live Mail and then click Next. Browse to the folder where you placed the Windows Live Mail restored folder (in our case C:\Temp\Windows Live Mail\AccountName(username)) and select the SUBFOLDER you want to restore. Select the subfolder containing the e-mail items and press Next. The imported messages can be found within the Imported Folder on the left menu. You can now manually move all the messages back to your inbox.
A. The case where you do not have the whole “Windows Live Mail ” folder.
After you installed the Windows Live Mail application, start it up. The application will ask you to create a new account. If you have previously exported the mail account settings, then you can choose to cancel the new e-mail account creation and import your old account. The account settings export file should have an “.iaf” extension. If you know you have exported the account settings and you know where your file is located then press ALT+F and go to “Export Mail” and select “@Account.” A new window will open and you can press “Import” to import the account settings or “Add” to add a new account.
B. The case where you have the whole Windows Live Mail folder.
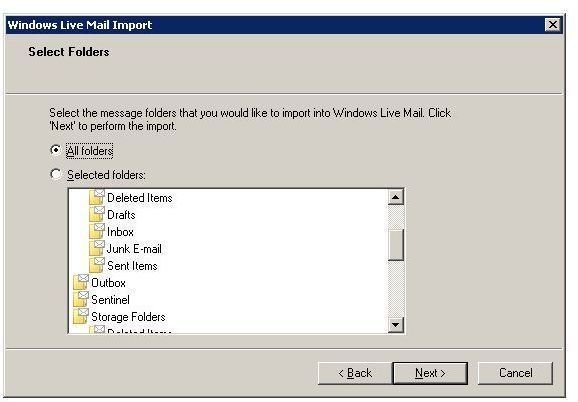
If you have the whole Windows Live Mail folder then you can press ALT+F, select Import Messages > Windows Live Mail and browse for the location of the recovered Windows Live Mail folder. Select All Folders and press Next. The import procedure will start and the items will be restored into the Imported Folder in the left menu.
If you have recovered the entire “Windows Live Mail” folder, then you can skip this section and directly import the whole folder. This will import your mail account settings.
Import Messages into Windows Live Mail

The Alternative Method
If your Windows Live Mail account was set up to leave a copy of the e-mails on the server, I do not recommend importing the entire recovered Windows Live Mail folder. This will create duplicates in your Imported Folder and it will start downloading all the e-mails again. If this is the case, I would recommend going with an alternate method.
Close Windows Live Mail if you have it open. Open Windows Explorer by pressing the WindowsKey+E. Go to Tools>Folder Options and select the View tab. Then in the Advanced Settings select Show hidden files, folders and drives. Navigate to C:\Users\[username]\AppData\Local\Microsoft\Windows Live Mail folder. Select all the files and press Delete. This will empty all the contents of the folder. Go to the location of the restored folder, select all the sub-folders and files by pressing CTRL+A then right click and select Copy. Go back to the C:\Users\[username]\AppData\Local\Microsoft\Windows Live Mail folder and press CTRL+V, this will paste all the content of the restored folder. Now start Windows Live Mail and check to see if all your e-mails are there and if you can send and receive mail. If everything is ok, then you can permanently delete the restored folder from your C:\Temp folder.


