Learn how to use Windows XP Recovery Console
Introduction to Windows XP Recovery Console
Windows XP Recovery Console, what it is? It is a powerful tool that helps in fixing various booting problems in Windows XP. Blue Screen of Death (BSOD) is one most common and dreadful error in Windows XP; Windows XP Recovery Console helps in solving this error. Without loading Windows XP, you can do the following using Windows XP Recovery Console:
a) Formatting drives
b) Troubleshoot boot up problems
c) Enable or disable services
d) Read or write data to a local drive
It is recommended by Microsoft that tech savvy persons should only use Windows XP Recovery Console. Install Windows XP Recovery Console in the system before you actually use it.
Pre-requisites for using Recovery Console
1. Recovery Console should only be used as a last option; meaning, you should have tried solving the problem by starting the system in Safe Mode and other troubleshooting steps.
2. You must be an advanced user with sound knowledge about basic commands.
3. You must be either an administrator or a member with administrative privileges.
Starting Recovery Console from Windows XP Startup disk or CD-ROM
Okay…so you have fulfilled the pre-requisites. Read through on how to use Windows XP Recovery Console. I’m going to explain how Windows XP Recovery Console should be used considering that you have either Windows XP startup disk or Windows XP CD-ROM.
1. Get hold of either Windows XP startup disk or Windows XP CD-ROM. Insert it in the system and restart the system.
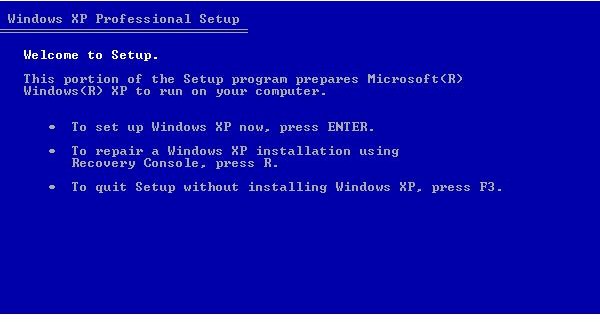
2. You will be prompted with the welcome screen that says “Welcome to Setup.”
3. To go to the Recovery Console, press R.
(Ref Fig 1 - Welcome to Setup) Image Source : XP Professional Recovery
4. Select the installation you wish to use Recovery Console.
5. You will be prompted to enter the Administrator password. Type in if you have one else leave it blank and press
6. Recovery Console command prompt will now open up and you can take full control of it.
7. Once you are over with diagnose or repair of your system, type EXIT at command prompt.
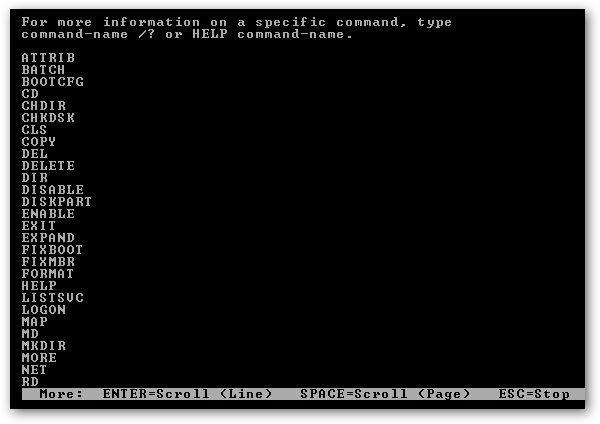
NOTE: To know the commands and how they are used, type HELP at the command prompt. If you require more information about any specific command,
type HELP
(Ref Fig 2 - Recovery Console - Help commands)
Source : Windows Geek
Fig 1 - Welcome to Setup
Fig 2 - Recovery Console - Help commands
Images
Starting Windows XP Recovery Console from Windows Startup
If you have installed Windows XP Recovery Console in your system, follow these steps to start Recovery Console and use it:
1. Choose “Recovery Console” from the startup options.
2. Select the installation in which you wish to use Recovery Console.
3. Type the administrator password when prompted.
4. Start using Recovery Console.
Once again, I would like to tell you that use Recovery Console only if you are an advanced user. Microsoft recommends that the user is an advanced user to use Recovery Console.