Using Apple Mail for Yahoo! users can be a stumper. Previously it could only be used by Yahoo! Mail Plus accounts, and not the free Yahoo! Mail accounts. But thanks to the free MacFreePOP service, you can now configure the Mail app to fetch, send out, and
There’s no direct way to use Apple’s Mail app for your free Yahoo! Mail. You’d need a paid Yahoo! Mail Plus account to get through that “Create New Account” screen. Sure, you can sign up with Gmail (it’s free), and that’s a good alternative, or have a MobileMe account (free for 60 days), but if you REALLY want that free Yahoo! Mail account because you’ve wrapped your whole entire digital life on it, I’ve got your back! Luckily, there is a way to POP your way for cheapskates and stubborn Yahoo users like I.
Just like a recipe, you’ll need the following:
- A free Gmail account
- A free Yahoo! Mail account
- MacFreePOPs
- A Terminal code
Don’t be daunted. Following this guide should help you get through.
First off, sign up for a Gmail account if you don’t already have one. For those who want to avoid having multiple accounts, we can set Gmail to auto-forward whatever it receives to your Yahoo! email account, which will be discussed more later.
We need the Gmail account to be able to send outgoing mails. Unfortunately, our free Yahoo! Mail accounts won’t allow us to send mail out using Apple’s Mail program.
I’m sure you already have a free Yahoo! Mail. That’s why you’re reading this article! We’ll need the login details for your Yahoo! account to set up the account in Apple’s Mail.
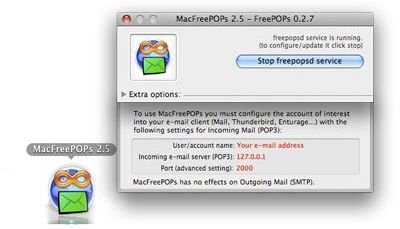
Download, install, and update MacFreePOPs. The link can be found via Apple’s downloads section . It will handle forwarding your emails from Yahoo! to your Apple Mail.
1. Run MacFreePOPs and Launch Mail
Once we’ve done all these preliminary “set up” steps, now we get to the nitty-gritty, sci-fi Mac OS X technical tinkering.
When you launch MacFreePOPs a window will pop-up and then quickly hide, that’s its normal behavior since it runs in the background, getting out of your way. Check for any updates by just right-clicking on the icon and click on Show MacFreePOPs Window and let it look for updates. I strongly suggest you to install them. Should there be no updates, you’re in luck so just hide the window away and make sure that the MacFreePOPs icon’s envelop is colored green - meaning it’s running in the background.
Launch Apple’s Mail and be welcomed by the

if no accounts have been set. Input your desired name, your full Yahoo! Mail address, and your password. Make sure to uncheck “Automatically set up account”.
2. Set the Incoming / Outgoing Mail Servers
In the

, leave the Account Type as POP. Change the Incoming Mail Server text to 127.0.0.1, username and password should be your full Yahoo! Mail address (including the “@yahoo.com” suffix) and your Yahoo! password. Click Continue (even if it says that the POP server “127.0.0.1” is not responding).
In the
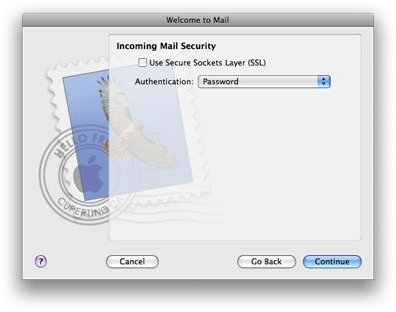
, make sure that “Use Secure Sockets Layer (SSL)” is unchecked, and the Authentication is set to Password. Click Continue.
The
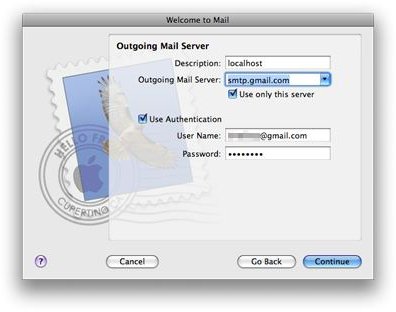
’s description should be set to localhost, and Outgoing Mail Server should be set to smtp.gmail.com. Check “Use only this server”. Check the Use Authentication box. Username and password should be your complete Gmail address (including the “@gmail.com” suffix) and your Gmail password.
Shortly thereafter, an
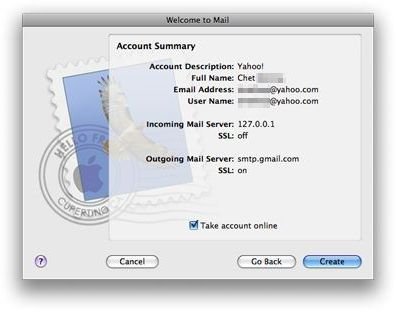
. Check “Take account online” then hit Create.
3. Further Preference Settings
By now, you’ve set up your Mail account for your free Yahoo! Mail account. But we’re not done yet. On the
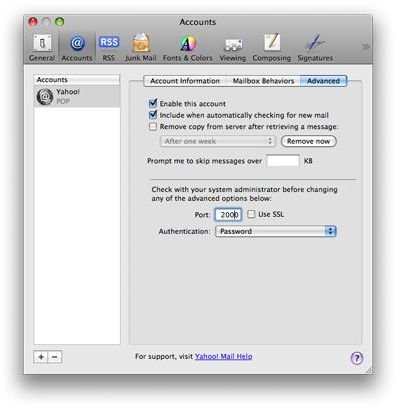
, go to Accounts then select the Advanced tab. I personally prefer keeping my mail on my Yahoo! account so I uncheck Remove copy from server after retrieveing a message. I raise this because there might be people who want to keep both copies online and on their Mac. Change the port to 2000, then save your settings.
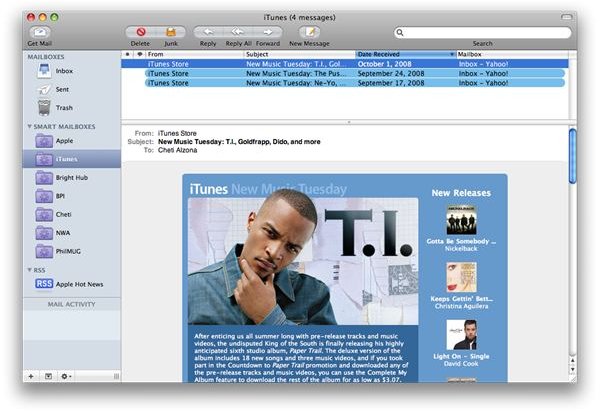
Get mail and you’ll notice your Yahoo! Mail’s popping your messages from your Inbox. Make sure you run MacFreePOPs before launching Mail. It will fetch contents from your Yahoo! Mail inbox.
4. A Few More Tricks
The current set up of your Mail is that it fetches your @yahoo.com inbox, but sends out using your @gmail.com email. This might pose a problem since our configuration is:
- Fetch from Yahoo! inbox
- Send emails using Gmail
Whenever we send out emails the account being used is Gmail. If a recipient replies, the email will go to Gmail, which is the wrong inbox since we’re fetching from Yahoo! There are two things you can do (and I suggest doing both) to prevent this from happening, consequently keeping your email exchanges Yahoo!-centric.
5. Auto-Fill the Reply-To Fields
One solution is provide an entry in the Reply-To field when you create new mails. But for those who often forget, like myself, you can automate filling this field via Terminal.
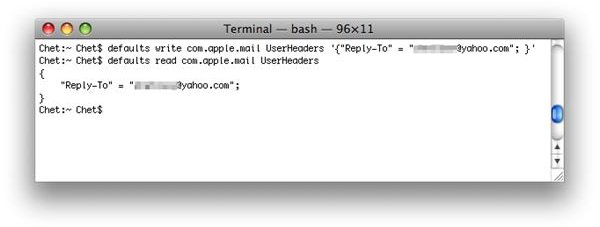
You can dictate via Terminal that all mails sent out from Apple’s Mail be replied to a specific email address. In this case, we want everything to be replied to your free Yahoo! Mail account.
-
Open
-
Type defaults write com.apple.mail UserHeaders ‘{ “Reply-To” = “replytoaddress@yahoo.com ”; }’
-
(“replytoaddress@yahoo.com ” is the specific email address you want people replying to).
-
Press Enter
-
To check if your desired email was entered properly, you can review the Reply-To address by typingin in defaults read com.apple.mail UserHeaders and press Enter. It should return the Yahoo! Mail address you specified.
6. Auto-Forward Gmail to Yahoo!
I personally don’t use Gmail and only have an account solely for the purpose of being able to send out using Apple’s Mail, and I like running my digital life around Yahoo!
Sometimes I occasionally get email sent “wrongly” to my Gmail accounts. To avoid this, you can set Gmail to forward whatever it receives in your inbox, to your specified email address.
Log on in your
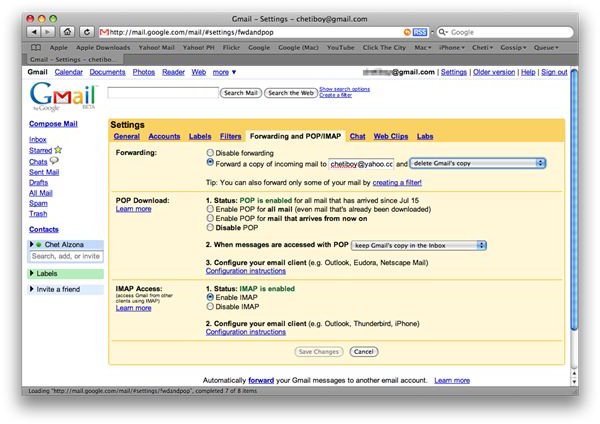
on the web and…
- Click Settings
- Go to the Forwarding and POP/IMAP tab
- Choose “Forward a copy of incomping mail to” and input your Yahoo! Mail address
- Choose if you want to either keep, archive, or delete Gmail’s copy in its inbox.
- Click on Save changes
Once all of these are done, you can enjoy your free Yahoo! Mail to send and receive by running both MacFreePOPs along with Apple’s Mail. Enjoy!


