How To Customize Mac 10.6 for Style and Productivity
A Breath of Fresh Air
Apple’s Mac OS X operating system has long been coveted for its unique design elements and flair. As the Mac brand grew in popularity, so did its fan base, and Macs are now not as rare as they used to be. These tips are designed to make your Mac stand out from the crowd, but they could also help improve your productivity.
These tricks are among the most popular tweaks and work on most recent versions of Mac OS X, but the directions below are specifically for Mac OS X 10.6, (Snow Leopard).
Desktop
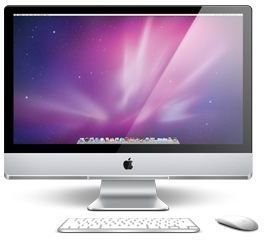
Changing the desktop background is the simplest way to bring about a big change to your Mac’s looks. The default background on Snow Leopard is a purple Aurora image, but It is very easy to change it. Just right-click (Control+click) on the Desktop and select Change Desktop Background from the context menu. This will open up Desktop and Screen Saver Preferences and you can choose from one of Apple’s many wallpaper choices by browsing the themed folders and clicking on an image.
Alternatively, you can look for images you have stored in iPhoto. Just click the iPhoto option in the sidebar and browse through the images you currently have. If your images are in a different folder, click the Folder option and/or the plus key to browse for other locations.
If you are looking for wallpaper online and find a suitable image, simply right-click (Control+click) on it and the pop-up context menu in your browser will give you the option to set that particular image as your Desktop wallpaper.
Icons
Icons are a popular thing to change when you are looking to customize Mac 10.6. There’s not much to it because changing an icon is really just a case of copying and pasting. First, find the icon you want to use, click on it, and then press Command+I on your keyboard to open the Get Info screen for that file. On the info window, click on the icon in the top left hand corner, and press Command+C to copy it.
Now find the icon you want to change. Click on it and press Command+I again to open the Get Info window for that icon. Click on the icon you want to change in the top right hand corner of the window, and then press Command+V to paste the icon that you copied moments before.
You can copy and paste icons that are already on your Mac, or you can browse the internet for icons to download for your Mac. Try the Icon Factory or Iconspedia for a selection of good quality icons. Alternatively, you can make your own. Almost any image you have can be used as an icon. Just open it in Preview and click Command+C to copy it. Then click the icon you want to change, press Command+I on your keyboard and then click on the icon in the Get Info window. As before, paste the new icon by hitting Command+V.
You can change the size of icons on your Desktop and in your folders. To do this, right-click (Control+click) on your Desktop then select Show View Options. Move the slider to change the icons size how you like it. If you have a very few icons on your Desktop, try maximizing the size. You’ll be surprised at how good this looks.
For a more automated approach to customizing your icons, you could invest $29 in software like Candybar, or try the free LiteIcon.
Spotlight

Spotlight is the built-in search tool for Mac OS X. It will quickly retrieve any number of files for you quickly and efficiently, but finding what you want among its search results is sometimes a bit hit and miss. Thankfully, there are ways to customize Spotlight in order that you find what you want faster.
In the System Preferences menu, look for Spotlight. Clicking on it will open a new window that lets you customize your Spotlight search results. By default, all file types are searched and displayed when you use Spotlight, but you can change this by removing the check mark for file types or locations. You can also reorder the search results. So, if you spend a lot of your time searching for Mail Messages, simply click on that entry and drag it to the top of the list. Now when you use Spotlight, Mail Messages will be among your top results.
Dock
The dock is the productivity hub of Mac OS X, so having it just the way you want it is important. You can customize the dock by going to the System Preferences menu and selecting Dock. From here you can adjust the size of your dock with a left/right slider. You can also turn on magnification to enlarge the dock icons when you hover over them. The dock can be on the left, right, or center of your screen, and can be minimized in one of two ways. You also get options to hide the dock when it is not in use, animate the dock icons when the program opens, and to save space by minimizing windows into the application icon. Turn these on or off as required.
Do you have Applications on your dock that you just won’t use? Remove them by clicking on them and dragging and dropping them onto the desktop. They will disappear in a poof of smoke. Want to add some more folders to your dock? Simply drag and drop them on to the right hand side of the dock and they will be there for quick and easy access.
Desktop Slideshows
Some people are just not fans of screensavers. All that mouse wiggling and keyboard tapping to wake up your Mac can be just plain inconvenient. However, you can achieve much the same effect on your desktop with minimal effort. Go to the System Properties menu and select Desktop & Screensaver. Now select one of the Apple wallpaper folders and check the box that says Change Picture. The dropdown menu next to Change Picture determines how often you want the pictures to change.
Not a fan of the Apple wallpaper selection? Use your own photos by selecting images from the iPhoto menu in the sidebar, or browse for a folder of your own images by clicking Folders and then the plus button.
Finder Sidebar

Typically, the sidebar includes links to your Applications, Documents, and Movies folders, but you can change what you see here without too much trouble. Start on your desktop and click Finder in the top left of your screen. In the dropdown menu that follows, select Preferences. There are four icons at the top of the next window. Select Sidebar. This shows you the default list of icons that appear in your Finder sidebar. Uncheck any that you want to get rid of or don’t use very often.
Want to add some new icons? Open a Finder window and navigate to the application you would like to add. Once you find it, simply drag its icon into the position you want it to be in on your sidebar. Remember that the sidebar functions like the dock in as far as you can drag files over an application in the sidebar to open it. For instance, dragging a PDF over the Preview icon will open your PDF file.
Toolbars
You can customize Mac 10.6 toolbars with just a few quick clicks. By default you will see the forward and back arrows, some view buttons, the quick look, action, and search tool. However, if you hold down Command and Option while clicking on the small oblong button in the top right hand corner of a Finder window, you will be greeted with a plethora of other buttons you can drag onto the toolbar. Useful extra buttons include the New Folder button, the Delete button, and the Burn button, but there are others here too.
You can also remove buttons from the toolbar in much the same way. Simply drag them off the toolbar, and they will vanish before your eyes! Or, you can choose to have text under your buttons to remind you what they do. To do this, click the dropdown menu next to the word Show in the bottom left hand corner, and select Icon and Text. Now your toolbar buttons have labels.
Keyboard Shortcuts
Want to create your own keyboard shortcuts? It might sound hard, but it is quick and easy to accomplish. Start by going to the System Preferences menu, and then select Keyboard. When the keyboard window opens, click Keyboard shortcuts. Now look for the plus sign in the middle of the window and click that to add your first shortcut.
Next to Application, select the program that you want to create a keyboard shortcut for. For the sake of this tutorial, I am going to choose Firefox. In the box next to Menu Title, you need to type the exact program command that you want to create the shortcut for. Firefox gives you the option to clear your recent browsing history. This command is found under the Tools menu and is called Clear Recent History… so this is exactly what you would type next to Menu Title, (including the ellipsis).
Finally, choose the keyboard shortcut you want for this command, and click Add.
So, with these great changes, you can easily customize Mac 10.6 to your needs and create a stylish productive environment for all your computing needs.
References
iMac image courtesy of Svengraph
Spotlight folder image courtesy of Prax_08
Finder icon courtesy of Mazenl77
