When you buy a music CD in the store you get a jewel case with a nice insert in it with album art and track listings. If you burn CDs in iTunes you can make your own insert right within the program. Here’s how.
Make Your Insert
Making a jewel case insert using iTunes could not be easier. Here’s how it’s done:
1. Click the playlist that you are making the insert for.
2. Go to “File” and “Print.”
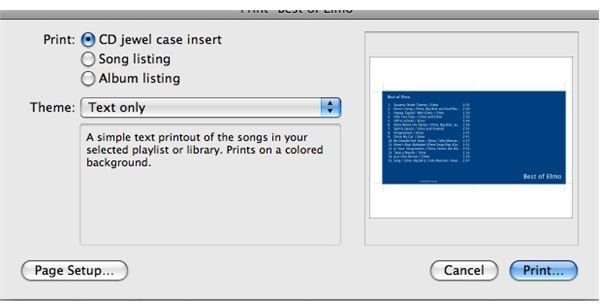
3. You will be presented with a window to print the insert. The window has a few options. You want to make sure the button next to “CD jewel case insert” is selected. Under that will be a drop down menu with “Theme” options to choose from. A preview of your insert will appear on the right as you pick each theme. If you want the closest option to a store bought CD choose “Single Cover.” (figure 1)
If you have tracks from multiple albums on your CD choose one of the mosaic options. This will print an insert with a tiled cover using the album art from all of the tracks on the disc. The left side of the insert will have a track listing. If your CD has too many songs on it you will not fit all of the songs on the listing.
(If you want a sheet with all of the songs print a “Song Listing” instead of or in addition to the insert from the same screen. You can also print a list of albums if you have multiple albums on the CD.)
5. Click “Print”
6. Your insert will print with crop marks for cutting. Cut the insert out and fold it in half. Slide it into your jewel case and you are done!
Of course, the higher quality paper you print on the better the insert will look.
Now you can print jewel case inserts for all of your CDs made in iTunes. It not only makes the jewel case look better, but it will make your CDs easier to find too!


