Need to use an external monitor with a laptop running Nvidia graphics and Ubuntu? It doesn’t work “out of the box,” but it’s not all that difficult to set up. Here we’ll show you how.
The first time I hooked a second monitor up to the VGA port of my notebook and started the system, I was surprised. The Ubuntu sign-on and log-in occurred on the external screen. I wondered about this, but as soon as the X-server started, it switched back to the notebook’s higher resolution screen, and the external monitor went dim.
This notebook has Nvidia discrete graphics, which turned out to require some reading and testing in order to set up and get working. To save you the same, first we’ll look at how it’s supposed to work, and then we’ll look at how it really works for Nvidia-equipped laptops. Fortunately, depending on your point of view, the settings can all be done graphically and won’t require much in the way of the command prompt.
How It’s Supposed to Work
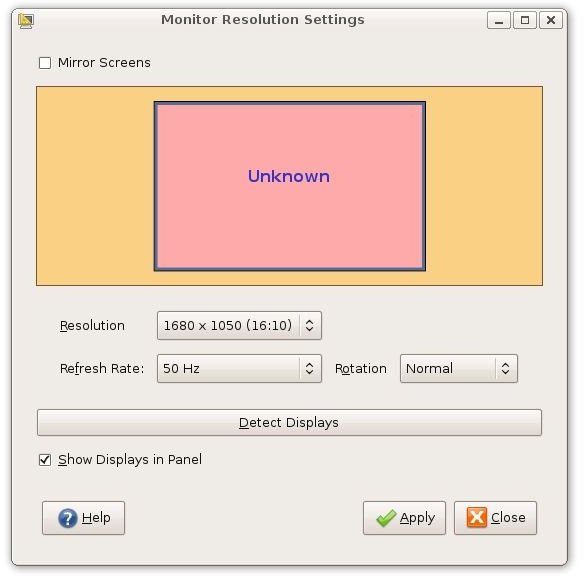
According to the Ubuntu online help, going to Applications → Preferences → Screen Resolution and clicking “Detect Displays” should have found the external monitor. I had no such luck. Instead, I found a single monitor shown that was labeled “Unknown,” even though the resolution and refresh rate for the Thinkpad’s screen were correctly shown. (Hover your mouse to read the label, or click the image to enlarge.)
In theory, one should find both monitors showing here and be able to drag them into the configuration that matched the monitors’ physical configuration - the external over the primary, to the left, to the right, or below. Then clicking “Apply” should change the settings, although you may still need to log off and back on to restart the X-Server.
How it Actually Worked
The Nvidia Quadro FX-570m was not supported for hardware acceleration “out of the box” upon installing Ubuntu. Instead, the OS asked me if I wanted to download the proprietary drivers from Nvidia that enabled the advanced features of the chipset. Not being the sort of Linux purist that does without things like Flash, MP3s, and accelerated graphics, I said, “Sure!”
This actually installed a package called “Nvidia-settings” and added an “Nvidia X-Server Settings” menu item under System → Administration. Upon selecting it, I discovered that it did not prompt for the administrator password like some other administrative settings did. It also did not work. Part of what it needs to do is to modify the X-server configuration file, and that, of course, requires an administrative okay.
The answer was to start it from a command prompt with “sudo nvidia-settings” followed by the password.
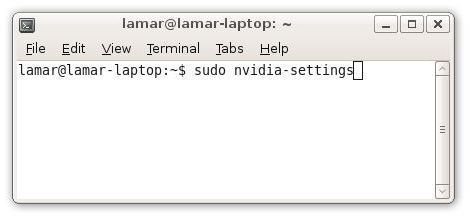
The dialog opened showing both the external monitor and the notebook screen and identified them both correctly. The first tab shows information about the X-Server setup.
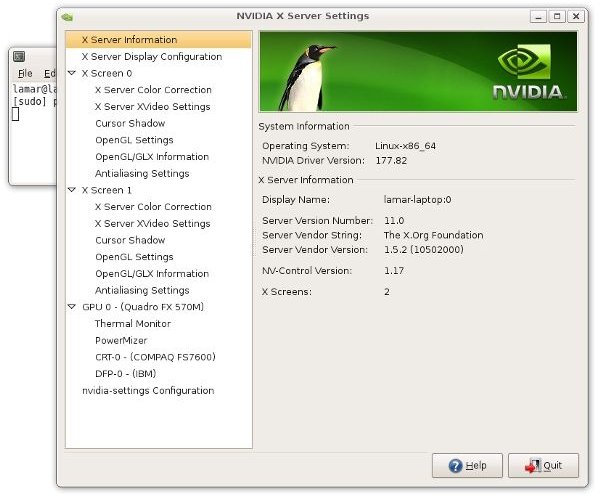
The second tab is “X Server Display Configuration” and that’s what we’re interested in. Immediately, we are presented with a choice: “[ ] Enable Xinerama.” What’s that? It’s an extension to the X-Windows Server that allows “multi-headed” X applications and windows managers “to use two or more physical displays as one large virtual display.” In other words, Nvidia is asking if we want to use the X-server’s built-in multi-monitor support. Maybe, but first we want to try Nvidia’s proprietary support (binary driver).
Clicking the “Configure” button with the external monitor rectangle selected brings up the “Configure Display Device” dialog, and we are presented with three choices: Disabled, Separate X-Screen, and TwinView..
“Separate X screen” does literally that. You can transition the mouse from one screen to another, but not drag applications across.
TwinView, like Xinerama, tries to connect the monitors, making the screens appear to be seamless from one display to the other. TwinView makes the X-Server think that the two displays are actually one. This may have an advantage for certain graphics applications such as those using OpenGL direct 3D rendering, at the cost of some overhead from the driver.
However, I got an odd result when I tried this. The external monitor became the primary monitor, and the task bar wasn’t even drawn on the laptop screen. Oddly, though, it retained the icons that I’d placed there.
Next: an Unexpected Update, a Minor Setback, and Getting it All Working
And at about this time, Ubuntu decided that I needed to install updates. One of them was called “Nvidia-common” and the description was “removes old Nvidia drivers.” With some misgivings, I allowed the updates to install, restarted the system, and found my laptop starting in 1024 x 768 mode instead of the normal 1680 x 1050, and with the external monitor and laptop screen showing the identical image.
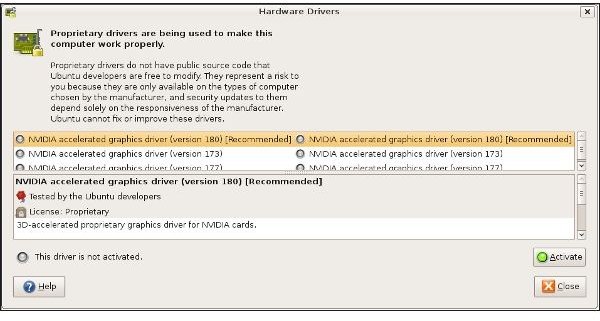
A few seconds later, this notification appeared: “Restricted drivers available. In order to use your hardware more efficiently, you can enable drivers that are not free software.”
Where had I seen that before? During the initial installation of Ubuntu, of course.
Here we go again.
“Ubuntu cannot fix or improve these drivers.” I remember reading that the majority of Windows Vista problems during the first year after release were related to Nvidia drivers. Microsoft apparently was unable to fix or improve them, either.
I saw the new version of the driver was 180, and I selected “Activate.”
.
After spending some time downloading and installing the Nvidia drivers, the dialog advised, “You need to restart the computer to activate this driver.” Okay. Should I do this with the external monitor still hooked up, or disconnect it? My sense of adventure told me to try it with the external monitor attached.
I certainly seem to spend a lot of time rebooting Ubuntu.
After reboot, the Ubuntu startup screen appeared on the external monitor with some fine print: “Routine check of drives.” Wondering if I was ever going to get this working and this article written, I waited… and waited some more. Then the log-in screen appeared on the laptop. Ubuntu started at full resolution, and the external monitor was blank.
I was right back where I started, but now I was feeling very little of that fabled Ubuntu-love.
This time I noticed “[ ] Make this the primary display for the X-screen.” It was checked when I clicked on the external monitor, but I definitely had not selected it. With TwinView selected, I changed the laptop screen to the primary display, selected “Save to X-Configuration file,” logged out, and logged back in.
This was more promising. The login screen was on the laptop and the task bar appeared there, too. I could drag applications from the laptop screen to the external monitor. For some reason, the desktop icons were showing on the external monitor, but that was resolved by simply dragging them down to the laptop.
All seems to be well now, but there’s one more thing to try - starting the laptop without the external monitor attached, and then again with it attached.
The restart without the external monitor went smoothly. I did have to adjust the position of the desktop icons, but there were no error messages or other problems. I noticed that the Nvidia splash screen declared itself a beta.
Now for the final, I hope, restart. The GRUB screen and Ubuntu splash screen appeared on the external monitor, and then the login screen appeared on the laptop. Both screens remained active. The desktop icons again appeared on the external monitor, but the task bar appeared on the laptop screen.
This appears to be a success.
I really would like to be able to set the second desktop to display on the external monitor, but that may make a good topic for the future. Now I need to overcome the boring orange-brown theme of Ubuntu and find something more lively. Next we’ll be looking at Gnome-Art and Ubuntu themes.
Thanks for reading this.


