So you just bought your shiny new digital camera and a CD containing all the stuff for the “other” operating system came out of the box. You start wondering if you will be able to use your camera under Linux. Hop right in to see why you have no reason to worry.
Linux and Digital Cameras
Now you have all the cables, connections, batteries, and your memory card set up in front of you. You have read the quick setup guide and the handbook (really?), and you are ready to go out and shoot as many photos as you can. However, once you are back you are not sure how you will import your photos to your computer under Linux. No worries! Your Linux operating system has very nice programs that will guide you through the process without eating up your precious system resources. Let’s see how.
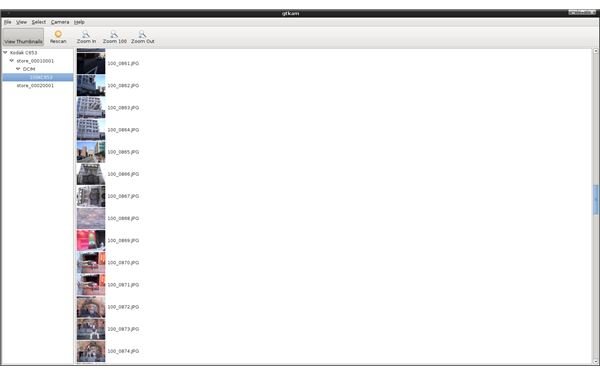
Gtkam: Gnome’s digital camera management tool has a very simple interface and tries to leave the user with as few clicks as possible. I have connected my Kodak C653 camera to my Linux box and a dialog asks me with which application I want to launch. The default option was F-Spot but I skipped the dialog by hitting Cancel and continued to open Gtkam from Gnome’s Applications menu. I was prompted to select my digital camera and the port that I used to connect it to my system. As I know my camera make and model, I selected it from the drop-down menus. If you don’t have an idea of what to select from all these options, you can simply click on the Detect button to let your system configure your camera automatically.
After all is ok, then you will be proceeding to download the images to your computer. Gtkam will list your photos, and it lets you choose which ones you want to save to your computer. You can select multiple photos by holding down the Shift or Ctrl key and then by choosing File -> Save Photos -> Selected. Downloading all of the images is not a big deal: go to File -> Save Photos ->All and within a couple of seconds your photos in the camera will be downloaded to your computer. (Click any image for a larger view.)
Digikam: This is my favorite program to manage my photos. Not only does it give you the option to download the images from your camera in Linux, but it also allows you tag, rate and caption your photos. You can also upload to Flickr and Picasa, send to your iPod, or make some basic editing all from the same program.
Digikam lets you retrieve your photos from your digital camera more or less the same way as Gtkam. When you first start the program, it asks you where to create an album on your hard disk, basically where to save your photos:
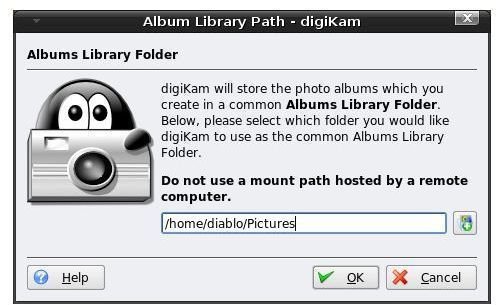
This is not a place to choose individual folders, such as snow boarding, Paris trips, etc., but a top-level folder to store all sub-folders in. This way, the top folder is the collection of albums, and the folders are the individual albums. We will define these individual folders before we download from our camera.
After we set up the folder, we will follow Import -> Camera -> Add Camera and then select our camera from the Camera Configuration window:
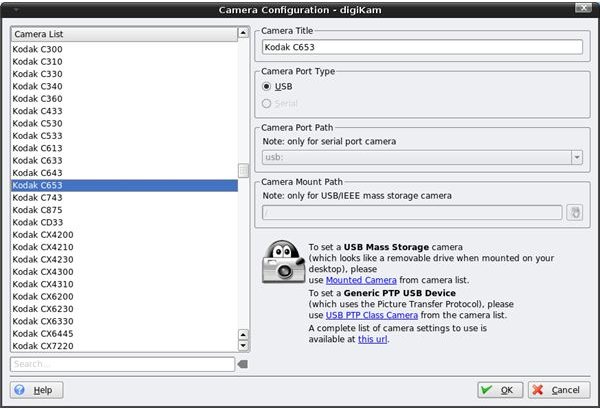
After selecting our cam from the window and go back after clicking OK. We now follow Import -> Camera and select our cam. In this example, we choose the Kodak C653. In the newly opened window, we will have to wait a couple of seconds while Digikam retrieves the photos. After all is complete, we can either select individual photos or all images to download.
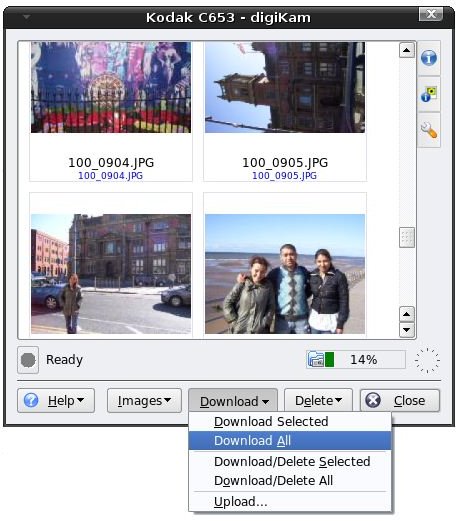
The images are downloaded to the directory that we defined/selected previously and we are done.
Do not underestimate the capabilities of Digikam. I strongly recommend you to explore the right-pane and the menus to discover the power and flexibility that the program offers.
Picasa: That’s right. Thanks to our friends at Google, we have Picasa available for Linux. Since the Linux version runs on a compatibility platform, the menus and the options are almost the same as the Windows version.You can tag, star and add captions to your photos, publish to PicasaWeb or upload to your Blogger account to blog immediately. You can also perform minor editing on your photos with a single click, Geotag your photos with Google Earth, and export your album as a web page. Do not hesitate to explore the menus for many goodies.
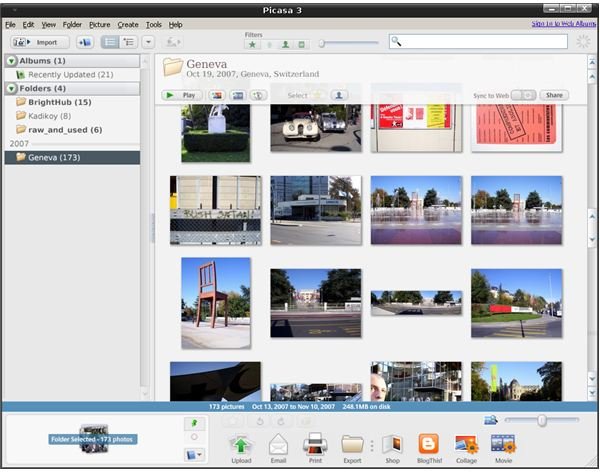
You can add photos to Picasa by going through the Import button on the top-left corner_._ In the newly opened window tab, under Import Tray on the left pane, you can click on “Select Device” and choose your camera. On the right pane, you will see the previews of the images which you can select and import to your hard drive.
If you are keeping your photos in PicasaWeb (like me) for back-up/sharing, then after a failure or a new installation, you can retrieve all your photos with two clicks. Picasa also lets you make immediate slideshows on the screen and export your photos as movies to burn directly to cd/dvds. It is also one-click away to have your photos printed.
Picasa is also a very powerful application that is seamlessly integrated with Google services as we would expect. With or without additional photograph managing applications, I believe Picasa should always be installed on your system for both novice and intermediate level users or photographers.
Until the next article, happy tuxing!
References
All material and screenshots courtesy of author.


