How to Install and Initialize an Unformatted Hard Drive in Windows Vista and Windows 7
Connecting the Hard Drive
I recently bought a brand new unformatted OEM hard drive and installed it in my Windows Vista PC. The drive is connected to the motherboard via a SATA (serial ATA) cable, just like my original hard drive. This new drive was for data/backup. When I turned on the computer, the BIOS picked it right up. However, when I got into Vista, it did not detect any new hardware. I even went into the Control Panel and chose Add Hardware and let it scan for changes, but it didn’t find anything new.
Windows Plug and Play
If your drive isn’t detected, there is no need to panic. Both Windows Vista and Windows 7 is a little funny about this sort of thing, but it is quite easy to fix. The problem is that the drive is not initialized, so the standard plug-and-play procedure for adding a drive does not apply. First, you must initialize the drive, then it will allow you to format it. After the drive has been formatted, it will be ready to use.
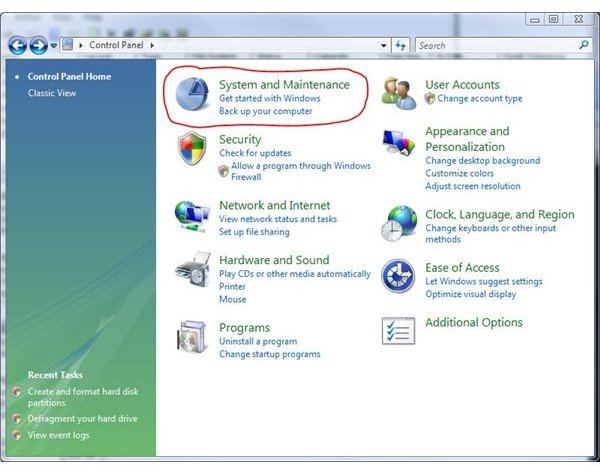
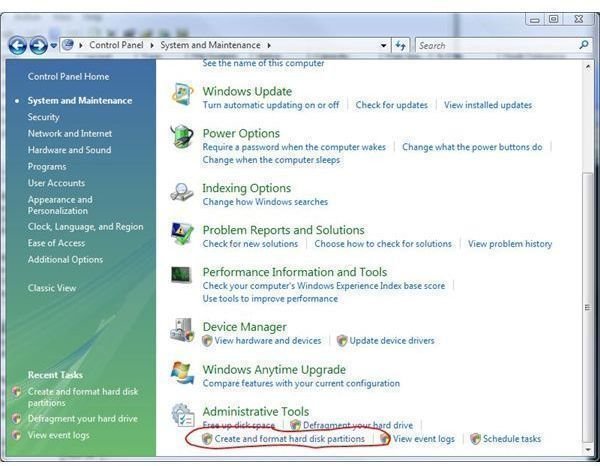
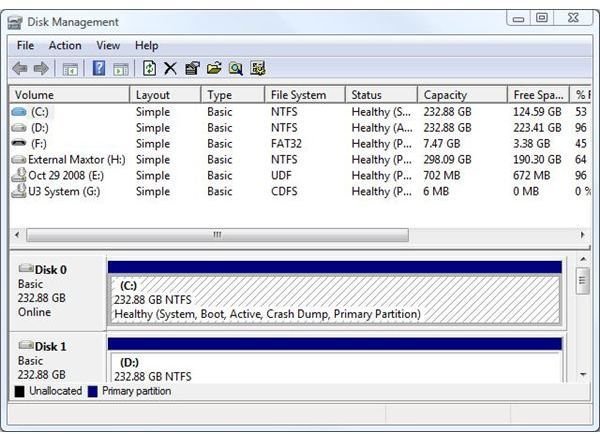
The first thing you need to do is go into the Control Panel, then double click on Administrative Tools. After that, open up Computer Management, then go to Storage, then Disk Management. This is where you will see all of your drives listed. Be extremely careful in this section because you don’t want to screw up your main hard drive.
What you are looking for in the Disk Management area is your new hard drive. If you only have one hard drive, it should show up as Disk 0. Therefore, your new drive should most likely be Disk 1. Underneath the name Disk 1 it should say Unknown, the size of the disk, and Not Initialized. Right click in this area and you should get a pop-up window. Click Initialize Disk and it should only take a couple of seconds.
Your hard drive is now ready to be formatted.
Formatting Your Drive
Once your new hard drive is initialized, you will still have to format the drive before you can use it. To format, right-click in the column to the right of the Disk 1 label and then click New Simple Volume in the menu that pops up. From here, you can allocate how much of the drive you want for a new volume, what drive letter you want to call it, give it a name, and finally format the hard disk.
Formatting the hard drive may take a while, depending on the size. My 500 gigabyte drive took nearly an hour to format, so don’t be alarmed if your’s takes a while. Once the format completes, your new hard drive will now show up in My Computer and you can start putting files on it.
Screen Shots
Windows Vista Hard Drive Articles
Now that you have your drive up and running consider taking a look at these other hard drive articles for Windows Vista:
- Configure Your Vista Hard Drive For Advanced Performance
- More Great Ways to Speed up Vista: Scan your Hard Drive for Errors
- Hard Drive Recovery: How to Create a Vista Recovery Disk
References
Author’s own experience.