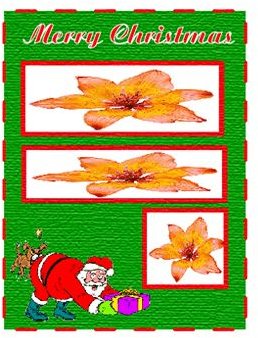
Santa Clause Scrapbook Page Part 2
Adding the Text and Graphic
In part one of this tutorial, I showed you how to create the background and border part of the Santa Clause scrapbook page. In this part of the tutorial, I will show you how to create the text and add the graphic. You are free to use the font style of your choice. I know that everyone does not have the same font style on their computer. So, let’s get started.
Adding the Text to the Santa Clause Scrapbook Page
Grab your text tool and click your page. Type “Merry Christmas” in the text field that appeared. Grab your pointer arrow (black arrow) and click the text to select it. Right click on the text and click Font > and select the font that you want to use. I used the Ariston font for my scrapbook page. You are free to use any font that you want. Right click on it again and select Size > and the size that you want for the font. To use a size that is not in the menu, click Other and the text box will open. In the text box, you can change the size to what you want.
Now you will need to drag the text to the top of the page. Next, you will want to change the color of the text. Double click the color fill box and change the color to # FE0003. Then change the stroke color to white.
Adding the Graphic to the Santa Clause Scrapbook Page
The next step is to add the graphic to the page. Go to the top of your Illustrator program and click File > Place. When the box opens, locate the graphic that you saved to your computer before starting the tutorial. Click the graphic and click the open button.
The Santa Clause graphic will open on your background. You will probably need to size the Santa graphic down some. If you do, grab the transform tool in your toolbar and size it down using that.
After you have sized your Santa, drag it to the bottom left corner of the scrapbook page. If you would prefer it be in the right corner, that is no problem. Drag the Santa graphic to the right corner and then flip it. To flip it, right click on the Santa. Click Transform > Reflect and a box will open. Tick the Vertical field and click OK. That will flip the Santa graphic around.
Now you are ready to move on to the final part of this tutorial. In the final part, I will show you how to add the frames and the photos to the Santa Clause Scrapbook Page.
