Learn How to Make a Diamond in Photoshop
Getting Some Inspiration
If you haven’t figured out the trick to designing great looking graphics based off of real-life objects, here’s the biggest tip I can give you. When at all possible, locate the object you wish to design in real life and study it for a little bit. For example, if you’re designing coins, vases, buttons, bottles, boxes or jars, go ahead and find one and hold it in your hand, turn it over, study it from every angle.
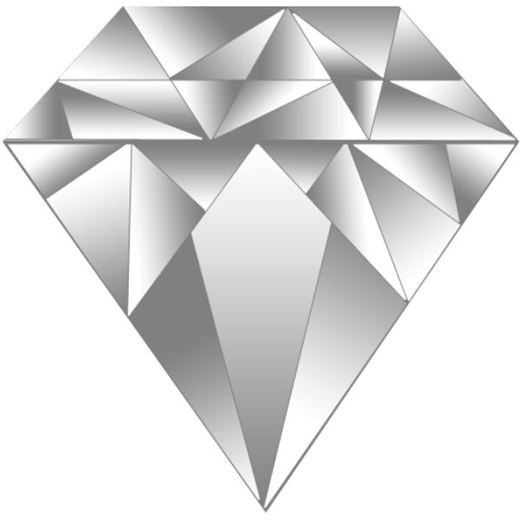
Of course, there are a ton of situations where this actually isn’t very plausible. For example, you might be designing an elephant, and there’s probably a good chance that you don’t have an elephant on hand to study. This is where a little bit of internet research will come in plenty useful. So, for this project, I’ve looked up two different pictures of diamonds – seeing as I don’t happen to have any loose diamonds laying around – which will help me to create the perfect diamond.
Getting Started
Open up Photoshop and create a new document with a white background. Really, it can be any size you want (within reason), but always remember that starting bigger and scaling down is much easier than starting smaller and scaling up. That being said, my document is 800 by 800 pixels.
Create a new layer and name it “Diamond.”
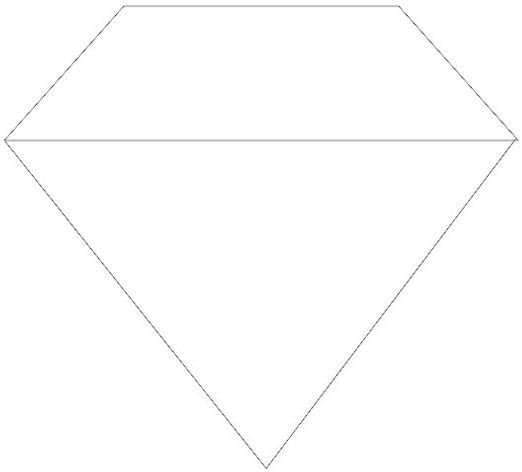
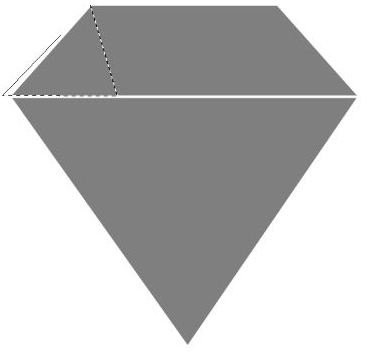
Grab your pen tool and create the basic shape of a diamond which is fairly easy to make. If you take a look at a traditionally cut diamond from the side, it generally looks like a trapezoid on top of an upside down triangle, so here’s what mine looks like. If you’re unfamiliar with the pen tool, you might want to take a quick moment to look over my pen tool tutorial which will help you become familiar with it.
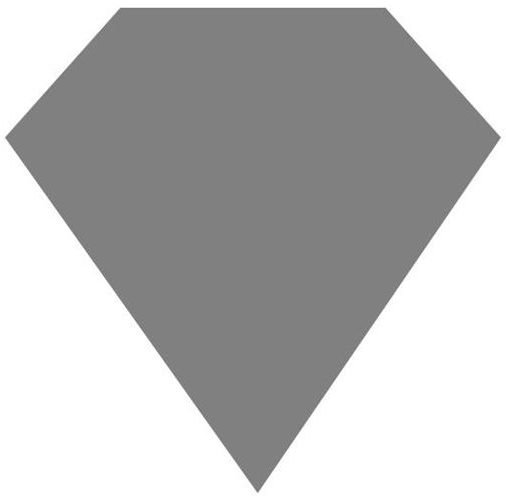
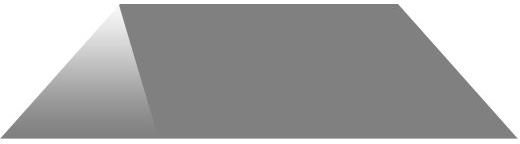
Now you just have to right click and fill your path with whatever color you want. At this point, it’s not terribly important, but it helps us to lay the facets later (more below.) I’m just going to fill it with a fairly generic 50% gray.
When you think of a diamond, you probably think about a bunch of flat surfaces designed specifically to reflect lights. These little surfaces are called facets, and they’re what gives diamonds their characteristic glittering appearance. To design facets, we’re going to employ a few simple tricks that will give you a cool vector effect.
Create a new layer and name it “Facets.”
Grab yourself your polygonal lasso tool and strap in! Here’s where it’s going to get fun. This is going to require a good eye and a lot of artistic liberty. The idea is to draw triangles on the surface of the diamond (we’ll start with the top part, here) and use those to create a faux-reflective surface. Here’s an example of a facet I’ve drawn. (Note: The white line is to define the top of the diamond from the bottom and will not be there in the final product.)
Now, grab your gradient tool and use a white-to-transparent fade. It should look like this:

Drag a gradient into your triangle so it looks like this:
Now you simply have to continue creating triangles across the surface of your diamond. Vary the gradient from top to bottom to make your diamond appear extremely shiny. Here is the finished top of the diamond.
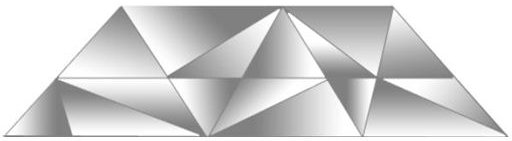
Continue the facets on the bottom of the diamond, making sure to keep them elongated to follow the shape of the bottom of the diamond. Here’s the finished diamond with all its shiny facets in place.
Of course, it doesn’t have to be a diamond, you know. By changing your base color to another shade, you can take this image from a diamond to an emerald or a ruby in seconds.
Adding Sparkles
Of course, diamonds mean very little if you don’t see them glinting at you from across the room, so we’re going to take the time to add two different kinds of sparkles to this particular diamond. Now, by no means do you have to use both types of sparkles, but this gives you two different options.
The first option is relatively simple. Create a new layer and name it “Sparkles” Now simply click on your brush tool. Go up to the brush menu and open “Assorted Brushes.” Here you’ll find a few sparkle brushes in various sizes. They look like this in the brushes panel:
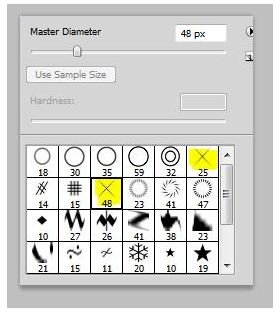
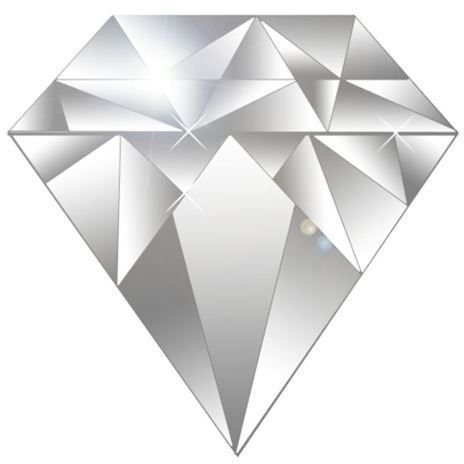
Simply set your active (foreground) color to white, select a sparkle brush, and add to your diamond like so.

Of course, if you want to add a bigger WOW! factor, that’s easily achievable too. Here we’ll use one of the included Photoshop filters to achieve the effect.
Create another new layer and name it “Shine” or something easy to remember, and make sure it is on top of your diamond and facet layers. Fill the layer with black - yes black.

Now go to Filters, followed by “Render” and then click on “Lens Flare.” Now you get to pick whatever you would like. Go ahead and browse through the options. When you find something you like, go ahead and press OK. Here’s what my settings looked like:
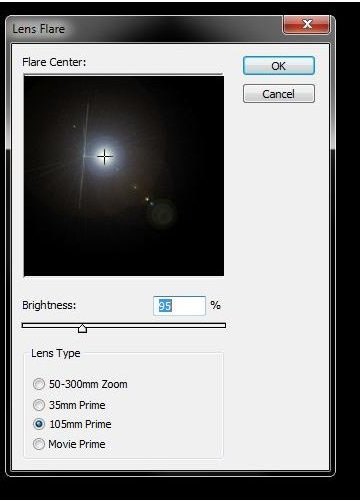
Now to make this visible on your diamond, simply set the blending mode to “Screen.” A fantastic three step shine for your brand new diamond. (Note: This will show up even better on a colored background.)
Resources
All images and information provided by Amber Neely.