10 Easy Steps to Create a Photo Slideshow Using Ulead GIF Animator - Slideshow Software Tutorial
Slideshows in GIF Animator
Creating slideshows in GIF Animator is quite easy and once you start getting the feel of it, you’ll find it a very relaxing and entertaining activity. The quality of the photographs won’t be brilliant because they lose some of the color information at the conversion into GIF images but the effect will be fantastic. Today we’ll learn how to create a slideshow using Video F/X. Video F/X is a component of GIF Animator that allows the user to create impressive transitions from one frame to the other. The transition we’ll use today is called Gate-3D and has an effect similar to opening a gate.
What you need
- Ulead GIF Animator (the version I use is 5.05)
- A set of digital photographs, preferably in landscape format, with the width of 500 pixels.
Before starting, it is important to make sure that none of your photographs exceeds 2 megabytes, otherwise the program won’t open it. You can use as many photographs as you like.
What to do in 10 simple steps
- Open GIF Animator
- Create a new project by clicking New in the File menu or the corresponding icon in the standard toolbar.
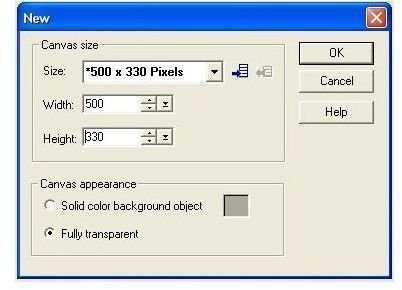
- In the window that pops up, specify the width and the height of the frame in pixels (in our case 500:330). Under Canvas Appearance, tick the Fully Transparent box. Click OK. (See Fig. 1)
- Once you see the frame on the screen, you can proceed to adding the first photograph. In the File menu click Add Image or click the corresponding icon in the standard toolbar. Choose your photograph, make sure the Insert in the current frame box is ticked, then click OK. You have added the first photograph to the slideshow. If you need to resize it, double-click it and adjust the sizes in the pop-up window. You can also move it around to make it fit better by using Drag and drop.
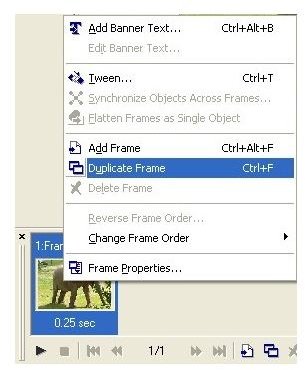
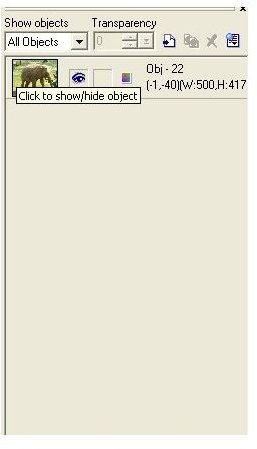
- Right-click the frame in the Frame Panel at the bottom of the screen. In the pop-up menu, click Duplicate Frame (Fig. 2). Another similar frame will appear. Select the second frame and remove the first photograph by clicking the eye next to it in the Object Manager bar (on the right).(Fig. 3)
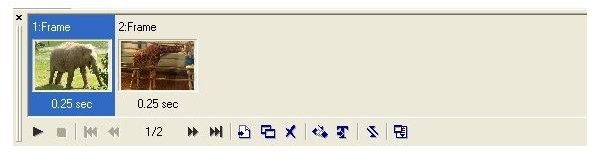
- Add the second photo to the new frame in the same way you added the first one. Now you will have two frames with two different photographs.(Fig. 4)
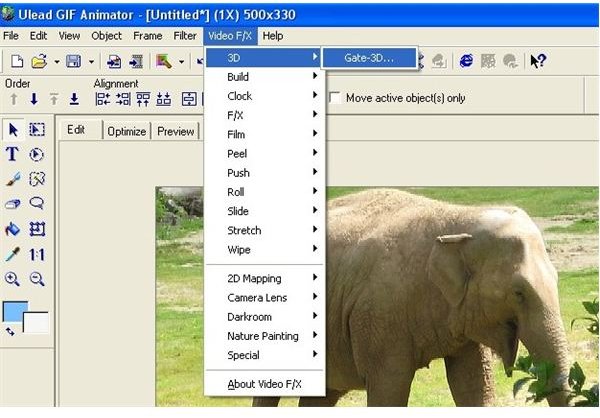
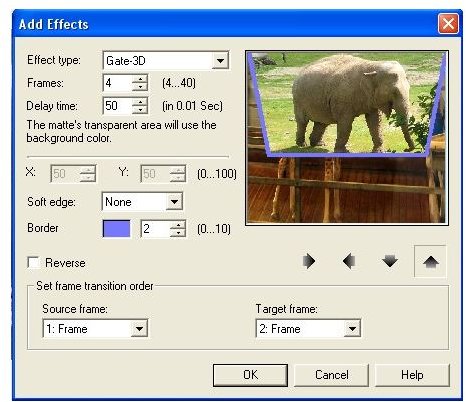
- Select the first frame. Go to Video F/X – 3D – Gate 3-D in the menu (Fig. 5). The Add Effects window will pop up. Adjust the settings as in Figure 6 and click OK. Four new frames will be inserted between the two already existing ones.
- Click your last frame and repeat steps 5 and 6 to add a new photograph. Then repeat step 7. Make sure you always put in the Source Frame box the frame you make the transition from and in the Target Frame box the one you make the transition to.
- Add as many photographs as you like by repeating these steps. When you come to the last one, set the first frame as the target frame so that the slideshow goes in a loop.
- Save the slideshow as a GIF file. Make sure you also save the project as a GIF Animator (UGA) file so that you can always add other photos later. To view your new gif slideshow, open it with an Internet browser.
Tip: To make the slideshow slower or quicker, right-click the frames, click Frame properties and adjust the time as you like.
Click an image for full size
The Final Result
To get an idea of what your slideshow is going to look like, go to Animals Slideshow.
Tip
You can use your slideshow as a wallpaper to create a personalized animated desktop.