Tips on Photographing Monument Valley - Learn How to Take the Best Pictures of Monument Valley
Guided Tours of Monument Valley
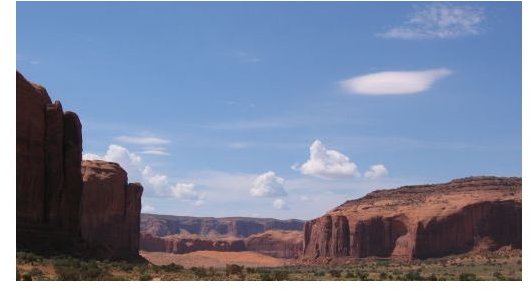
Monument Valley on the border between Utah and Arizona is a study in contrasts. The blue of the western sky brings out the red of the sandstone, which in turn highlights and enhances the green of the scrub grasses that run around the valley. Basically, Monument Valley is a photographer’s playground.
It can, however, take some foreknowledge and practice to truly take great photographs of Monument Valley. First of all, pay for a guided tour from one of the Native American guides. These tours will take you into the back country, including near the Native American hogans in the vicinity and behind attractions like Thunderbird Mesa. While these tours can get pricey ($50 to $100 over the price of admission depending on the tour guide and time of the year), it’s worth the price.
If you decide not to take a tour, you can still do a self-tour. But, you must stay on the loop road, and you are restricted to certain areas. One thing about the self-tour though is that you take as much time as you want, and you still get to see many of the major views in the park, including Artist’s Point and the Mittens. In contrast, it will depend on your tour guide as to how long you can stay in one place while on the tour. That being said, a tour guide will often point out special areas that will make for the best photographs.
Needed Photography Equipment
But, before you even head into Monument Valley, you need to pack up some equipment. A camera tripod will greatly assist you. A major part of photographing Monument Valley is patience. You want to wait for the light to play just right against the buttes and landscape, but you need to stay until those moments arise. And, a tripod will take some of the burden off your hands.
Bring a polarizing filter. The sun gets pretty bright in the desert and can be blinding. A polarizing filter, or even a lens hood if you don’t have a filter, will help diffuse some of that light and add a different shade to your photographs. As far as cameras go, a digital SLR may be the best choice in order to photograph Monument Valley. You need a camera in which you can change the lenses. And, you need to bring a variety of lenses, including a telephoto and a panoramic (wide-angle) lens.
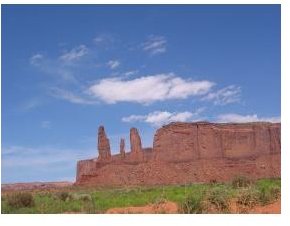
Much of the scenery lends itself to wide angle shots, especially the two mittens. But, animals are also present within the park. You may want to zoom in to catch lizards, scorpions or one of the many desert animals that run all over the park. Many different types of birds also make the valley their home.
Best Times of Day and Year to Take Photographs
In order to get the best photographs of Monument Valley, you should try to visit the park either at sunrise or sunset. Sunrise and sunset photographs are amazing in Monument Valley. The desert air makes for some amazing colors at both of these times. Pinks, yellows,
blues and a variety of other colors will light the sky and cast the buttes in a variety of shades and radiance. And, winter may be the best time to go with its softer light and fewer tourists.
One final tip, play with the natural lighting within the park. Light coming in from the side will illuminate some of the many rock formations and petroglyphs within the hidden recesses. But, the shadows also play their part by seemingly widening the distance between two objects.