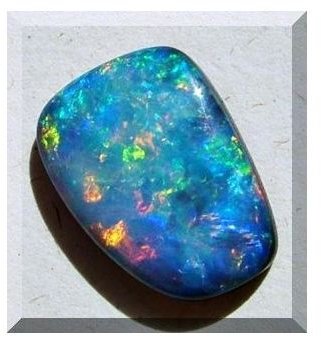
How to Photograph Rough Opal and Other Gemstones - Rock (Stone) Photography Tips & Techniques
Gemstone Photography Tools
If you’ve ever tried to take a picture of any type of gemstone, you know that it’s nearly impossible to capture the beauty of these jewels without some work. So, how do you take photographs of rough opals, diamonds and other precious gemstones? Well, you do it with a little preparation and a lot practice.
The first thing that you need to do is to find a stand that will support your jewel. One of the best ways to do this is by purchasing some type of gemstone support. You may have to do some digging to find one if you don’t already own one of these tools. But, a background free of exterior junk will give you surprisingly great results when trying to take a picture of a gem.
Next, you need something to hold you camera steady. This can be a camera tripod or a copy stand. These will allow you to position your camera and take non-blurry shots. But, if you have a good camera with any type of optical stabilization, this will work just as well for your photographs as long as you aren’t taking the pictures from too far away.
Gemstone Lighting and Focus
Now, you need to read your owner’s manual because you will have to adjust your camera’s settings. You need to set your camera on either manual focus and/or find the spot focus mode. You really just want to focus on the gemstone itself and nothing else. If you’re an experienced photographer, you can simply experiment with zooming in manually. If not, the spot focus mode will help you greatly.
Another consideration is lighting. Flash will dull your gemstone and not capture its true beauty. Natural lighting or diffused can be very effective when photographing any type of gemstone. But, you should also look at LED lighting since it will help you capture your gemstone’s sparkle if that’s your goal. If you add a few LED lights at the base of your stone and all around, you will be able to easily capture the colors and sparkle of your gemstone. Even lighting is really the key.
Gemstone Positioning
You should also play around with camera angles. Some stones may be best photographed from above while others may look prettier from the side. Take a few from each angle to determine what angle looks best.
Finally, take a lot of pictures. What works for a rough opal may not work for a piece of hematite. Experiment with lighting and lighting locations. Try taking pictures in your studio, and then take a few in a lighting tent. The key is to take as many pictures as possible until you get the right one that shows off your precious gemstone the best.
