Skydiving Photography - Equipment and Techniques For Those Who Want To Take Photographs While Skydiving
Before You Start
When you’ve decided to take your photography to the skies, there is a lot of equipment necessary to make sure you have everything covered. The USPA (United States Parachute Association) requires you have at least 100 jumps (conflicting information sometimes says 200) before you are allowed to have a camera with you when you jump. This is mostly for your own safety, as emergency procedures and other necessary knowledge that you’ll need will only come with experience.
Once you’ve got the 100 jumps under your belt, there are many different options for how to strap a camera on and start shooting. The easiest of course being to get a video camera, press record, and jump. It’s a great way to get used to having the extra weight of a camera on your helmet, and also good practice for how your body moves while in the air so when you do take a still photo, you can have a better idea of angles. It’s also best to preset your camera’s f-stop, shutter speed, and focus while you’re still on the ground.
Camera Mounting
First and foremost, you’ll need a steady helmet capable of attaching a camera to. Some helmets will already come with pre-existing attachments to strap your camera to. If you already have a skydiving helmet, if it has a flat surface there are attachments you can purchase in order to strap a camera to the helmet. I highly recommend doing research on your specific helmet before you just decide to add a camera attachment. You may be better off purchasing a helmet which already includes the equipment required to add a camera. There are also mounts that you can get in order to attach a camera to your belly or to your foot to make shots even more interesting.
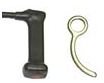
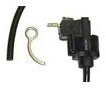
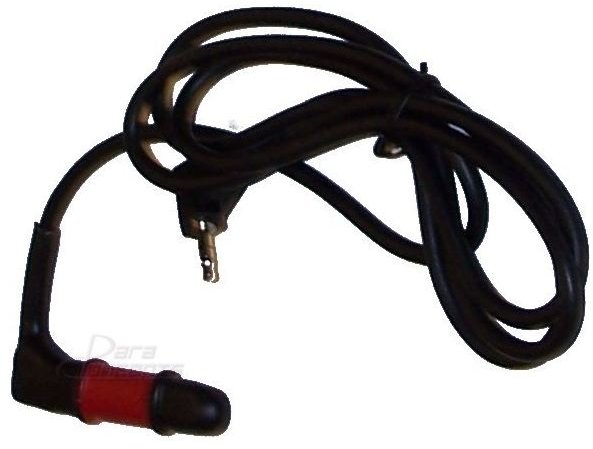
You’ll also need some way to take the photo. In most cases this is done using a mouth piece. There are different types of mouth pieces which will “close the circuit” and allow you to snap a picture. The most commonly used is a bite switch. What this does is take a photo every time you bite down on the mouth piece. You can also get switches that activate when you use your tongue to press a button, or a small tube that you blow into.
Switches
Ideas To Seriously Consider
A very wise investment would be to get an audible altimeter. When you get sidetracked trying to find the best angle for a shot, you may forget just how close the ground is coming upon you. The audible altimeter will remind you when to open your parachute.
Another good idea would be to consider purchasing a wide-angle lens. These will greatly allow you to take photos without being too close to the subject you’re photographing. It’ll also allow more angles and greater opportunities for shots that you may not have with a standard 35mm lens.
A Few Helpful Techniques To Keep In Mind
-Anticipate where your subject will be so you can get the action on film
-Experiment! Don’t always worry technically about the photos, try something just by instinct and you may be pleasantly surprised.
-Get your timing down. You really don’t have that long to frame the photo the way you want it and take the picture before it’s time to pull your chute.
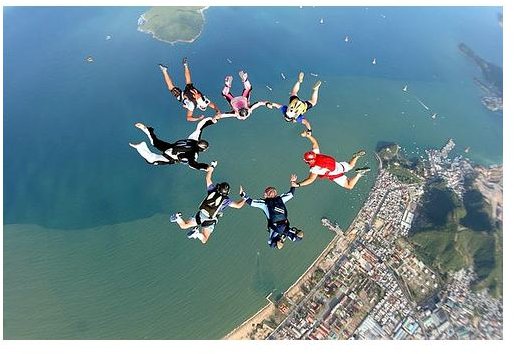
Example Skydiving Photos