Virtual Reality Photography - Techniques & Software to Take Virtual Reality Pictures
Virtual Reality Photography
What is Virtual Reality Photography? The words “virtual reality” are typically associated with computer-aided design and the construction of a virtual facsimile of a real-world place. While there is some resemblance between this and virtual reality photography, the two are not quite the same. One of the hallmarks of traditional virtual reality is the immersion into a 3D environment. In the case of virtual reality photography, the photograph is two-dimensional in most cases, though stereo imaging is possible by introducing parallax through the use of two cameras or pictures taken at an offset (to learn how to do this, please read Learn 3D Photography - Tips & Tricks on How to Take Stereo Photographs).
Panoramas - where do they fit in?
Virtual reality photography and immersive imaging consists of a panorama that can be navigated through by the use of keyboard or mouse. By far the most common format for virtual reality photographs is the QTVR, or QuickTime VR, standard. Due to the popularity of QuickTime (and the free nature of its plugin), this format is accessible cross-platform. Though QTVR is the format you’re most likely to encounter, it is possible to use more commonly encountered formats such as Java or Flash, as well. Before you can construct a virtual reality photograph, though, you need to construct a panorama image.
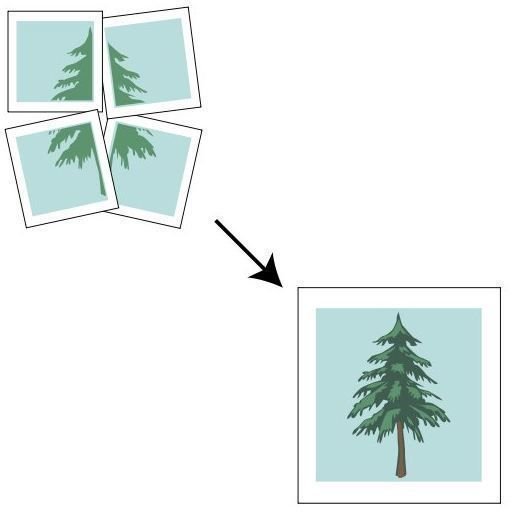
While a panorama may sound intimidating, it’s simply a number of conventional photographs combined to give a wide-angle view of a scene. In the case of virtual reality photography, overlapping photographs are taken at regular intervals and stitched together to form an image which incorporates the entire scene (most often 360 degrees or spherical). Things aren’t quite that simple, though - your virtual reality photography equipment and technique, as well as the software you use to stitch your photos together, can make all the difference.
Often, these virtual reality scenes, or nodes, are linked together to form a path through a real-world space. One excellent example are these virtual tours of archaeological sites in Greece. Within these scenes, it is also possible to hyperlink to other content - websites, pictures, audio files, etc.
Challenges of virtual reality photography
Getting started in virtual reality photography is easy - all you need is a camera, panorama stitching software such as Hugin, PTAssembler, or a full-featured photo editor such as Photoshop or Paint Shop Pro, and a means of converting your panorama into a format compatible with your VR viewer of choice. While you can find inexpensive or free stitching software, converting to a VR format is going to cost you. Personally, I’ve used Pano2QTVR (now Pano2VR) with good results, but there are a number of other options out there if you’re willing to look for them.
Getting good results, however, will take patience, planning, equipment, software, and skill. Stability is essential for a smooth stitching process, as is proper orientation of the camera (get a sturdy tripod with a bubble level, if at all possible). Very good stitching software (such as PTAssembler, if you’re willing to learn it), or one of the numerous all-in-one VR authoring packages out there can make up to some degree for user error, but you don’t want to chance ruining a very good panorama on the strength or weakness of your software, do you?
As for the final ingredient, did I forget to mention practice? You’ll learn more than you’d think from trying your hand at things, even with imperfect tools. If you’re interested in pursuing VR photography further, check out VRMag for examples, tips, and more!