Tutorial: How to Use Picnik Photo Editing Tools
It is easy to begin using Picnik, as you do not even need to register to access the basic features although you can create an account if you wish to. You can utilize the free online photo editing program by going directly to Picnik.com. Once there, you can upload photos from your computer, from your social networking profiles or from photo sharing sites such as Flickr or Photobucket.
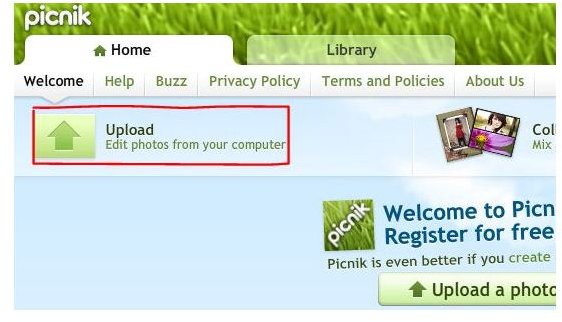
To upload photos from your computer, click Get Started Now on the home page of the site. Click the Upload button under the Welcome tab at the top left side of the window. Find the picture on your computer and upload it to the website.
Grabbing photos from your Facebook page, a photo sharing site or even another web page is easy, too. Go to the Library tab at the top of the page and click the button for the site you want to access, such as Photobucket or MySpace. You can click Get from Website and enter a URL. You can even select Webcam Photo to take a picture with your webcam and immediately use Picnik photo editing on it.
If you are a Flickr user, you can get to Picnik right from your Flickr account. While on a photo’s main page, go to the Actions menu and select Edit Photo in Picnik. Click OK to allow Picnik access to your photos and the photo you were viewing will instantly load in Picnik.
Basic Editing
Once you have loaded a photo, you can get busy using the basic editing features on the toolbar. If you have ever used another photo editing program, these tools will be familiar. For instance, you can click on AutoFix to let the editor make automatic corrections for you. You can rotate or crop the image to change the perspective of the photo. Alter the exposure, colors or sharpness and eliminate red eye using the corresponding buttons.
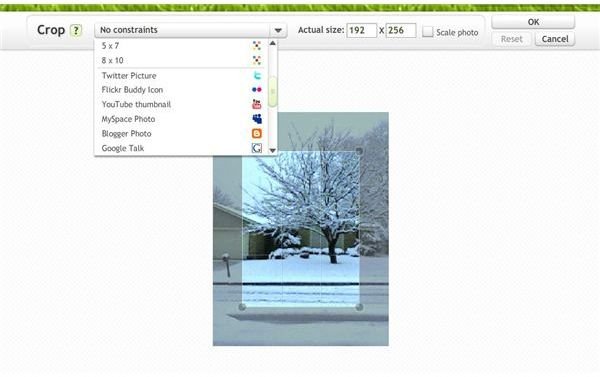
While all of these tools are quite standard and self-explanatory, make sure that you check out the advanced options for each one. For instance, if you click Advanced while using the Exposure tool, you can control highlights, shadows and more. In the Crop tool, click the No Constraints drop down to see a menu of cropping options with choices such as Twitter Picture, YouTube Thumbnail or your current desktop resolution.
Create a Collage or Slide Show
You can make an artistic collage or slideshow of your photos with little effort in Picnik photo editing.
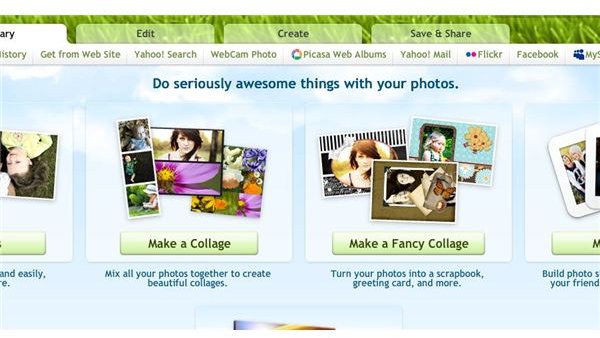
To create a collage, go to the Library tab and click on Start at the far left end of the toolbar. Select Make a Collage or Make a Fancy Collage. The latter are ideal for scrapbooking and desktop publishing projects such as greeting cards.
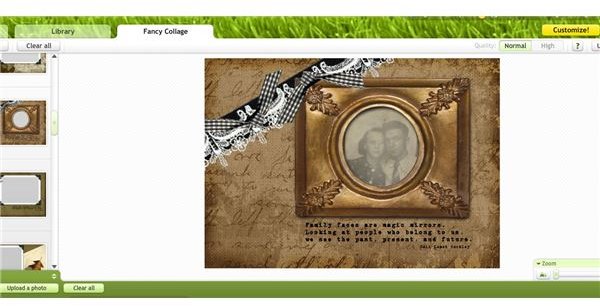
Choose the layout that you wish to use. Basic users have access to 12 basic collage layouts while Premium users get to choose from over 50. Load the photos you want to use from the photo basket at the bottom of the page. To add photos to your photo basket, open the menu at the bottom left to grab pics from another site or click the Upload a Photo button to access photos on your computer. Drag the photos to the layout and drop them where you want them.
To create a slideshow, go to the Library tab and click Start. Select Create a Show and then click on Create New Show. Choose the layout you want from the left pane and then drag photos from your photo basket to the right pane. Apply the speed and type of transition you wish to use from the options in the left pane. You can add comments, change the background color and make other customizations there as well.
Effect Painting
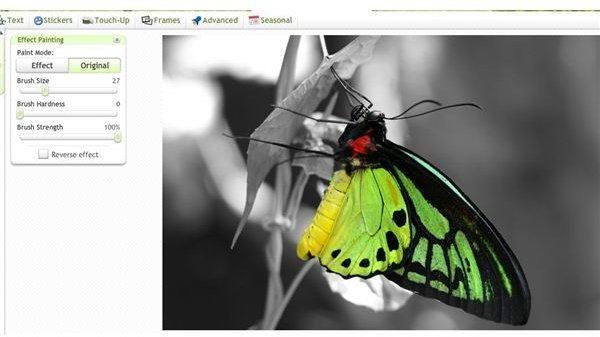
One of the cooler Picnik photo editing features is Effect Painting. Go to the Create tab and open the photo you want to edit. Select an effect from the left pane, such as Black and White or Sepia to apply it to the image. If the Effect Painting box is not visible, click on the paintbrush beside the effect to open it. If you want to return the original appearance to a small section of the photo, click on Original. Select the brush size you want to use and “paint” the original appearance back onto the area of the photo you choose.
You can also paint an effect onto a specific area of the image by clicking the Reverse Effect check box and painting the effect onto the area you choose.
Picnik Browser Extensions
Now that you have learned more about all that you can do with Picnik photo editing tools, you will probably want a way to access it quickly. While you can certainly just bookmark the site, there is an even faster option. Go to the Picnik Tools page where you can download an extension for Firefox, Internet Explorer or Chrome. You will be able to edit images from the web almost instantly.