How to Install WP7 and Android on the HTC HD2
The remarkable flexibility of the HTC HD2 Windows Mobile phone seems to know no ends. Not content with being able to run Android and Windows Phone 7 on the device – a handset that is a virtual template for the HTC HD7 and HTC Desire – this 1 GHz phone is also capable of running both operating systems together in a dual boot arrangement!
It’s yet another remarkable development for a phone released in 2009 to great reviews, but thanks to the presence of the old Windows Mobile 6.5 operating system (the much-less-stylish forerunner to Windows Phone 7) on the device, few imagined that HTC HD2 devices would still be in use two years later, much less be running two of the most impressive mobile platforms currently available!
If you have an HTD HD2 and you are looking for a way to upgrade the device and you haven’t already considered installing Android or Windows Phone 7, you can kill two birds with one stone by installing both mobile operating systems and enjoying them together!
HTC HD2 Specs
So why is the HTC HD2 suitable for dual booting Windows Phone 7 and Android?
First of all, it’s a great device, as the specs demonstrate:
CPU: 1 GHz (1024 MHz) Qualcomm Snapdragon
GPU: AMD z430 with OpenGL ES 2.0 support
Memory: 512 MB internal flash ROM (1024MB on T-Mobile US version) and 576 MB RAM
Removable storage: MicroSDHC, up to 32 GB
Battery: Rechargeable 1230mAh Li-ion battery
Data input via multi-touch capacitive touch screen, proximity sensor, ambient light sensor, accelerometer and digital compass (magnetometer)
Display: 4.3 in. LCD capacitive touchscreen with 480x800 pixel 65k-color WVGA, backlit TFT LCD
Additionally the device has a 5 megapixels autofocus rear camera capable of video up to 800x480 resolution and you can use Bluetooth, 802.11b/g, A-GPS, and micro-USB connectivity options, with audio output via the 3.5mm jack.
Second, the HTC HD2 was the first device to feature HTC Sense, so you can see why it can be considered a good phone to run Android.
Third, and most importantly, the HTC HD2 is a very similar handset to one of the most popular Windows Phones, the HTC HD7, from handset design and weight to the hardware specifications; in fact, they’re almost identical, making the HTC HD2 the only Windows Mobile device that can be upgraded (albeit unofficially) to Windows Phone 7.
As you can see, this is a phone that is absolutely made for dual booting two great mobile operating systems!
The Installation Process and Files You Will Need
Before proceeding, take heed: this isn’t for the faint hearted. Beyond the possibility that you might brick your phone (and we take no responsibility for this eventuality) the process requires you to reset your HTC HD2 phone, copy files to a MicroSD card and execute them on your handset as well as hook the device up to your PC via USB cable and run various installation management tools.
If you’re new to installing new ROMs, you need to block out at least an hour (possibly two) so that you can give the process your unending attention. Even with previous experience you will need to take your time.
The process requires us to first install Windows Phone 7; the flexibility of Android allows this OS to be launched from a boot choice screen, something that isn’t possible with WP7.
Everyone should begin by downloading the following files:
WP7 STOCK ROM + MAGLDR 1.12 + LATEST LEO512(EU) + LEO1024(T-MOBILE) RADIO
https://www.mediafire.com/?dx3k459a2k3m3dr
MAGLDR 1.13
https://www.mediafire.com/?qkanbxou7ure1x8
WP7 HD2 Custom ROM v1.01.00 (Already Unlocked/Jailbroken)
This depends entirely on your phone’s carrier and the country you’re in, so for the best results head to the HTC HD2 Windows Phone 7 forums at XDA-developers.com where you should be able to find the right ROM for your device, territory and network.
A UK T-Mobile ROM can be found here: https://www.megaupload.com/?d=Q6NOQEI9
Easeus Partition Manager
https://download.cnet.com/Easeus-Partition-Master-Home-Edition/3000-2248_4-108…
Copes SD Android Gingerbread CM7
https://www.mediafire.com/?xb3s9ttd5ieimet
You don’t have to use this build; as long as it has been configured to run from a MicroSD card you can use any Android version that you can find. For the best selection, visit the HTC HD2 Android board at XDA-Developers.com.
MiniTool Partition Magic
https://www.mediafire.com/?x24ctew8hc7vfef
Once all of these files are downloaded to a dedicated folder for safekeeping, remember to unzip the contents.
Additionally, you should also have the following:
- HTC HD2 (fully charged)
- Accompanying USB cable
- MicroSD card class 4 (8 GB or higher for the best results)
- MicroSD card reader
Once you have downloaded all of your software and gathered the various hardware components you will be ready to begin!
Preparing the HTC HD2 for Windows Phone 7
Before starting this process, beware: Windows Phone 7 is a proprietary operating system. As such, you should already have purchased and own a genuine Windows Phone device otherwise
you run the risk of prosecution under software piracy laws (as an open source OS the same problem does not exist for Android).
To successfully dual boot we need to first install Windows Phone 7 onto the HTC HD2. You should begin by checking the downloaded folders, and ensuring that you have unzipped them. Navigate to the DFT_LEO70_RELEASE folder where you will find the following three directories:
- LEO70_ROM
- MAGLDR112
- Radio Leo 2.15.50.14
Open Radio Leo 2.15.50.14 and right-click the CustomRUU.exe program, selecting Run as administrator and agreeing to the UAC (User Access Control) warning. The next step is to connect your HTC HD2 by USB cable to your PC, and then reboot the phone, holding the volume down button as you do.
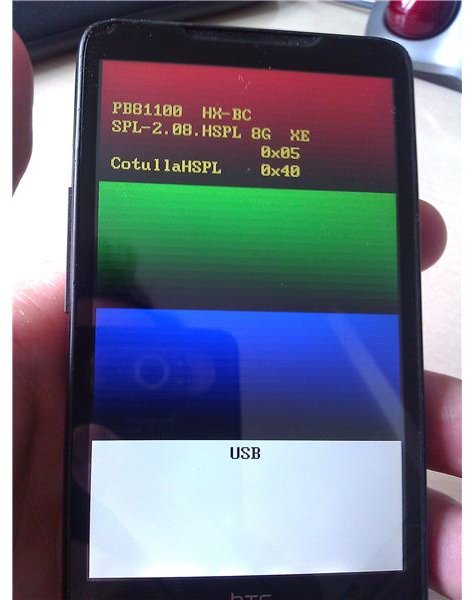
When the phone restarts you should see the tricolor bootloader screen (as pictured on the right), where red, green and blue stripes appear in the top portion of the display, and the rest of the screen is white. After a moment you should see the USB notification, confirming that your phone is connected. If this is the first time you have accessed the bootloader then wait a few moments for Windows to install the drivers.
On your computer the ROM update program will be running, so check that you have met the requirements in the list, put a check in the box and click Next. In the following screen click Update, then Next > Next and wait as the progress bar advances and completes the installation of the basic HTC HD2 ROM. After a few moments it should complete, and your phone will start up, with an HTC logo and a green progress bar. Once the bar reaches 100%, hold the volume down button again to re-enter the bootloader screen.
Installing Windows Phone 7
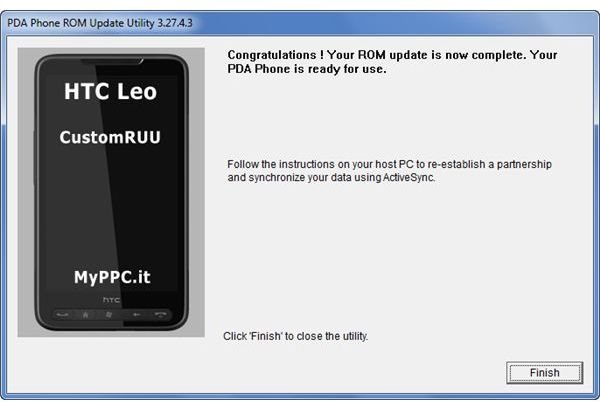
You should now be back in the tricolor screen; back on your PC, navigate to the MAGLDR112 folder and right-click ROMUpdateUtility.exe and Run as administrator. Once again, agree to the UAC notification and the ROM update program will launch. This looks very similar to the previous CustomRUU program, and the process is the same – check the I completed the steps indicated above box, click Next > Update > Next > Next and again wait a few moments until the progress bar indicates completion.
Your phone will then restart. At this stage you need to press and hold the power button on the HTC HD2 to enter the MAGLDR screen. You will be presented with a long menu of options – use the volume buttons to scroll up and down through the menu until option 5, USB Flasher, is highlighted and use the call button on your phone to select it.
Back on your computer, close the completed ROMUpdateUtility program (click Finish) and then open the LEO70_ROM folder and run DWI.exe as administrator, agreeing to the UAC notice as before.
(Note that if you are using a Windows Phone ROM that you have downloaded from XDA-developers.com then this should be used here.)
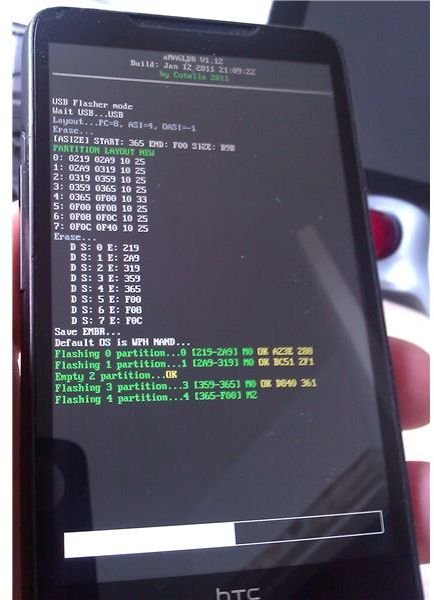
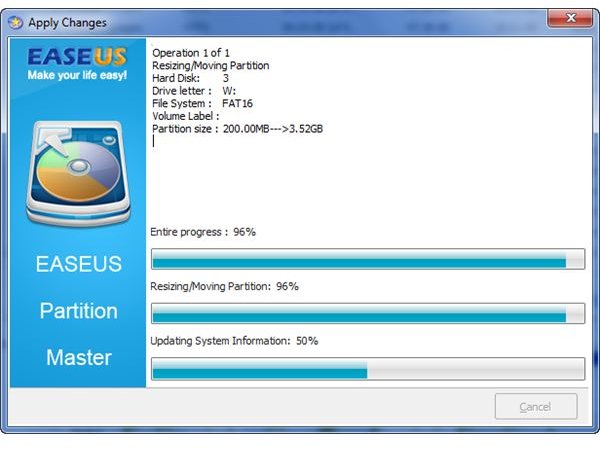
The ROMUpdateUtility installs the Windows Phone 7 ROM on your HTC HD2. To proceed through this program, click Next when prompted (although take notice of the details displayed at each step) and as the software is installed you will be able to check your phone for a progress report (as pictured, right).
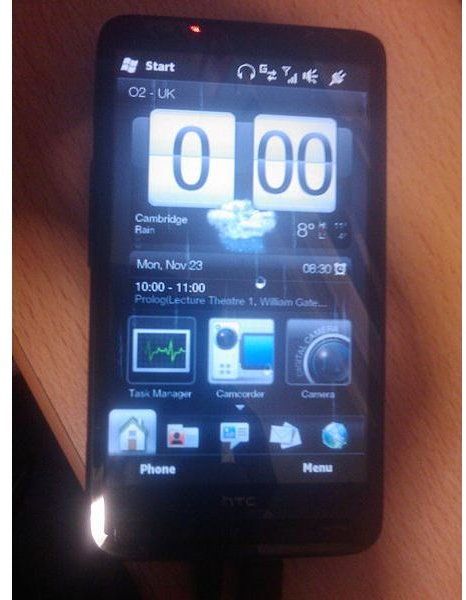
This step will take a while to complete, but once it does your phone will reboot. Click Finish on the ROMUpdateUtility and then watch your HTC HD2 as it boots into Windows Phone 7!
Using Windows Phone 7 on the HTC HD2
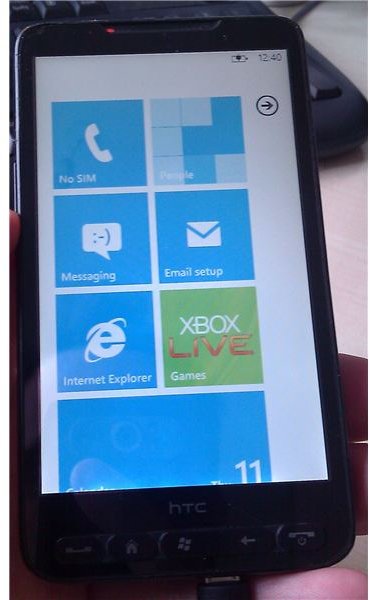
With Windows Phone 7 now installed on your handset you will be able to use it as normal; however, note that the HTC HD2 device has more buttons than a genuine WP7 device. For instance, the HTC HD7 has Back, Start and Search buttons across the lower portion of the handset, whereas the HTC HD2 has Phone, Home, Start, Back and End Call/Power.
Clearly there is a slight difference here, and throw in the fact that the HTC HD2 doesn’t have a hardware camera button by default you can see how it might be difficult to use this device with Windows Phone 7.
Fortunately, some useful key mapping gets around the problem. On a HTC HD2 device, the hardware buttons are assigned as follows:
- Phone – Camera
- Home – Search
- Start – Start
- Back – Back
- End Call/Power - End Call/Power/Lock screen
It shouldn’t be too long for you to get used to this arrangement!
Preparing the HTC HD2 for Android
With Windows Phone 7 now installed on your device, the time has come to copy the necessary files and folders required to run Android in a dual-boot setup.
Ensure that you have a suitable MicroSD card inserted (see page one of this article) and in Windows Phone 7 go to Settings > About > Reset my phone > Yes > Yes to clear all of your data and restart the device.
Before the phone gets a chance to boot, however, hold the power button to open the MAGLDR screen. At this stage, remove the MicroSD card (you might want to leave the battery cover off for a while) and insert it into your card reader, which you should then connect to your PC.
It is now time to use the Easeus Partition Manager software, which you should have already downloaded and installed. You should be able to launch this from the Windows Start > Programs menu, and once running you will need to identify your MicroSD card. This will appear as an additional disk (for instance, if you have a single hard disk drive, the MicroSD card will appear as Disk 2; don’t be confused by disk partitions, Easeus looks for physical devices. If in doubt, check the size of your MicroSD card and look for this).
The MicroSD device will be listed as having a single partition that is quite small and in FAT16 format and a second unformatted section which you will need to right-click and select Delete. Once you have done this you will need to use the Apply button on the top toolbar – this is the same for all steps when using Easeus Partition Manager. After applying the change, wait for the software to scan for devices again, which will update the view slightly.
You will now see that the unformatted section is now unallocated. Right-click this and select Create, clicking Yes to confirm. Set the Create as drop down to Logical and the File System to Unformatted, and then adjust the slider to allocate space to your Windows Phone 7 partition. A 50-50 split would be typical, but make sure that the Partition Size figure is larger than the Unallocate Space Before figure. Press OK to confirm and Apply – once everything is refreshed, safely eject your MicroSD card from your card reader and replace it into your phone.
Installing Android on the HTC HD2
Before installing Android we first need to boot into Windows Phone 7; on the MAGLDR boot menu select the top option and press the call button. Your phone will then start into Windows Phone 7 and you will need to reconfigure your regional settings.
Once this has been done, go to Settings > About and check the current storage figures, which should match what you set earlier. Next, hold the power button to power off (you will see the “Goodbye!” message) and remove the MicroSD card.
With the card now connected to your computer, reopen Easeus Partition Manager and look for your card again. The FAT16 partition can now be dealt with, so right-click this and select Resize/Move; in the properties box pull the slider from left to right so that the whole space is allocated and click OK then Apply.
Wait for everything to update and then go to the FAT32 partition, right-click and select Format. In the properties box for this partition, change the Cluster Size to 32KB, click OK and then Apply.
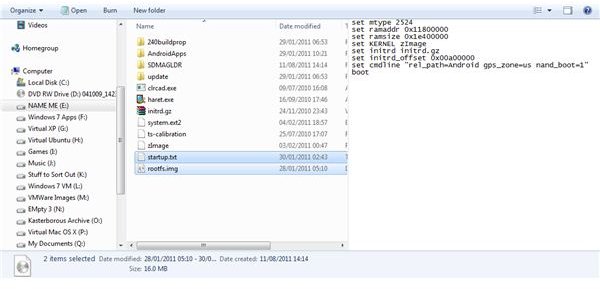
You will then be ready to put Android on your phone, using the build downloaded earlier (as listed on the first page). This must be a dedicated MicroSD card build. Browse to the folder where you downloaded and unzipped the Android build to and find the Android/SDMAGLDR directory. In here you will find rootfs.img.sdmagldr – rename this to rootfs.img.
You may need to instruct Windows to display file extensions for this step – as such in Windows Explorer open Organize > Folder and search options > View and clear the Hide extensions for known file types check box, then click OK to confirm. You should then be able to see all file extensions and use the rename function to edit the filename.
Once you have done this, copy rootfs.img and startup.txt and paste them into the Android folder (this will require you to overwrite some existing files with the same name). You can then copy the Android folder onto your MicroSD card.
With this step completed, run the Minitool Partition Magic program that you downloaded and installed at the beginning. You should see the MicroSD card listed as it was previously in the Easeus Partition Manager application, and a FAT32 partition will be displayed alongside one marked Other. Right-click this and select Modify > Set Partition as Primary and click Apply – once refreshed, you can remove your MicroSD card and insert it into your HTC HD2.
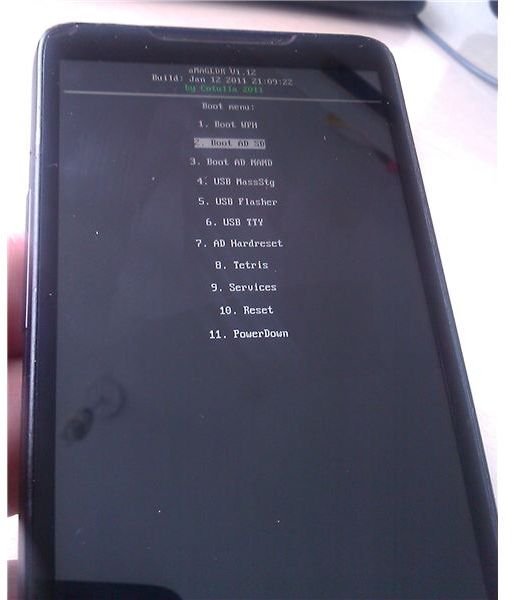
We’re getting close to completion now – your phone should still be in Windows Phone 7 mode, so hold the power button down to restart the phone and leave your finger on the button to open the MAGLDR screen. Using the volume controls go to the tenth option, Services and press the Call button and then select option one, Boot Settings. Next choose option three, and then you will see two choices listed as below:
<.>
ANDROID
The first option will take you back to the previous menu; select Android here and you will be returned to the MAGLDR screen, where you should select the second option (BOOT ADSD) and press the Call button to boot into Android!
Choosing Which Operating System to Boot
Next time you switch on your phone, you will find that the device automatically boots to Windows Phone 7 by default. This is because that operating system has been installed first, something that is necessary for it to work correctly.
Android, meanwhile, as the second operating system must be launched in a slightly different way. While the HTC HD2 will run Android natively without a problem, the operating system is flexible enough to let Windows Phone 7 take control of the device for a standard boot.
If you want to boot into Android, all you need to do is hold the power button down until the MAGLDR screen appears. As previously described, use the volume rocker to select BOOT ADSD.
References
- XDA-Developers HTC HD2/HTC Leo Android, http://forum.xda-developers.com/forumdisplay.php?f=735
- XDA-Developers HTC HD2/HTC Leo Windows Phone 7, http://forum.xda-developers.com/forumdisplay.php?f=977
- All photos provided by author.