Guide to Nokia N95 Email
Defining the Nokia N95 Email Settings
Before you can send email on a Nokia N95, you must set-up the phone first by defining the e-mail setting.
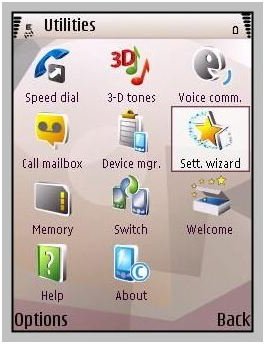
When defining the e-mail setting of your N95, you can use the Settings Wizard. Access the “Settings Wizard” by pressing the main menu icon and select “Tools”. From the folder, select “Utilities” and then click “Setting Wizard”.
Also, to be able to open your Nokia N95 e-mail, you must have an acceptable internet access point (IAP) on your mobile phone and then define your e-mail settings accordingly.
After you have defined the email settings of your N95, you will be asked to set up your “Mailbox”. In creating your mailbox you will be required to provide a name. The name will appear in the main folder of “Messaging” that would replace “Mailbox”. You can create up to six mailboxes for Nokia N95 email.
Set Up Your Mailbox
Step 1: From the main screen display, click the Menu Key and then go to “Messaging”.
Step 2: From the list, scroll down and select, “Mailbox”
Step 3: A pop-up message will appear prompting you, “No mailbox defined. Define now?” select “Yes” by clicking on your left selection key.
Step 4: Another pop-up message will appear asking you to start the process, click “Start”. You will then be asked to select your mailbox type.
Step 5: POP3 is usually used when you have an email address from an internet service provider. Click “Next”.
Step 6: In the screen, type your email address then click “Next”.
Step 7: Type the incoming mail server and then click “Next” to be followed by your outgoing mail server and then choose “Next”.
Step 8: You are then asked to enter your “access point”. Access points differ from one service operator to another so you may want to ask your service operator for the information, after that, click “Next”.
Step 9: To personalize your mailbox, you can name your mailbox anything you want, once entered, click “Finish”. Click OK as soon as the pop-up message, “Mailbox setup complete” appears.
After defining your email settings and creating your mailbox, you can now send email using your N95.
How to Send Your Email Message via Nokia N95
Step 1: From the main screen choose the Main Menu button located at the left of the navigational keys. Then select “Messaging”.
Step 2: Scroll down and choose “Mailbox”. Use the left key and choose “Options > Create Message > E-mail.
Step 3: A new screen will pop up and in the “To” field, type recipient’s email address. You can also add the multiple recipients’ email addresses by selecting “Options” and then selecting “Add Recipient” to select from your contacts list.
Step 4: After inserting the email address of the receiver, write the subject and the content of your email. Then press “Send” and you are done.
You may also want to learn How to Change the Wallpaper on your Nokia Phone.
