tag can be modified using the following attributes in XHTML 1.0 Strict: abbr, align, axis, char, charoff, colspan, headers, rowspan, scope, valign, width.
How To Convert A Table In Word To HTML: Structure
So how do you make sense of your Word table in HTML? First work out your underlying structure.
To lay out your HTML table, start with the tag. Do you need a border? Add a border=“1” attribute to your tag. Do you need the table to fill the whole row? Add a width=“100%” attribute.How many columns are there in your table? Lay out the first row. Start with a tag. Add the first blank cell as a pair of tags. If you have a lot of columns, use copy and paste to replicate the cell as often as you need it. Finish the row with a tag.How many rows are there in your table? Copy and paste the entire row as often as you need it and then finish the table with a tag.
Now you can add the contents to fill each cell. But there is a quicker way, especially if you have a complex table. Additionally, it may reduce the chances of transcription errors.
How To Convert A Table In Word To HTML: Shortcuts
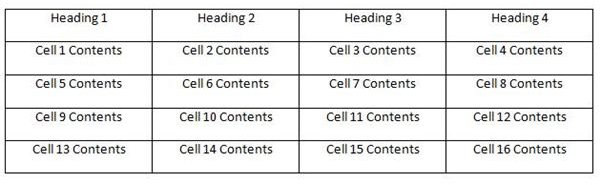
A neat trick is to use Word’s find and replace facilities to generate your HTML code: First use Word’s convert table to text facility to convert the table to text. I suggest using the Separate text with Other (@) character to delineate the table:
Heading 1@Heading 2@Heading 3@Heading 4
Cell 1 Contents@Cell 2 Conte nts@Cell 3 Contents@Cell 4 Contents nts@Cell 3 Contents@Cell 4 Contents
Cell 5 Contents@Cell 6 Contents@Cell 7 Contents@Cell 8 Contents
Cell 9 Contents@Cell 10 Contents@Cell 11 Contents@Cell 12 Contents
Cell 13 Contents@Cell 14 Contents@Cell 15 Contents@Cell 16 Contents
Now you can replace each @ with | to start to generate the code:
Heading 1 | Heading 2 | Heading 3 | Heading 4
Cell 1 Contents | Cell 2 Contents | Cell 3 Contents | Cell 4 Contents
Cell 5 Contents | Cell 6 Contents | Cell 7 Contents | Cell 8 Contents
Cell 9 Contents | Cell 10 Contents | Cell 11 Contents | Cell 12 Contents
Cell 13 Contents | Cell 14 Contents | Cell 15 Contents | Cell 16 Contents
Next top and tail each row by replacing the carriage returns. Use Find ^p and Replace with |