How to Set Up a Blog for a Life Success Coaching Business
Preparatory Keyword Research
You’re probably tempted to just set your blog up as quickly as possible, but don’t rush it! Before you get started with the actual creation of your blog, you need to perform some preparatory keyword research. If you don’t, you might not get a fair amount of traffic, and thus, you’ll lose potential customers.
What is a keyword then? Put simply, it’s a word or multiple words that an individual uses to search for information on the internet. Whenever you type something in Google, you’ve just typed a keyword.
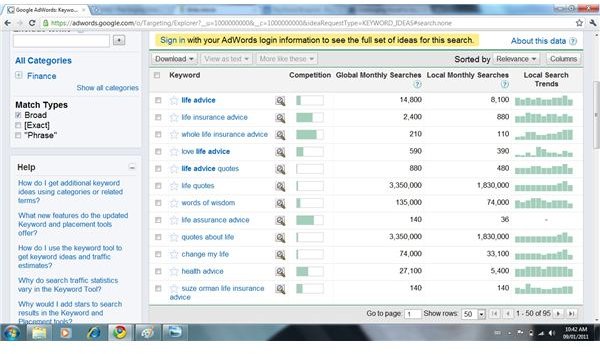
To find adequate keywords, you need to follow a few steps and abide by some rules. First, visit the Google AdWords Keyword Tool. Once the webpage loads, enter a phrase you think people might be searching for inside the “Word or Phrase” box. An example is “Life Advice.” Retype the security code and press “Search.”
Tip: If you have a Google AdWords Account, you can sign in and avoid entering a security code. Signing in will also provide you will more in-depth information and more keywords.
After you press “Search,” a large list of information will load. From this list, you’ll select only the best keywords. By default, the columns that appear include:
- Keyword
- Competition
- Global Monthly Searches
- Local Monthly Searches
- Local Search Trends
A little overwhelming, isn’t it? Don’t worry though, the only part you need to focus on is the “Global Monthly Searches” column. Browse through the keywords and find those with a total Global Monthly Search volume of 1,000 to 50,000. Each time you find one, click on the keyword and a Google search will appear in a new window.
Now what? First, look at the number of results. For example, a Google search for “Life Advice” brings up 470,000,000 results. That’s far too many competing websites, and your blog is unlikely to achieve a first-page Google rank for that keyword. Instead of “Life Advice” then, you may opt for “Online Life Coaching,” which brings up 8,220,000 results.
Web experts call this a broad search. If the keyword you selected passes the initial 1,000 to 50,000 search criteria and has less than 20,000,000 broad search results, you’re nearly done!
There’s just one more thing you need to do. In the Google search, simply type quotations around the keyword and press enter. This brings up a more specific number of competing websites. In the case of “Online Life Coaching,” there’s only 62,600 results; which means this keyword is an ideal one!
It may sound like just a large mass of confusing numbers that make no sense at all, but it’s crucial you do this part correctly. As long as you find one keyword with the specified Global Monthly Searches and search results, you’re good to proceed!
*Continue To Page 2 To Learn How To Register a Domain and Purchase Hosting*
Registering A Domain & Purchasing Hosting
Phew! That first part can be a little daunting, but the rest of this tutorial on how to set up a blog for a life success coaching business is a bit easier to progress through. Once you have selected an ideal keyword with good search volume and moderate competition, it’s time to register a domain name. What is a domain? Essentially, it is the web address of a website. For example, “www.BrightHub.com” is a domain name.
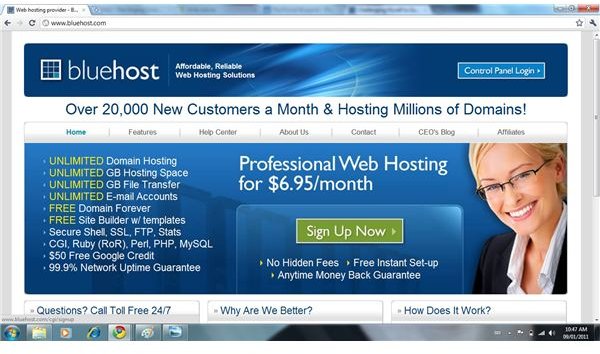
Domain names can be purchased from a variety of different companies and providers, but you really shouldn’t go with just any old company. Ideally, you should register your domain name from the same company you purchase your hosting. Because you’ll be using WordPress as your blogging platform, you’ll want to use one of these recommended services:
- BlueHost
- DreamHost
- Media Temple
- Laughing Squid
Any of these providers will do, but there’s quite a bit of support offered by BlueHost. Visit your preferred provider’s website and sign up for an account. They usually have a large, colorful “Register” or “Sign Up” link that you can click. These providers almost always give you the option to register a domain before proceeding, so take advantage of it!
Type in the desired web address you want. Try to combine your business name with the keyword you previously selected. By doing this, you’re branding your business and yourself as reputable resources while also increasing the likelihood of getting found in the search engines. So, if your business name was “Claire’s Coaching,” you may combine that with “Online Life Coaching” to create a domain name like “www.Claires-Online-Life-Coaching.com” or similar. Mix it up and get creative!
Once you’ve typed in a domain name, go ahead and click “Next” or similar. If the domain you opted for has already been registered by another person, you’re not going to be able to use it. If this is the case, just go back and type in another domain variation. As soon as you have an available domain, you’ll be provided with a few different types of hosting packages. Select which hosting package appeals to you, and press “Next” or similar.
Tip: Because you’re just using the hosting for a blog, you might just want to opt for a standard hosting package that doesn’t cost too much. No need to go for some ‘premium,’ pricey hosting service if you’re not running a video website that gets tens of thousands of visitors a day. Just stick to a simple, affordable, and reliable hosting package.
Once your hosting is selected and the new webpage loads, simply complete the sign up procedure by filling out the required fields. This part should be pretty self-explanatory. It’ll just ask you for your name, email address, phone number, etc. You’ll also need to submit your payment information and confirm your order.
*Continue To Page 3 To Learn How To Install WordPress*
Installing WordPress
So far you’ve learned how to find ideal keywords, register a domain, and purchase hosting. What training for life coaching online is next? Well, the preparations are over! Now it’s time to install WordPress, familiarize yourself with its interface, and install an attractive theme.
After buying your domain and hosting, you should have been sent a confirmation email. In it you’ll find a username and password that’ll you be required to use to login to your cPanel. What in the world is a cPanel? It’s a graphical interface that allows you to manage and maintain your website in an easier way; like a ‘mission control.’
To login to your cPanel, type your domain name into the web browser along with “/cPanel” at the end. Using the original example, then, you would type “www.Claires-Online-Life-Coaching.com/cPanel" into the web browser. When the page loads, enter your username and password.
As soon as you’re logged in, you’ll see a bunch of different sections with various tools in each. Scroll down the page until you find the “Software/Services” section, or similar. In this section, you should find a little WordPress icon. Click on it and wait for the new page to load. You can read more about WordPress and its features here, but you really just need to know that it’s a blogging platform.

Click on the “Install” button to install WordPress on your hosting account. When the new page loads, make sure the newest version of WordPress is selected to install. It usually is by default, but it’s just good practice to double-check. Select your registered domain from the list of domain names to install WordPress on and make sure the subfolder field is empty. Give your blog a name such as “Claire’s Online Life Coaching” and create your own username and password. Finally, check the box to agree to the terms and conditions and click “Complete,” or similar.
Now you play the waiting game, but don’t worry, you won’t have to wait too terribly long. WordPress will usually install within 30 to 60 seconds. Should any problems arise during the installation procedure, the webpage will tell you what went wrong and give you options to fix it. Once it’s done, a new webpage will load providing you with your blog web address, login address, username, and password.
*Continue To Page 4 To Learn How To Navigate WordPress and Install a Theme*
Navigating WordPress & Installing A Theme
Time to login to your WordPress Dashboard! To do this, simply type your domain into the web browser along with “/Wp-Admin” at the end. Again, using the original example, you would type “www.Claires-Online-Life-Coaching.com/Wp-Admin" into your web browser. Once the webpage loads, enter the username and password you just created into their respective fields.
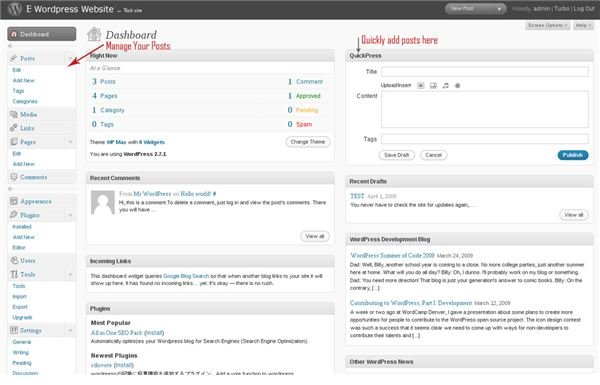
Once logged in, you’ll be presented with a Dashboard that displays all information related to your blog. The middle of the screen, more commonly known as the work area, will display recent posts, comments, visitors, etc. On the left, there’s a long menu filled with links, which is referred to as the main navigation. Whenever you click on one of these links, the work area will show different tools.
Tip: Feel free to explore WordPress and get a feel for it. Due to time restrictions, the “Themes” and “Posts” tabs will be the only portion covered in the remainder of this tutorial. It’s wise to navigate through the links though and spend five minutes exploring each section. It can seem like a lot to digest, but it’s actually a very easy platform to employ once you’re used to it.
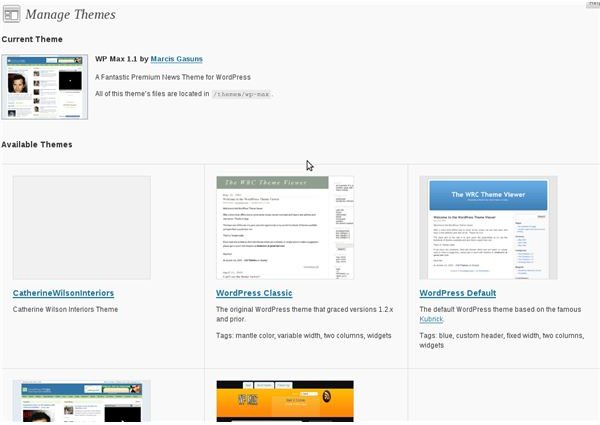
When you’re ready, click on the “Themes” link in the main navigation. There’s no doubt that the default theme WordPress provides is, well, boring, to say the least. In order to have a truly effective life coaching blog for your business, you definitely need an attractive theme. It draws visitors in and keeps them there. In the “Themes” work area, you’ll be able to browse through a few different themes of basic style and quality. You can also purchase premium style themes that are far better looking at websites like WpNow or iThemes.
Whichever one you decide to go with, go ahead and click the “Download” link once you’ve found an appealing theme. Save it to your computer, preferably somewhere where it’ll be easy to find such as your Desktop. Return to WordPress and click the “Upload” button. A system window will popup allowing you to browse through your files to find the theme you just downloaded. Select it and click “Okay.” Again, you’ll have to do some waiting as the theme files upload, but it shouldn’t take that long. Once done, just check the box beside the theme you just uploaded and press the “Okay” button.
That’s it! Now you have a nice, neat, and aesthetically pleasing theme for your WordPress blog. Remember that you can always change your theme if it turns out you don’t like the one you selected or just need a change after awhile. Just follow the same process to do so. Next up in your training for life coaching online, creating Pages and Posts!
*Continue To Page 5 To Learn How To Create Pages & Posts, As Well As Tutorial Conclusion*
Creating Pages & Posts
Alright, you have your blog all set up! Or, at least, the technical aspect is all done. Now you just need to create some Pages and start writing Posts. What are Pages and Posts? Pages are permanent webpages that have essential information that the visitor wants to see and read, while Posts are small entries that provide value and insight for the reader.
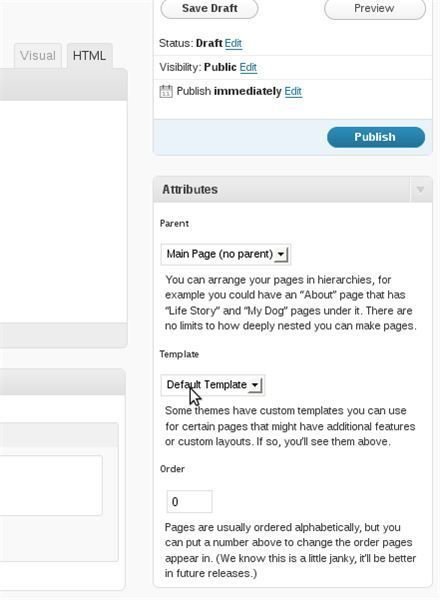
To get started, click on the “Pages” link in the main navigation. By default, there will already be one up there to show you what they look like. Check the box beside this default page and delete it. Then, go ahead and click the “Create New” button. You must enter a title into the text field for your Page before you can edit it. Common pages for a Life Coaching Blog may include About Us, Testimonials, Contact Information, Media, and Buy Coaching.
Just focus on one Page at a time. When the title of your Page has been entered, a new webpage will load with a basic text editor. It’s pretty straightforward here, just write in the text and use the menu bar to format your writing. Make sure you save your Pages as you go! You can save them as drafts before publishing them live. So, for your “About Us” Page, you may want to include information like:
- Founders/Owners
- Date Founded
- Reputation
- Coaching Specializations
- Company History
- Life Coach’s History
Creating Pages is really quite simple, and it shouldn’t been too complex of a task for you to fulfill. Posts, on the other hand, will require a little bit more effort. Why? Because Posts are the main way to acquire additional visitors and either build or diminish trust.
Before writing any Posts, you need to do your keyword research again. Use the same process you employed earlier, but this time, try to find long-tail keywords. These are longer keywords that have less searches, but far less competition. An example is “Professional Relationship Advice.”
As soon as you have a good keyword for your post, click on the “Posts” link in the main navigation. Then, click the “Create New Post” button and wait for the text editor to load much like when you created the Pages. Go ahead and write your Post, ensuring the keyword you selected is in the Post’s title and first paragraph. Try to keep your Posts within 250 to 500 words. Again, save each entry in draft before publishing, save frequently.
Tip: All of your Posts must provide some type of value to the reader. It doesn’t matter if you’re providing career advice or relationship suggestions, it just needs to provide the reader with valuable advice. Keep the posts generic and applicable to all visitors. This way, the advice offered only helps the visitor to a certain extent, and he or she will be motivated to pursue your paid services if they need more specific assistance.
Mission Complete: To Build A Life Success Coaching Blog
Phew! It’s really a lot to digest, but as you can see, it isn’t too difficult to start a blog for a life success coaching business. It takes quite a bit of work and effort, but it’ll certainly pay off in the end! You just have to get past some of the more technical components of the set up.
With all of the above steps and procedures completed, you’ll just need to keep on top of your blog. Aim to update it with new Posts at least three times each week. The more Posts you write though, the higher the likelihood of acquiring new visitors.
One last pointer, if you’re ever looking for another income stream, consider adding Google AdSense to your blog. It could end up paying off your monthly blog expenses at some future point.