4 Steps for a Home Cinema Installation
If you are planning to do a home cinema installation, you need not be nervous. The installation process is relatively easy, even for a non-technical person given the right set of instructions and the right set of tools. You will surely be able to get the job done even if you are not a hardcore hi-fi fiend.
Tools and Materials
Before starting the installation of your home cinema, ensure you have everything you need to complete the project. The following tools should come in handy:
Required Tools:
- Power drills
- Stud finders
- Fish tape
- Assorted screwdrivers
- Electrical tape
The tools mentioned above should be readily available, as these are needed for the installation of some of the equipment such as the home cinema speakers and home cinema projectors.
Step 1 – Setup of TV or Projector
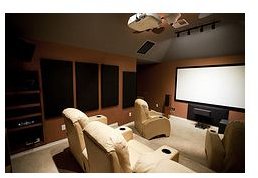
Now you need to decide the order in which everything will be set up. For your home cinema, it is advised you set the TV up first. Mount the TV on the wall or get it set up on a TV stand. If you are installing home cinema projectors, the projection screen should be placed at the middle of the front wall. The projector should be mounted on the ceiling toward the rear wall where the images can be projected onto the screen for optimal picture quality.
Step 2 – Speaker Placement
After the TV and/or the home cinema projectors are installed, the next thing do is placement of the speakers for the best sound experience. Front speakers should be placed at least three feet and to the left and right of the projection screen. The center speaker should be placed directly below the screen. The subwoofer should be in the middle of the viewing area and the rear speakers at the back at opposite corners. Now that everything is in position, the wiring needs to be routed for power and the home cinema speakers connected.
Step 3 – Wirings
Now that everything is in place for your home cinema, the next thing to do is the wiring. If you have the ability, you might want to hard wire the projector to power through the ceiling. For the TV, simply plug into an electric outlet. Next, run the wiring for the speakers and connect them to your TV or stereo receiver.
Step 4 – Speaker Calibration
Now that everything is properly wired together and the home cinema speakers are connected and placed in their proper positions, program the system for the most realistic surround sound. This needs to be done so that the sound from all the speakers will reach the seating area at the same time. After this, you have to set the speaker levels in such a way that all the speakers have the same volume.
While doing this, you need to take into consideration the room acoustics where the home cinema installation was done. The furnishing in the room can affect the sound. You may have to tinker a bit with the speaker positioning and might even have to readjust the volume levels and sound delay.
After everything is all set up and programmed to perfection, all you need to do is get some popcorn, pop a nice flick into the player, sit back, relax, hit play, and enjoy your new home cinema.
References
- Which works for you retrieved at https://www.which.co.uk/technology/tv-and-dvd/guides/how-to-set-up-a-home-cinema-system/
- Acme How To retrieved at https://www.acmehowto.com/howto/hometheater/home-theater-basics.php
- Image by gsloan on Flickr