How to Transfer Contacts From One Outlook Account to Another
Locate File
You have to locate the exact location of the contacts file on your computer before you can copy or import it. You can find the path of the contacts file in Microsoft Outlook’s Account Settings dialog.
Click the orange “File” menu button at the top-left corner of the Microsoft Outlook window.
- Click the “Account Settings” button and click the “Account Settings” link in the menu that pops up.
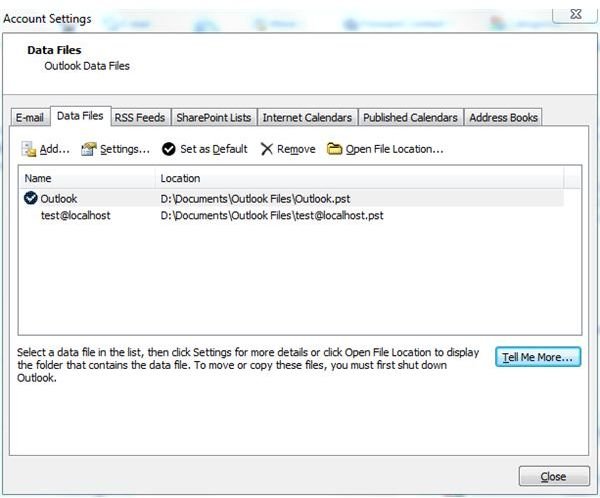
- Click the “Data Files” tab at the top of the Account Settings dialog window.
- Read the path of the .pst file from under the “Location” header in the list of data files. The name of the default .pst file is Outlook.pst, unless you’ve changed it.
- Click “Close.”
Copy File
This step is only necessary if you want to import your Outlook contacts to an Outlook account on another computer. You can skip this step if you’re importing the contacts on the same computer. Note that the .pst file also contains all of your emails, calendar items and other personal data in addition to your email.
- Close Microsoft Outlook if you need to copy the file. You can’t copy the .pst file while Outlook is open.
- Click the “Start” button and click “Computer.”
- Navigate to the location of the .pst file on your computer. The default location is in your user account’s documents folder, or “C:\Users\Name\Documents” on Windows 7.
- RIght-click the “Outlook.pst” file or the name of the .pst file that contains your contacts if it has a different name and click “Copy.”
- Paste the Outlook.pst file onto a USB drive or other removable media device and insert it into the other computer.
Import Contacts
You can import the contacts file to another .pst file in the same Outlook profile, on a different Windows user account or even on another computer.
-
Open Microsoft Outlook on the user account or computer you want to transfer the contacts to.
-
Click the “File” menu button near the top-left corner of the Outlook window.
-
Click “Open” at the left side of the Outlook window and click the “Import” icon in the main window.
-
Click “Import from Another Program or File” in the Import and Export wizard window that appears and click “Next.”
-
Click “Outlook Data File (.pst)” in the list of file types and click “Next.”
-
Click the “Browse” button, browse to the .pst file containing the contacts, double-click it and click “Next.”
-
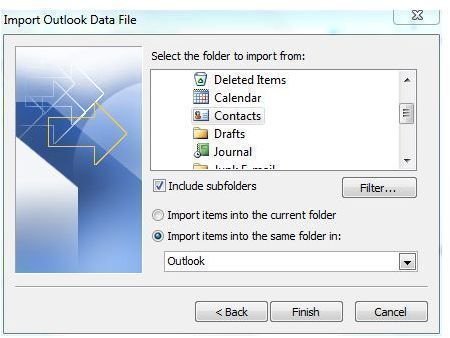
Scroll down in the list of available folders and click the “Contacts” folder.
-
Click the box under “Import Items Into the Same Folder In” and click the name of the .pst file you want to import the contacts into.
-
Click “Finish.”
You can find more tips and tricks as well as troubleshooting information for Microsoft Outlook here at Bright Hub.
References
Microsoft: How to Share Contacts Between Outlook Profiles; https://support.microsoft.com/kb/286044
Screenshots provided by writer