Microsoft Office Tutorial: Steps to Export an Email Distribution List From Outlook to Excel
Overview
If you are scratching your head, trying to figure out how to export an email distribution list from Outlook to Excel, there is good and bad news. The bad news is that, although you can easily export Outlook contacts, there is no way to export just a distribution list. The good news is that there is a way to work around this limitation, and it is neither difficult nor time consuming.
The key is saving the list in another format and then opening that new file in Excel.
Saving the Distribution List as Text
To begin, you must save the distribution list that you want to use in Excel as a text file. Start Outlook and go to your Contacts. Click on the distribution list you want to work with.
in Outlook 2003, go to the File menu and select Save As.
In Outlook 2007, click on the Microsoft Office Button and select Save As.
In Outlook 2010, go to the File tab and click Save As.
You can also press the F12 key in any version of Outlook to open the Save As dialog.
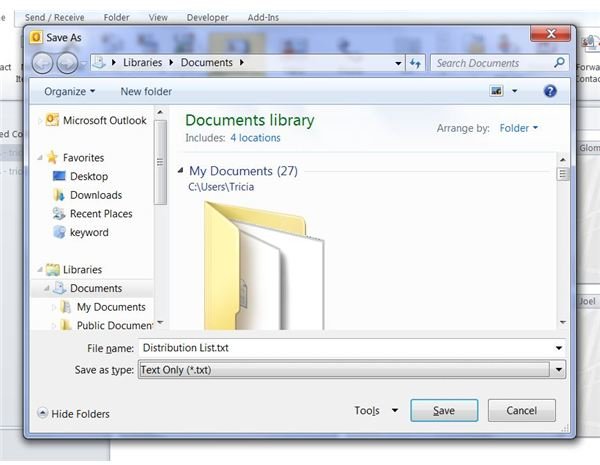
In the File Name box, enter a name for the text file. In the Save As Type box, select Text Only (*.txt). Navigate to a place on your computer where you can easily find the file, such as your desktop or Documents folder and click Save.
Using the Text File
Once you have saved the distribution list as a text file, you can easily open it in Excel. Start Microsoft Excel.
In Excel 2003, go to the File menu and click on Open.
In Excel 2007, click on the Microsoft Office Button and select Open.
In Excel 2010, go to the File tab and click Open.
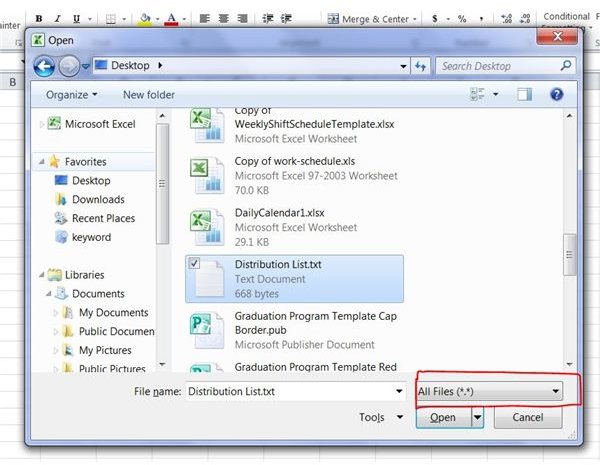
Alternatively, you can use the keyboard shortcut Ctrl+O to open the Open dialog in any version of Excel. Select All Files in the FIles of Type box. Navigate to the text version of the distribution list and click Open.
The
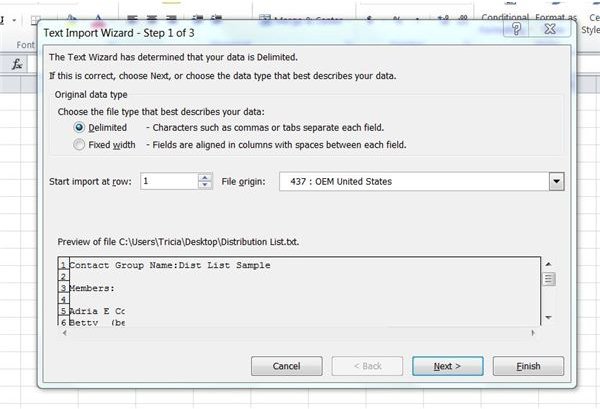
begins. Select Delimited under Choose File Type. In the Start at Import Row box, select the row that contains the first line you wish to import. You can look in the Preview section of the wizard to see what line that would be. Click Next to continue.
Choose Tab in the Delimiters list and click Next. Choose the format you want to apply to each column, which will likely be either General or Text. You can also click the Advanced button to apply advanced formatting options.
When you are done, click the Finish button. Excel imports the text file into a new worksheet so that you can modify and use it in any way that you need to.
References
Source: author’s own experience
Screenshots provided by writer