Review of Avira Anti-Rootkit v1.3.0.1
Rootkit Infection and Avira Anti-Rootkit
Rootkit infections are not easy to remove unless the antivirus program has the ability to detect and remove the hidden malware files. Some rootkits infects DLL libraries, the kernel, BIOS or boot loader in Windows. Users of the Avira AntiVir antivirus program may use the program to scan their system for rootkit infection, but removal of the infection can fail. To solve the problem in removing rootkits, Avira is offering this free and standalone Avira Anti-rootkit. In the next section of this article, we’ll see how you can use the anti-rootkit tool by Avira for detecting and removing rootkits, and the system requirements to use the removal tool.
System Requirements and Download Location
Before anyone can use the standalone Avira Anti-rootkit tool, the antivirus program by Avira should be installed on the system. The reasons behind this requirement are as follows:
- To use the Antivir antivirus program’s quarantine and restore features.
- There is no option to restore quarantined or removed hidden malware or rootkits in Avira Anti-rootkit tool.
Avira Anti-rootkit runs on 32-bit editions of Windows XP, Vista, Windows 2003 and Windows 7. 64-bit editions of the Windows operating system are not supported by the rootkit removal tool by Avira.
The anti-rootkit tool by Avira is freeware and can be downloaded from the Avira website. You only need to download one format of the file: An executable (exe) or compressed file (zip).
Using Avira Anti-Rootkit
When you first run the rootkit removal tool by Avira, a dialogue box will be displayed to inform you that the program is designed to detect hidden objects and active rootkits. Inactive rootkits cannot be detected that are stored inside files. To remove files with rootkits, it is recommended to use the AntiVir antivirus on-demand scanner:
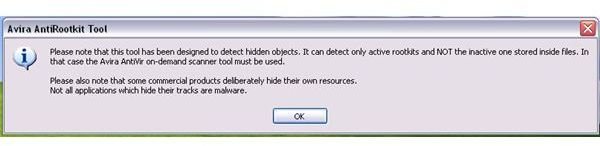
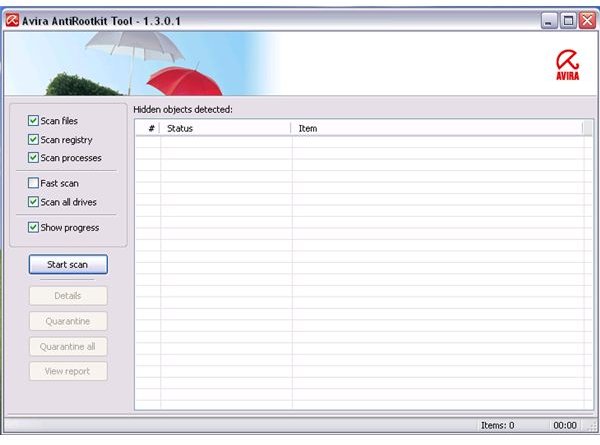
The user interface of Avira Anti-rootkit will be opened after clicking “OK” on the above dialogue box:
The options to scan files, registry entries, processes and all drives are pre-checked already. The option to display the scan progress is also selected by default. It is recommended to keep the default options in scanning for rootkit infections so it will run a thorough scan. To start scanning for rootkits, the browser and other application should not be running. Simply click the “Start scan” button and allow it to finish the task.
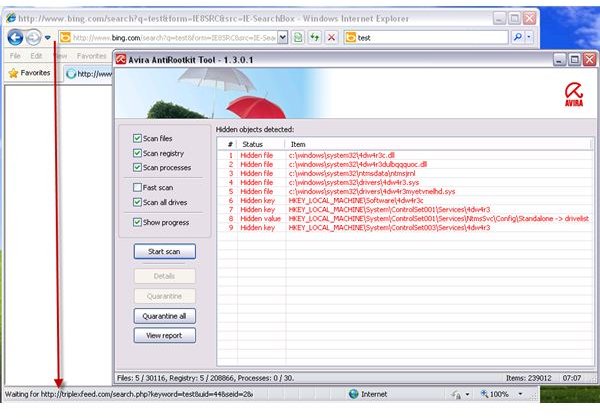
The screenshot below is an example of a system with TDSS trojan and rootkit infection that is causing a Google redirect virus issue that many users have encountered. Avira antirootkit has detected the infection but it also resulted in a false detection on legitimate system files which are listed as items #3 and #8:
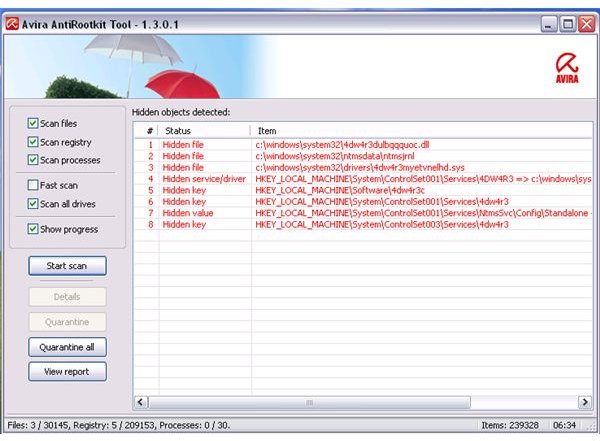
And item #2 and 7 in the second scan after the reboot:
You can view the report and the log file will be opened:
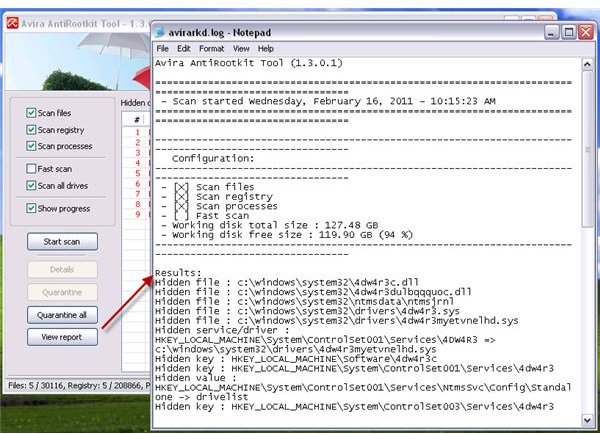
The log file is automatically stored by Avira Anti-rootkit in the folder or location where the tool is stored e.g. C:\Desktop.
Removing Rootkit Infection Using Avira Anti-Rootkit
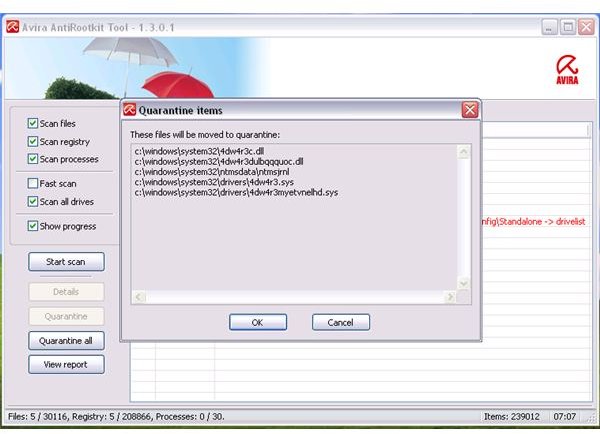
To remove rootkit infections using Avira antirootkit, simply “Quarantine” or “Quarantine all”. The option to quarantine single or more detected items is, for some reason, not working. It will display an error message “error sending to quarantine”. The only default action is to send all detected items to quarantine which is not good especially if there is a false detection.
An example below is when I allowed Avira antirootkit to remove everything it detects, the system file and registry entry for “Remote storage service” in Windows is removed. The side effect of this action is the test system becomes a “non-genuine copy of Windows” and then the product activation is again required which failed due to the removal of core system files in Windows:


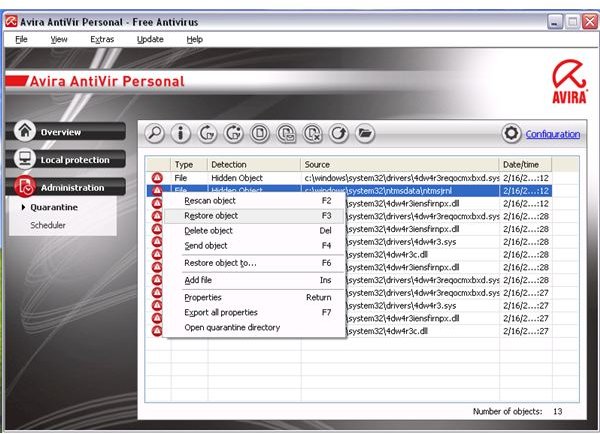
To restore the removed false positive, simply use Antivir antivirus program to restore the quarantined ‘remote storage file’ to its original location: C:\windows\system32\ntmsdata\ntmsjrnl
The removal of rootkits using Avira anti-rootkit is successful and resolved the browser redirection when searching the Internet, but only after scanning twice with a computer reboot requirement after each scan. A remnant of the rootkit infection is left in the registry which is not harmful anymore and can be manually deleted since it’s no longer a hidden object:
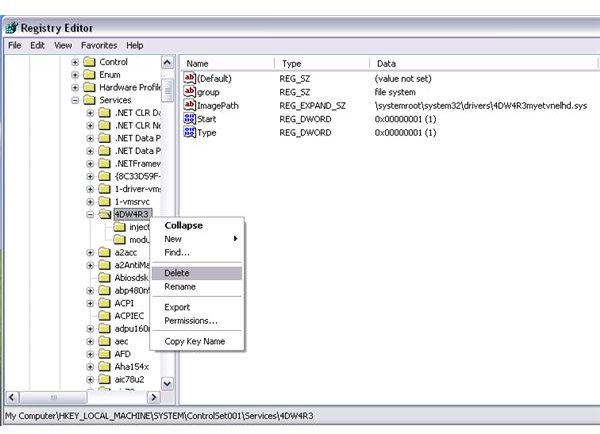
Running a scan using other rootkit scanners will only detect the above registry entry if you did not delete it manually. It’s easy to delete the entry as long as the user understands where the remnant is located. For users who are not sure of rootkit infections or not comfortable in using the registry editor in Windows, it’s best to run a scan using an anti-malware program that has the ability to detect and remove rootkits, such as Malwarebytes Anti-Malware, EmsiSoft Anti-Malware, SUPERAntiSpyware or Microsoft Security Essentials.
Final Words
Avira Anti-rootkit is an effective tool to remove rootkit infections. However, the false detections will cause problems, especially for novice users. Avira should improve the removal tool to allow single or more items to be quarantined, instead of everything it detected. Also, the requirement to have the Avira Antivirus program is a problem to users that are using other antivirus programs. It’s only recommended to use Avira Anti-rootkit if you are Avira program user or customer.
References
Image credit: Screenshot taken by the author courtesy of Avira.