Windows Live Mesh and the Home Office
Accessing Files
Many home office workers try to handle the access to files situation by emailing files back and forth to themselves, or by copying files to a USB drive to take with them.The problem, of course, is that sooner or later one of the files you need will be one of the files you didn’t copy.Even worse, the file you have with you may not be the one you updated most recently and now you are using bad data without even knowing it.
What you need is a way to access your files over the Internet without having to manually copy or update the files.In fact, it would be best if the files just kept themselves up to date.Welcome to Windows Live Mesh.
Tech Preview
Windows Live Mesh is a “Tech Preview” from Microsoft.This is less annoying than the permanent beta state that Google seems to have invented and spread around the Internet, but still a little bit disconcerting in that you don’t really know where this is going.Fortunately, Windows Live Mesh is both free and easy to both install and uninstall.So, if the rug ever does get pulled out from under the users, it should be an easy cleanup.
Using Windows Live Mesh
Setting up Live Mesh is pretty simple. First, you need a Windows Live account. It is the usual drill, username, password, email (you can use a live.com email if you like), and so on. It is free to sign up. Then, you download a client to the computers you want to use with Live Mesh. Install the client, and you are good to go.
Here is the great thing. You don’t have to install the second client at the same time you install the first client. In fact, you don’t even have to know when or where the second client is going to be.
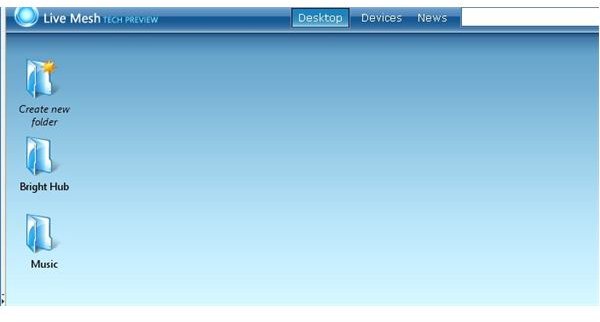
When you sign up for your Live Mesh account, the service generates a virtual desktop for you. This desktop resides on the Live Mesh servers on the Internet. This desktop works just like your actual Windows desktop. You can create folders, move files between folders, delete files, and so on. You can manually upload files to the folders you create as a way to store them on the Internet, but this isn’t where the power comes from.
Installing the client software on your computer results in identical folders being created on your “real” desktop. These folders represent what is on the Live Mesh Desktop. If you copy a spreadsheet to your Live Mesh spreadsheet folder on your desktop, it will be there on your virtual Live Mesh desktop folder automatically. Even better, if you have another system synchronizing the same folder, the file will end up there too.
Because the Live Mesh servers act as a virtual desktop, there is no need for a system to be online to receive the new file. Whenever the system does come on line, Live Mesh will get the new file put into the folder, even if the original system is offline.
So, now all you have to do to keep your files at your fingertips anywhere you go, is to start using your Live Mesh folders as your standard location for saving your files. Then, the latest version is always on your laptop, your home office desktop, your corporate office system, and even via the Internet. Just logon with your Windows Live ID and your folders are there.
Recommendation (4 out of 5)
For the most part, Live Mesh has worked pretty well for me. I’ve had a glitch or two that I’m not sure about, but that usually involved me doing something unusual with my files. The Live Mesh desktop claims that you will be able to sync to mobile devices like Windows Mobile cell phones or PDAs. When that functionality arrives, this will definitely be the system to beat.
Get it at www.mesh.com