Using Microsoft Office Live Workspace, you can create several individual workspaces, all accessible from any computer. This tutorial will show you how to create a new workspace with Office Live.
Overview
When you work from home, it can be difficult to share important files and documents with others who also require them. Fortunately, Microsoft Office Live Workspace offers a free, easy to use solution. Learn how to create a new workspace with Office Live to share with a group of people or create one to organize a specific project.
Getting Started
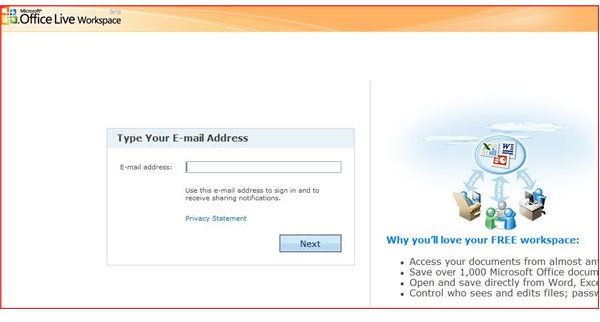
To get started creating a new Microsoft Office Live Workspace, head to the Office Live Workspace website and click the Get Started Now button. Enter your email address, which will be the identification you use to sign in to your workspace. File sharing notifications will be sent and received using this email address, as well. If the email address you entered is already associated with any Microsoft online services, you will be prompted to enter your password. If not, the next step will be creating Microsoft Office Live account. After you enter your information, an email with a verification link will be sent to your inbox. Once you have clicked this link, you can log in and start making your new workspace. You can click on any of the images within this article to view a larger image.
In the My Workspaces task pane on the left, click New Workspace. The Create a New Workspace window will open. From this window, you can select a blank workspace, or choose one of several workspace templates.
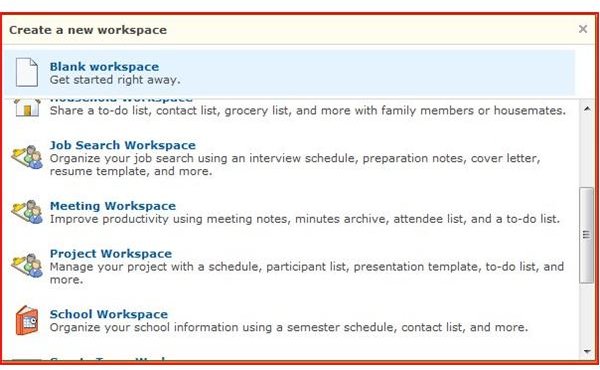
If you select Blank Workspace, the first step will be to give the workspace a name. Give it a name that will make it easy to distinguish later. For example, if you are using this workspace to share files with other users, you might want to name it something that pertains to the group. Once you have named your workspace, you can upload documents from your computer, create new documents, and share files with others.
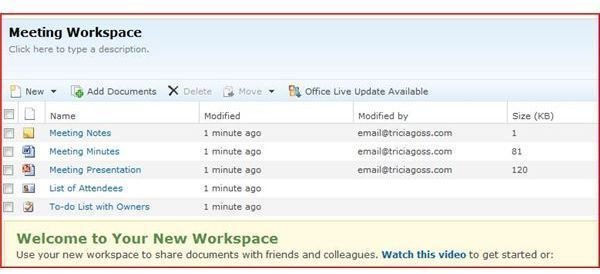
You can also select one of the workspace templates, which contain pre-made templates for relevant documents. For example, the Event Workspace includes templates for a flyer, an invitation, a to-do list, and more. After naming the workspace, you can make use of these templates, upload and create your own, or both.
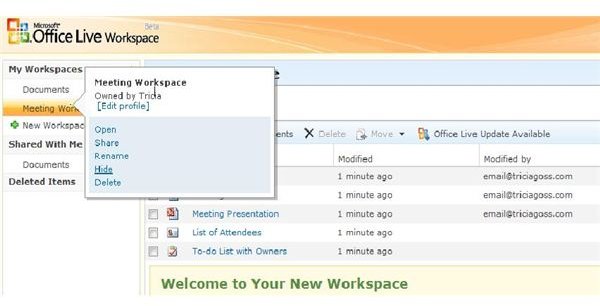
If you decide you no longer need a workspace, you can delete it in entirety. Hover your mouse over the workspace name in the My Workspaces task pane until a menu appears and then click Delete. You can also hide a workspace from this menu, which can be helpful if you have numerous workspaces and only want to view pertinent ones. Once you have hidden any workspaces, you can view a list of them all, or choose to show them again, by selecting My Workspaces in the task pane. A list showing all of your workspaces will appear in the main window. Show a hidden one by selecting it and clicking Show.
Now that you know how to create a new workspace with Office Live, check out the rest of this series to learn how to save files to it and share them with others. For even more off-site files storage options, read Off-site Data Backups: Data Protection for Small Businesses.


