This beginner’s guide will show you how to open your drawing tool in Microsoft Works. It will also show you how to draw basic shapes and change the color, pattern, and line style.
In part four of this Microsoft Works beginner’s guide I will show you how to use the drawing tool. The drawing tool is kind of like your paint program on your computer. You can open your drawing tool on Microsoft Works and draw what you want to insert it into your page. The drawing tool can be used for a number of things. This guide will show you how to use the drawing tool and from there you can create what you want.
To open the drawing tool, you will need to click the drawing tool icon. The drawing tool icon has a square with a circle. If you can’t seem to find it, go to the top of your window and click Insert > Picture > New Drawing. That will open the drawing window.
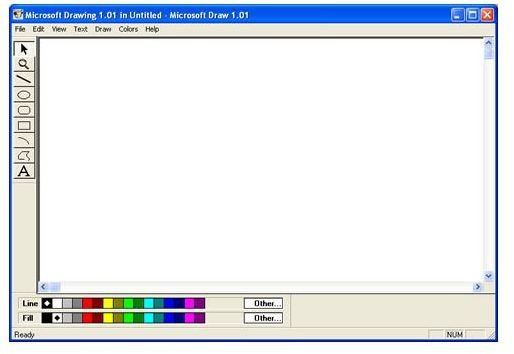
On the left side of the drawing window you will see the different shapes, the line tool, text tool, and the magnification tool. At the bottom of the window you will see the different colors. The first row of colors is the border or line colors. The second row of colors is the fill colors.
To change the colors in the bottom of the window, click the color that you want to use. You can also change the color after you draw your shapes. Let’s draw a basic shape so that you can get a feel for how to use the drawing tool.
Click the Rectangle Icon and draw a rectangle or square on your drawing board. Change the color fill and the border color at the bottom of the window. To use a color that is not in the bottom two rows, click the Other button at the end of the row. When the box opens, click the Define Colors button and select the color that you want to use. So, now you have created a basic shape. Let’s apply a pattern to the shape.
Grab your pointer tool in the toolbar. Click the shape to select it. Go to the top of your window and click Draw > Pattern > and click the pattern that you want to use. You will notice that the color of the pattern lines is the color of your border. To change the color of the pattern lines, change the color of the border.
You can also change the style and thickness of the border around the shape. Click the shape to select it. Go to the top of the window and click Draw > Line Style > and select the line of your choice.
Continue on to the next guide titled “Microsoft Works Beginner’s Guide Part 4 – Drawing Tool Part 2” to learn about using photos and graphics in the drawing board, adding text, and inserting the drawing into your document or page.


