Adobe Premiere: How do I Import a Flash SWF File?

SWF Files and Premiere
Looking to import a SWF file into Adobe Premiere? SWF files (which stands for ShockWave Flash, or Small Web Format) are a little trickier than Flash Video (FLV) because they often don’t contain just straight video: while an SWF might look like a simple video presentation of scrolling text, sequential stills or cartoon-style images, under the hood there’s actually a very different process going on. Put simply, FLV files are like a roll of film - they consist for our purposes of a series of frames that can be easily converted to Premiere’s frame-based AVI format. SWF files, meanwhile, are more like a non-playable videogame demo: they utilize a series of “sprites” to convey the impression of moving pictures.
Sounds complicated, right? Don’t worry - all you need to know is that if you have a movie in SWF format, there’s software that will convert it into a frame-based format that Premiere can handle. The plugin costs money to use permanently, because it’s a powerful tool designed for pro users - but a free trial is available for you to give it a whirl on a short project. So whether you have an SWF presentation that you want to work into a video or PowerPoint, an online SWF video that you want to chop up and remix, or just a fun cartoon that you want to share via DVD, this Adobe Premiere tutorial can help you out.
Downloading the SWF Plugin for Adobe Premiere
To convert SWF files for use in Adobe Premiere, the first thing you need to do is download the plugin. This plugin is made by a company called Flashants, so to get it, go to the company’s site and click “Download Free Trial” within the “SWF2Video Plug-In” section. When your download’s complete, save your work in Premiere and close the program. Double-click the downloaded file and follow the onscreen instructions to install it. Relaunch Adobe Premiere and open the project you wish to add SWF video to, or if you just want to output the file, select “New Project” from the “File” menu.
Working with SWF Video
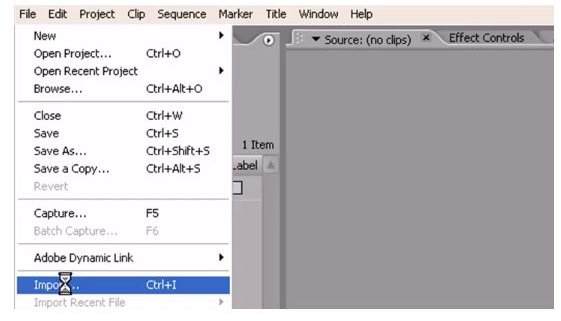
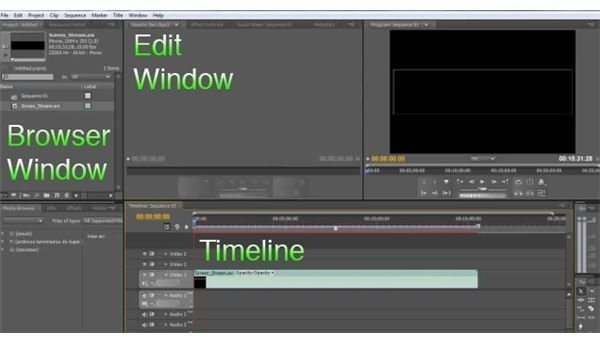
Now that our Adobe Premiere tutorial has shown you how to install an SWF plugin, it’s time to use that plugin to import and work with an SWF movie. Open the “File” menu and choose “Import.” Navigate to the location on your hard drive where the SWF video you want to work with is located, and double-click the file to launch the plugin. After a short wait signaled by a progress bar, your SWF file will be brought into the “Browser” section of Adobe Premiere (by default, the upper left window) for you to work with.
To edit the video, double-click it to place it within the “Edit” window, where you can set the start and end points just like a regular video. Alternatively, drag it onto the timeline (the long strip usually located along the lower half of the program window) to lay the whole SWF, beginning to end, into your movie. Here you can cut portions you don’t want, re-arrange the video as you see fit, or place the video within a larger presentation. If you find the watermark that the trial version places on your video distracting, consider copy-’n’-pasting the portion you’re using onto a higher track, applying a “Blur” filter, then cropping it so only the watermark is blurred. This will allow you to better evaluate the video quality to see whether the full version is worth your money.
To output the video, just select “Export” from the “File” menu and send the video to a DVD or movie file as you would any other project.