How to Alter Aspect Ratio in Your Final Cut Pro Video Editing Project
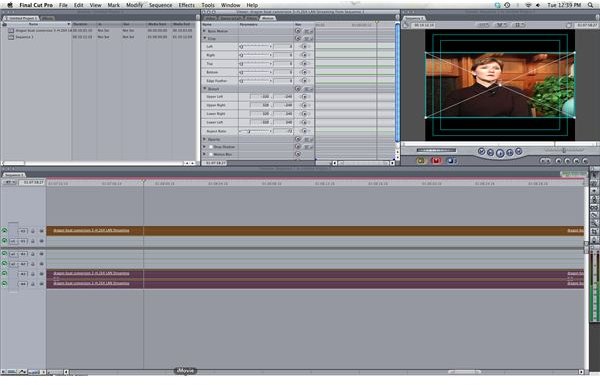
Image Control
Final Cut Pro, as a complete and professional non-linear video editing software package, allows for a very in depth amount of image control. Some of this image control comes as part of the Final Cut Pro video effects which are used to customize imagery, add style, or just alter them for appearance. Other types of image control comes outside of the Final Cut Pro video effects realm and goes directly into how the image appears in the frame. This is important in the days of shifting aspect ratio and you may find that while importing and capturing your footage into your Final Cut Pro project you will end up with your video not looking the way you prefer. Here is a look at how you can stretch images horizontally, or shrink them in the same way in your Final Cut Pro project.
Distort
When you are in your Final Cut Pro project, find the video cli
p that you want to alter and drag and drop it into the Timeline.
Put the progress bar at a representative point in the clip so you can see it in the Canvas. Double click the clip, bringing it into the Viewer as well.
In the Viewer go ahead and select the Motion tab. In the Motion tab go down to Distort, which will be right under Crop and directly above Opacity.
Under the Distort options you are going to ignore the top numerically based ones as these affect the position of the corners of the image. You are going to want to go to the very bottom to where Aspect Ratio is. Now it is up to you how much you want to alter the clip. You can drag the bar left or right, with a move toward the left giving the image more of a widescreen appearance and a move to the right making it more tall and narrow without much width. You can then decide how much change you want to apply here in the Aspect Ratio. Like anything in the Motion tab you can also look to the right and set marker points throughout the clip. You can then go to these marker points and apply different Aspect Ratio positions. This will then allow the Aspect Ratio to gradually change as the clip moves through its time.
Practical Use
The Aspect Ratio change in Distort is not something that is going to be used commonly like a normal Final Cut Pro video effect, but it has a very useful purpose when it does. Often times videos get captured in an aspect ratio that they are not in and you will have to repair it. For example, if you shot something on 16:9 widescreen and it ended up getting captured into your Final Cut Pro editing project as NTSC 4:3 then it will appear in that 4:3 ratio and be very smooshed together from the sides. If you alter it back to the correct 16:9 appearance with the Aspect Ratio tool then it will be as it should have appeared in the first place without recapturing the footage.
This post is part of the series: Final Cut Pro Video Effects
Here are articles dealing with Final Cut Pro and available video effects.