Chroma Key Effects in Premiere Pro - Learn How to Add Chroma Key Effects using Adobe Premiere Pro
Planning the Shooting
As a video editor, you may have been assigned a scene that needs an extra building or a visual effect that may take you over your editing budget. How do you avoid this issue? You can choose to add a chroma key with Adobe Premiere Pro. This is definitely a cost effective approach to visual effects. Once you begin creating graphic effects in Premiere, you will never be puzzled on how to complete a scene again.
Our visual effects in Premiere objective is to film a guy running over a train track after being viciously chased by bats who suddenly break loose and start flying towards him. Pretty frightening, eh? We will only see the guy running over the track for our scene. In order for the scene to be pulled off properly we need to set up the scene with our performer. We are going to shoot the scene against a blue screen or wall. The appropriate lighting must be set up to see the actor’s features and expression. Once the appropriate lighting is in place, then a complete open space with a solid blue wall or screen about 12 ft x 10 ft in size must be set up behind him. Now the scene will be performed entirely in this 12 ft x 12 ft space, with the performer running scared in the designated performance space. Ensure that you take as many angles of the shot as possible, it will help you later when you are trying to make decisions on where the visual effect should start and end. It will also aid in giving your imagination more room to explore other chroma key visual effect possibilities.
Now that we have a scene shot against the blue screen. We are ready to import it into Premiere. If you have either FireWire or another video capture device, you will be able to capture the footage from your camera directly into your workstation. You may need to use a third party converter to convert your video file to an avi or mov format. It’s time to edit in Premiere.
Adding a Chroma Key
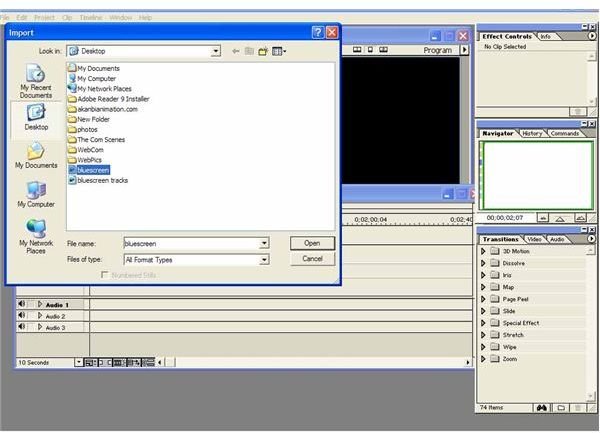
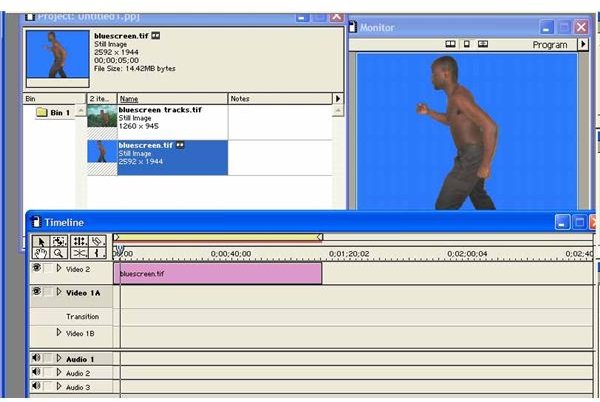
1. Let’s begin by importing the video you just created into Premiere. Now drag it to the time line in the Video 2 slot.
2. Select the video and go to Clip > Video Options > Transparency. On the drop down menu Key Type and select Blue Screen. You will notice in the window in the upright corner will now dissolve the blue screen around the actor and click OK.
3. We need to import separate footage of our the train track that the actor will run across. This type of stock footage can be found at iStockphoto. Import the bat footage, the same way you have imported the blue screen and drag it to Video 1A in the time line.
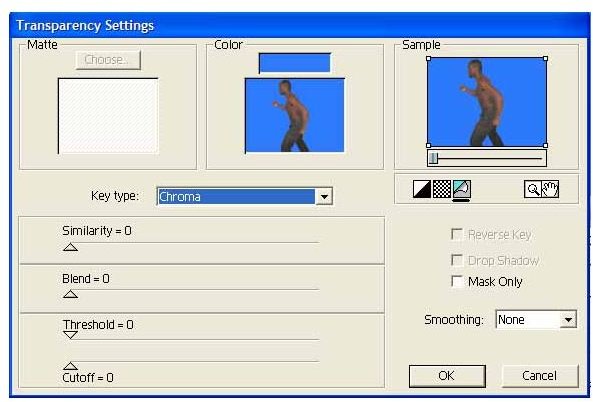
4. Return to the Transparency setting and select the Blue Screen option, from the Key Type drop down menu. Under the Sample window, select the page peel icon to preview your result. You should see the actor against the bat cave and click OK.
5. It’s time to render our video to see what we have. Go to File > Export Clip > Movie.
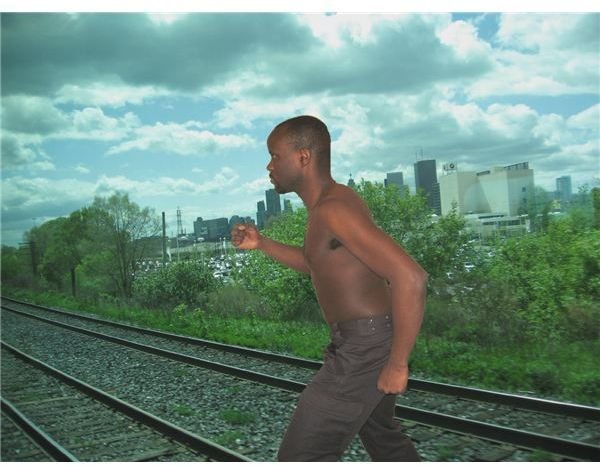
There you have it! We have our guy desperately running away from those out of control bats! You might also be interested in reading Tips for Inserting Stock Footage into an Editing Project or learning about visual effects in film and TV.