
Once you’ve designed and edited a video in VideoStudio Pro X3, you can save it in an optimized format and upload to YouTube with a single tool. This tutorial will explain that process.
Sharing Videos
The new tools in Corel VideoStudio Pro X3 not only let you upload a completed video directly to online sharing sites like YouTube, but they also allow you to easily save your movie in a format that is optimized for those same sites. This takes a lot of guesswork out of the process and makes it a lot easier to share your production with others.
In this guide, we’ll take a look at how to move your video from the editing process directly to YouTube without having to leave the VideoStudio Pro interface. You will need a YouTube account to complete the process, but don’t worry if you don’t have one yet. You can create one during the save and upload process.
Putting Your Video on YouTube
Once you’ve completed the editing for your video, you can save it in the proper format and upload it to YouTube by following these steps.
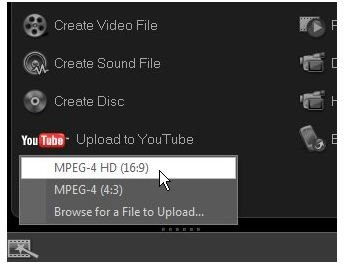
Step 1: First, click on the Share tab as shown in the screenshot below. (Click on any image in this tutorial for a larger view.)
Step 2: Click on YouTube and pick the type of format you want to use – MPEG-4 HD (16:9) or MPEG-4 (4:3).
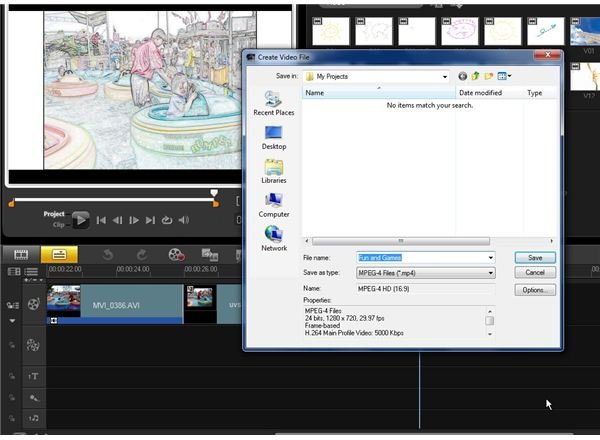
Step 3: The Create Video File dialog box will appear, asking you for a name and location where the video will be stored on your computer. Enter the information and click Save to continue.
Depending on the size of your video, it may take a few moments for this step to complete. While the movie is being saved in the chosen format, you will see a Rendering bar on your screen that lets you know the progress of the conversion and saving process.
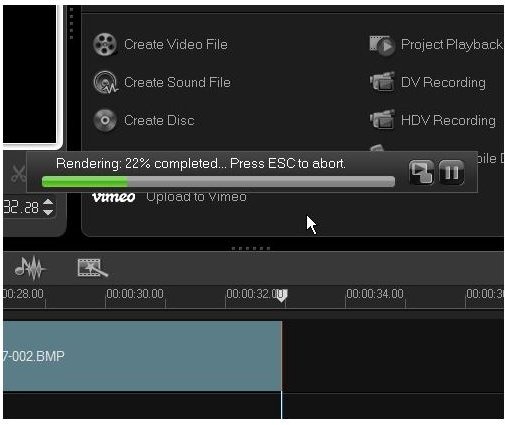
If you change your mind and want to abort the process, just hit the ESC key on your keyboard.
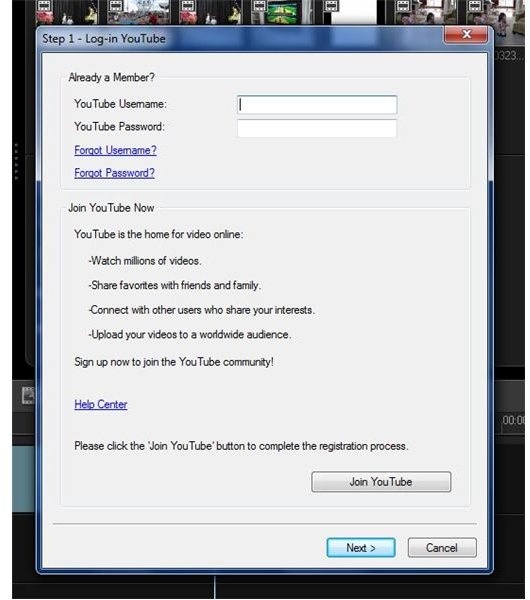
Step 4: Once the file rendering is complete, another dialog box will appear and ask for your YouTube log-in information. If you already have a YouTube account, enter your name and password, and then click Next to continue. Otherwise, click the Join YouTube button to set up your free account.
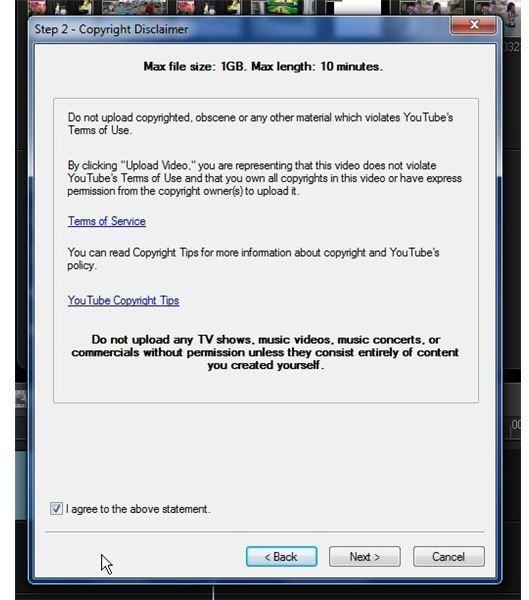
Step 5: Before you can actually upload your video, you will have to agree to YouTube’s Terms of Service. If you have questions about these terms or about YouTube’s policy on copyrighted material, you can click on the links to read more. Otherwise, if you agree with the terms, put a check in the box next to I agree to the above statement. Then, click Next to continue.
Step 6: Next, you’ll be asked for some information describing your video. You can be as detailed or vague as you wish, but it you are posting a public video, make sure to include enough information to help people find your production when searching. If you prefer to keep your video private and only share it with a selected few, mark the Private option.

Click Next to continue.
Step 7: Finally, it’s time to actually upload the video to YouTube. Click the Upload Video button and wait for the transfer process to complete. A progress bar in this window will let you estimate how much time is left before the process is done.
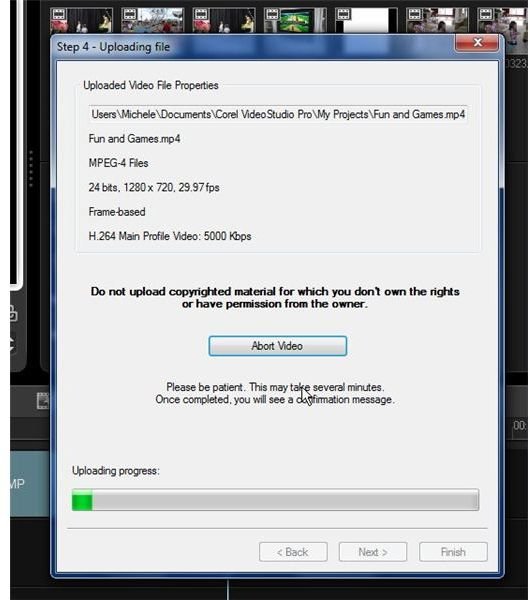
When your video finishes uploading, a browser window will open and show your new video. It may take a few additional moments for YouTube to completely process the added file, but that can be monitored on the browser page. When done, you can watch your completed movie on YouTube and send out the link to anyone you want to share it with.


