How Do I Convert a Video File to an Audio File? Quick Guide on Exporting Audio
Stripping Out the Audio
Audio is carried through a number of different sources, and there are actually many videos where it is actually the audio you may want to use rather than the video as a whole. This is much easier to do than you might realize with post-production software and non-linear video editing programs. With these you have the ability to split up the audio from the video and actually export the audio file on its own. This is how you convert a video file to an audio file, yet there is not actually a regular conversion process happening. Here is a look at how to export audio from video using Final Cut Pro as an example.
Editing Process
The first thing you need to do is to identify the video you want to use as an independent file and then import it into

Final Cut Pro. When you select to import this file it will simply reference the source file on your disk space, which means that nothing you do in the program will actually be destructive towards the source file. When you import it the file will go into your Browser, so find it and drag it into the Timeline.
Once here you will note that the file is not just one item, but instead it has a video track and dual audio tracks. What you want to do here is to actually rid yourself of the video track altogether. If the Linked Selection button in the upper right hand corner is green and you notice that when you select the video track the audio tracks are highlighted as well, then this means that they are acting together. Simply choose the Linked Selection button to turn it off, then select the video track and delete it. This is not always necessary since the next step will require you to just choose an audio file rather than an associated video codec, but it is good to keep organized.
Go to File and choose Send To, selecting Compressor from the options. This will open up Apple Compressor, which is used for video compression yet can also determine the type of audio file you want to export.
Compression
Apple Compressor is critical to when trying to figure out how you convert a video file to an audio file. When your

project opens in Apple Compressor you will first go to Target and set the Destination, which will be the identifiable storage place where you want the converted file to go.
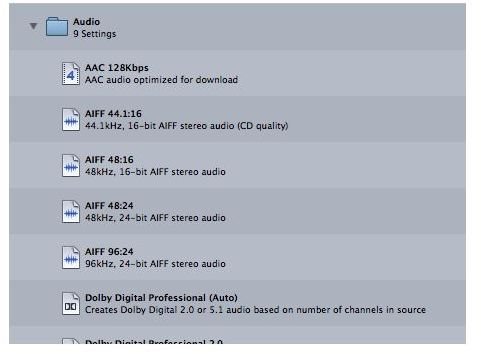
Next you will go down to the Settings panel and go into the Apple folder. Go to the Formats folder, which is directly below DVD, and this will bring up specific formats for export. The very top one will be Audio, which are the formats that you need to convert a video file to an audio file. Inside here you will have AAC 128Kbps, AIFF 44.1:16, AIFF 48:16, AIFF 48:24, AIFF 96:24, Dolby Digital Professional (Auto), Dolby Digital Professional 2.0, Dolby Digital Professional 5.1, and QuickTime Surround 5.1 to choose from. Drag it up to the project window where you set your Destination and then choose Submit, which will set the compression process and create the audio export from the video.
The Process
This unity of Final Cut Pro and Apple Compressor is really only one way that you can approach this, but there are a number of them. This is standard for those working in regular post-production because it means just stripping out the audio from the associated video manually, yet there are other ways to go about this. Apple Compressor’s option would allow you to just export the audio without removing the video track in Final Cut Pro, and other audio and video compression programs would have done the same. Likewise, when you are ripping videos from the Internet or DVDs you will usually have the option to simply take the audio track rather than the whole video file.
References
Photos: Screenshots by Shane Burley.
Source: Author’s own experience.