How to Send a Project from Final Cut to DVD Studio Pro
The Final Cut Studio
The Final Cut Studio is intended to be a series of programs that link together for an entire post-production package that is able to take your project through all the necessary stages. This means that the programs within the Final Cut Studio are intended to work together, communicating and sending projects between them. This is especially true for sending the project from Final Cut to DVD Studio Pro since this is what is needed for DVD authoring. Here is a look at how to send your project from the editing process to DVD Studio Pro so a DVD can be fully created.
Sending the Project
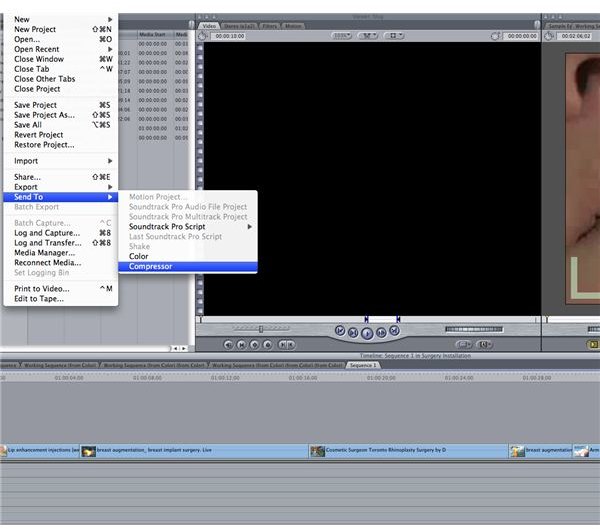
Once your project has been completed and rendered you will make sure that you are in the Timeline and you will go to File, Export, and Send to Compressor. This will open up the project into Apple Compressor as a file that has to be compressed. From here you need to start by going to Target and choosing Destination, which will prompt you to select a location where you want the compressed files to go to.
You will next go to Settings to choose a codec that you want. Go into the Apple folder and then select DVD, which
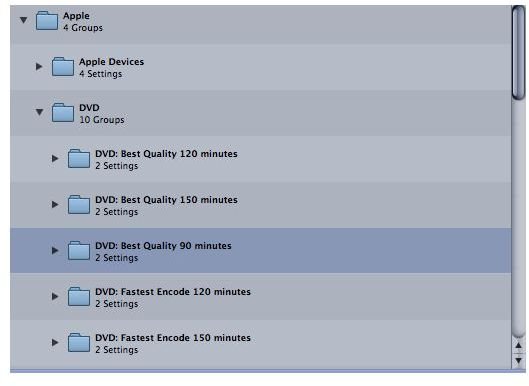
will be right under Apple Devices. Inside here you will have a number of different options based on your needs. The Best Quality options will maintain the quality, while the Fastest Encode are just for speed. Amongst them you will want to select the time that is closest to your project length. These file types associate the file quality with the size available on a DVD, which is 4.7 GB. If you have a ten minute project then you will want to select the closest time, which is 90 minutes.
Drag the entire folder for the DVD encoding option you choose into your project window, which will have both a file for video and audio. Select this to compress and the process will continue, resulting in two distinct files.
Into DVD Studio Pro
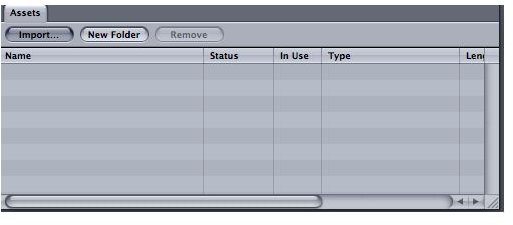
It is best to start a project in DVD Studio Pro after this process, selecting appropriate templates or importing ones that you have created through a design process. You will see an Assets menu to the lower left hand corner of your display, and this is where the elements and media that you bring into your DVD Studio Pro project will be listed. In the upper left hand corner of that Assets menu will be an Import button, and when you select it you will be given a prompt to search the available storage locations for the two files that you exported from Compressor. This is the final transfer from Final Cut to DVD Studio Pro, yet you have to manage them inside the project.
When you choose them they will then be put into your Assets list, and from here you will be able to then deliver them onto a track. This will be the fundamental “play” element on your DVD, and what will be necessary to have it finally appear on a DVD that you author.
DVD Studio Pro uses the same reference tool for its Assets as Final Cut Pro does for its media, which means that when it imports the video and audio files that you did it is simply referencing them in a non-destructive way. DVD Studio Pro is able to reference it by knowing the direct path to where it should be, so if it is moved or deleted the files will disconnect and will not be able to be a part of your DVD authoring project.
References
Photos: Screenshots by Shane Burley.
Source: Author’s own experience.
This post is part of the series: Final Cut Pro Tools
Tips on working with different Final Cut Pro tools.