Making a Clear Drinking Glass: Photoshop Tutorial
Making a Clear Drinking Glass in Photoshop: A Bit of Photoshop Magic!
If you’ve ever wondered how to go about making a clear drinking glass in Photoshop - or any clear, reflective object in general - this tutorial is for you. You can fill the glass with absolutely anything, and achieves a stunning effect! This tutorial uses Photoshop CS4, but should work well for anyone using Photoshop CS or higher. This tutorial is also intended for people who have an intermediate knowledge of Photoshop or are prepared to spend a little time learning as you go.
Creating the Glass Itself
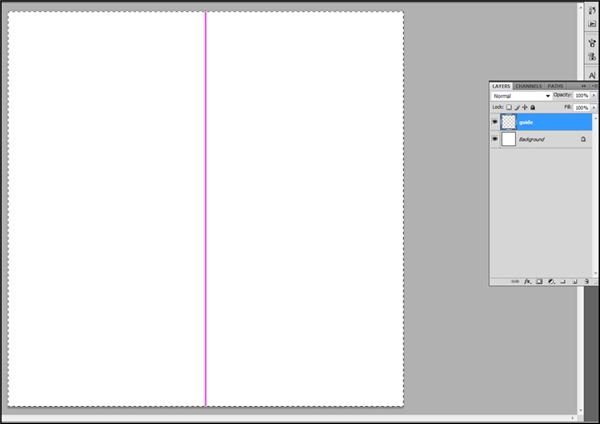
Open Photoshop and create a new document. Here I’ll be using a 900px by 900px document. For the sake of ease, draw a line down the approximate center of your image on a new layer. This is a guide to help you make sure your glass looks symmetrical. You can go ahead and name the separate layer “guide” if you would like.
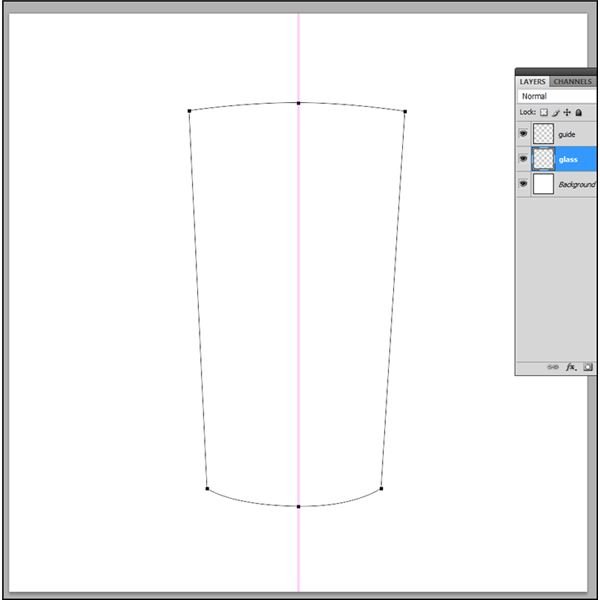
Create a layer named “Glass” Now, using the pen tool, draw yourself a glass! Generally tumbler-style glasses work best, but if you really feel like you could get fancy with a martini glass or anything nifty like that, go for it! Me, I’m lazy, so I’m going to stick with a highball glass.
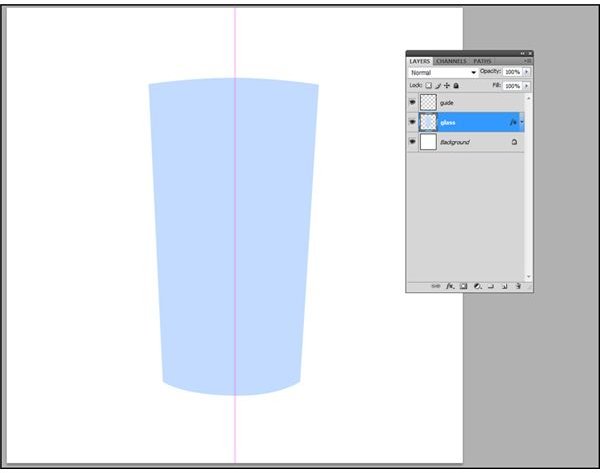
Right click on the path and select Fill Path and fill it with a glassy color - here I’m using #C2DAFF. Delete the path when finished.
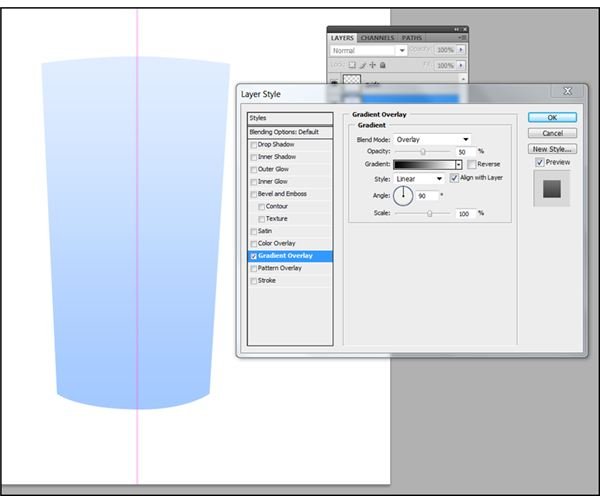
Now, a glass isn’t a glass unless it looks transparent, right? So go into a layer styles and find Gradient Overlay. Set the mode to overlay and the opacity at 50%. Leave the style at Linear. As for your angle, you’re going to want to take a moment to think about light source. If this is part of a larger picture, you’ll probably want to make sure that the gradient reflects the light source. I’m just going to leave it at 90, as though the light source was coming directly from the top of the image.
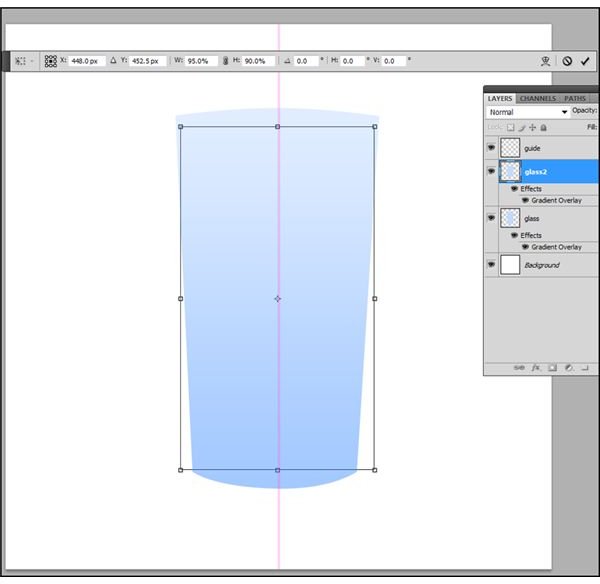
Now duplicate your glass layer, and name it something different, like “inner glass” or “glass2” or “inside”. Press CTRL+T (Mac: CMD+T) to bring up your free transform option. Set your width scale to 92-95% and your height scale to 90-95%. This will largely depend on how thick you want your glass to appear, and how thick you want the base of your glass to be. When you’re satisfied, press enter to set the transformation.
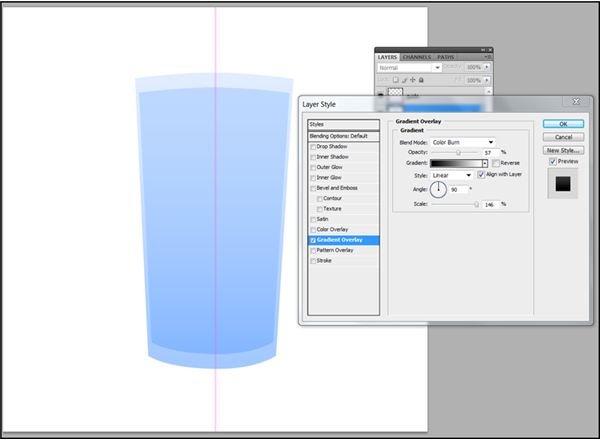
Change your gradient Overlay layer style on your glass2 (or whatever you’d named it) layer to Color Burn, and slide your opacity all the way up to about 50%-70% - eyeball it to where you think it looks good.
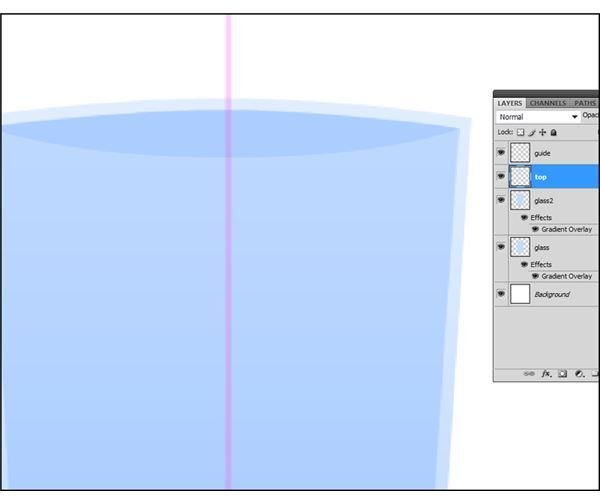
Move your glass2 layer upwards so it looks a bit more like the picture below. Basically what you’re doing is aligning the glass so the base is thicker, and the glass is thinner at the top.
Using the method of your choice, select the opening of the glass as I have done below, and when you are done, create a new layer named “top” and fill it with a darker color. Here I’m using #ABCDFF which I sampled from the image itself.
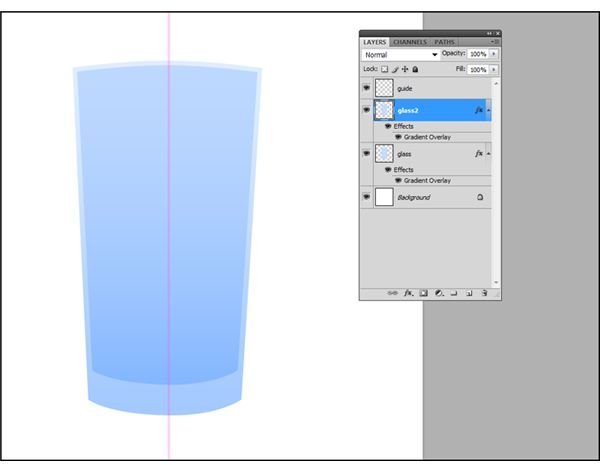
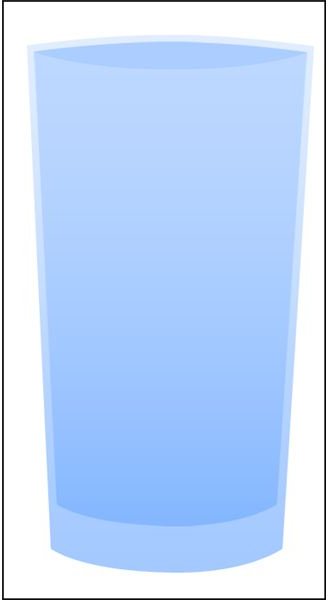
And here’s our glass! It still looks a little plastic, though, so read on to see how to make it look more glassy!
Creating Light Reflections
To create a clear drinking glass in Photoshop, you’ll have to employ a little “Photoshop Magic” - as just messing with the opacity will leave your images feeling flat and plastic. Grab yourself a rectangular marquee and select the area directly around your glass as I have done below

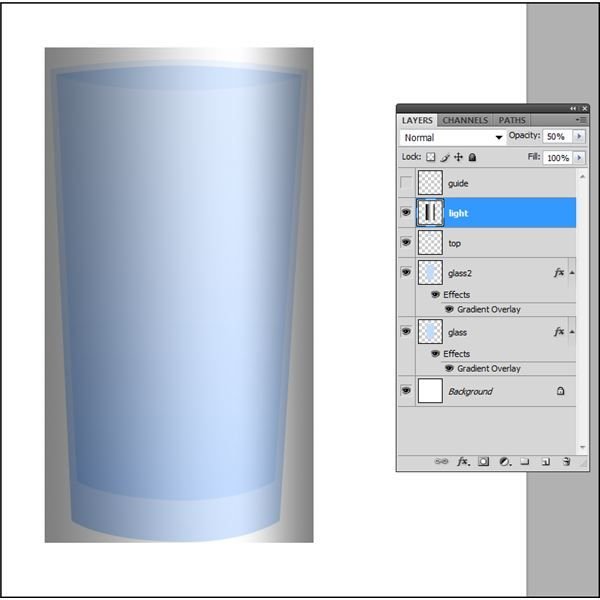
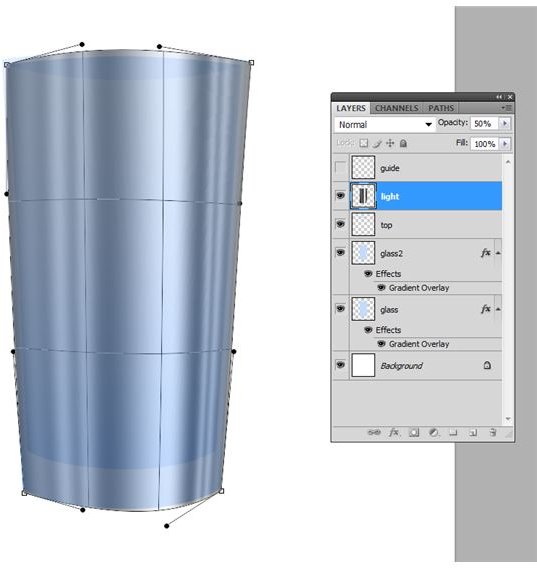
Create a new layer named “Light” Fill the area with a gradient - a black-to-white-to-black gradient generally works best, but you really do have a bit of artistic license here. Set the layer opacity to around 50% to make things a little easier to see.
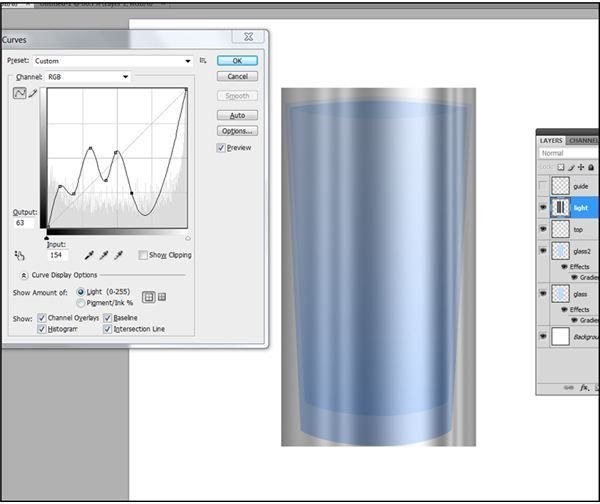
Press CTRL+M (Mac: CMD+M) to enter the Curves panel. Create a reflection like I have done below.
Now go to Edit, Transform, and then Warp. Bend your gradient around your glass. If it’s a little larger, simply clean up the edges when you are done.
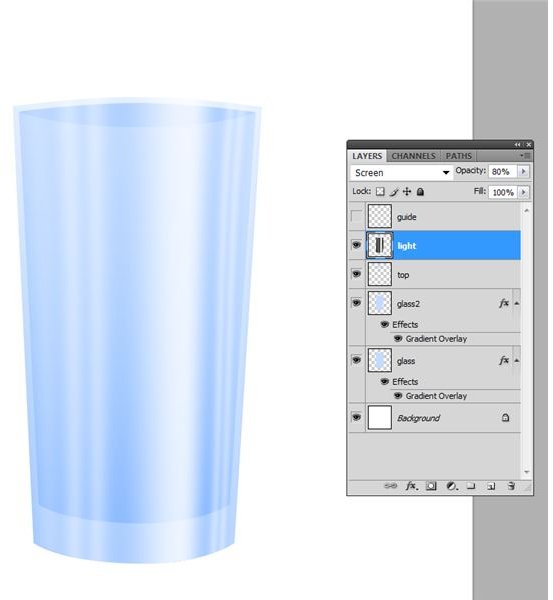
On your “Light” layer, set the opacity to 60-80%, and the blending mode to Screen. Feel free to actually change the opacity and blending of your layers to achieve different effects! Here’s the finished product!
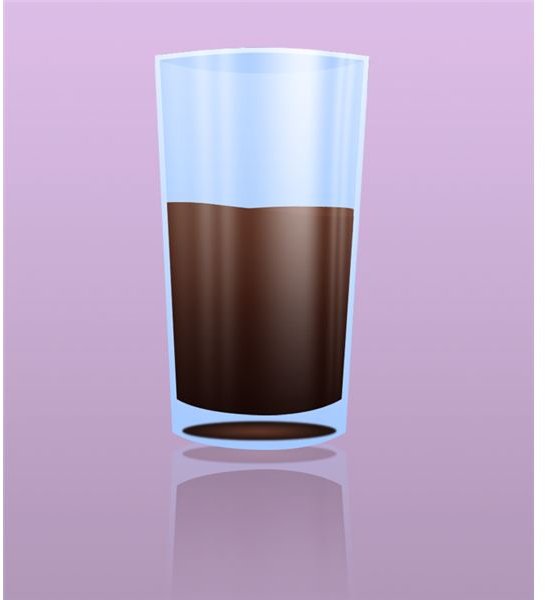
Here’s just one of many things you can do with the finished product!
Like this tutorial? I’ve also created one for Making a Bow in Photoshop.