Warping an illustration can give some nice effects. You can use warping to illustrate a flying flag or to shape a pattern in unique ways. This Adobe Illustrator tutorial will show the illustrator how to warp an illustration. Two methods will be demonstrated here: the Warp effect and the Warp tool.
Warping Artwork Using Warp Effect Styles
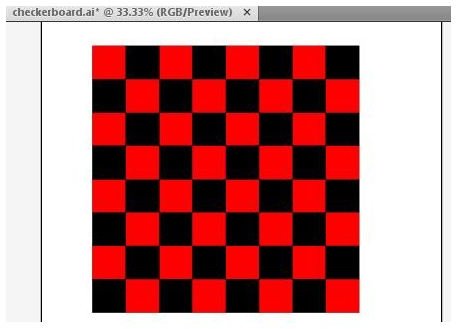
Open Adobe Illustrator and create a new document for this example. Before we get started, you need to have a graphic to warp. For this tutorial, we will use a checkerboard graphic that was used in an earlier article.
1. Select the graphic to be warped. Using the selection tool, click on the artwork that you want to warp.
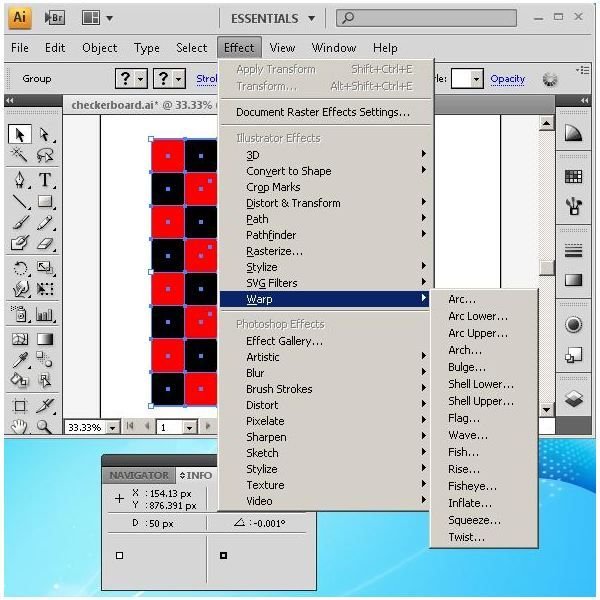
2. Use the Warp effect dialog. Click on “Effect” on the menu bar and then “Warp” to view the warp options that are available. You can choose from Arc, Arc Lower, Arc Upper, Arch, Bulge, Shell Lower, Shell Upper, Flag, Wave, Fish, Rise, Fisheye, Inflate, Squeeze, and Twist. With fifteen different ways to warp an illustration, we can’t go through them all, but we can show you how to use the effect.
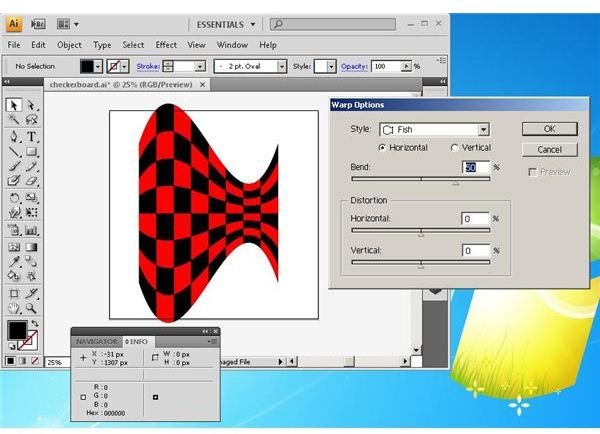
4. Warp with the Fish effect. Click “Fish” from the subset of the “Warp” menu selection. The “Warp Options” dialog will appear. Click the “Preview” box so you can see the way your artwork changes based on your selections. Every warp style has the same options: Orientation (Horizontal or Vertical), Bend, and Distortion (Horizontal and Vertical).
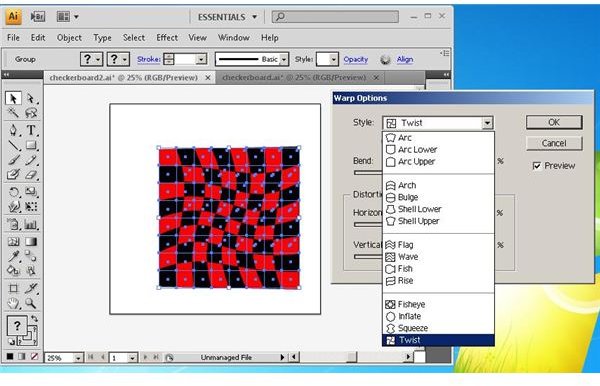
5. Choosing other warp styles. With the “Warp Options” box, changing the style of warp you use is easy. With your artwork selected, use the “Style” combo box to choose a different option.
Warping Artwork with the Warp Tool
You can show an illustrator how to warp an illustration a different way too. This time we’ll use the Warp tool from the Adobe Illustrator toolbox . This tool is a lot like “liquefy” in Photoshop because it bends paths as you manipulate objects. What makes this tool unique is that it automatically adds points to your paths so you can easily work with objects after they are warped. To demonstrate this, we will start with a colored rectangle.
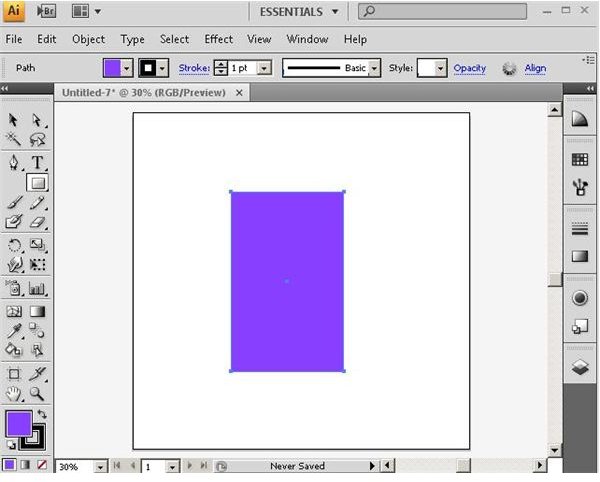
1. Select your artwork. Using the selection tool from the Adobe Illustrator toolbox, select the artwork you wish to warp.
2. Use the warp tool. You can also access the warp tool by simultaneously pressing
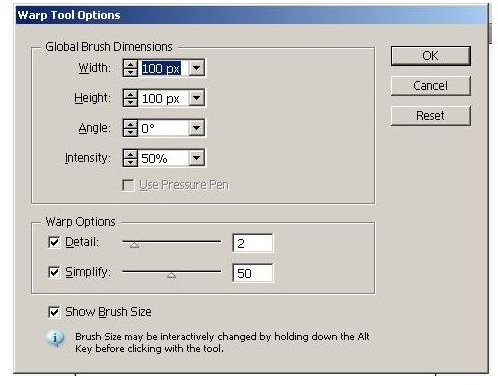
Here you can change the dimensions of your brush and modify the intensity of the warp. You also have “Detail” and “Simplify” sliders that govern the spacing of points added by the warp tool and how smooth the distortions are when applied. For this example, we will ratchet up some of these setting so that you’ll be able to easily see the action of the warp tool. Use the following settings:
- Width: 250 px
- Height: 400 px
- Angle: 45°
- Intensity: 90%
- Detail: 10
- Simplify: 50
Click the “OK” button and you will see the warp tool ready to use.
3. Warp your artwork. At the left side of the rectangle’s upper half, click and drag the warp tool through the shape.
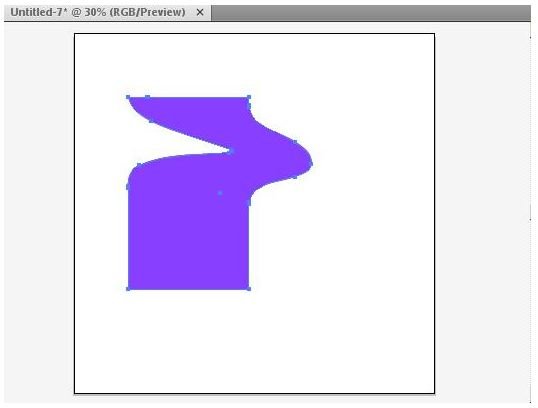
You will notice that the tool has added points to your shape. These can be manipulated using the direct selection tool to finish your illustration.


